When you're looking for the right drone for real estate photography, the choice often comes down to three key players. For quick, social-media-ready content, the lightweight DJI Mini 4 Pro is a fantastic pick. If you need more versatility, the DJI Air 3 and its dual-camera setup gives you comprehensive coverage. And for those top-tier, luxury listings where low-light performance is non-negotiable, the DJI Mavic 3 Pro is the undisputed king. Each one fills a specific niche, from grab-and-go portability to cinematic, high-end production.
Why Aerial Imaging Is a Must for Modern Real Estate Listings
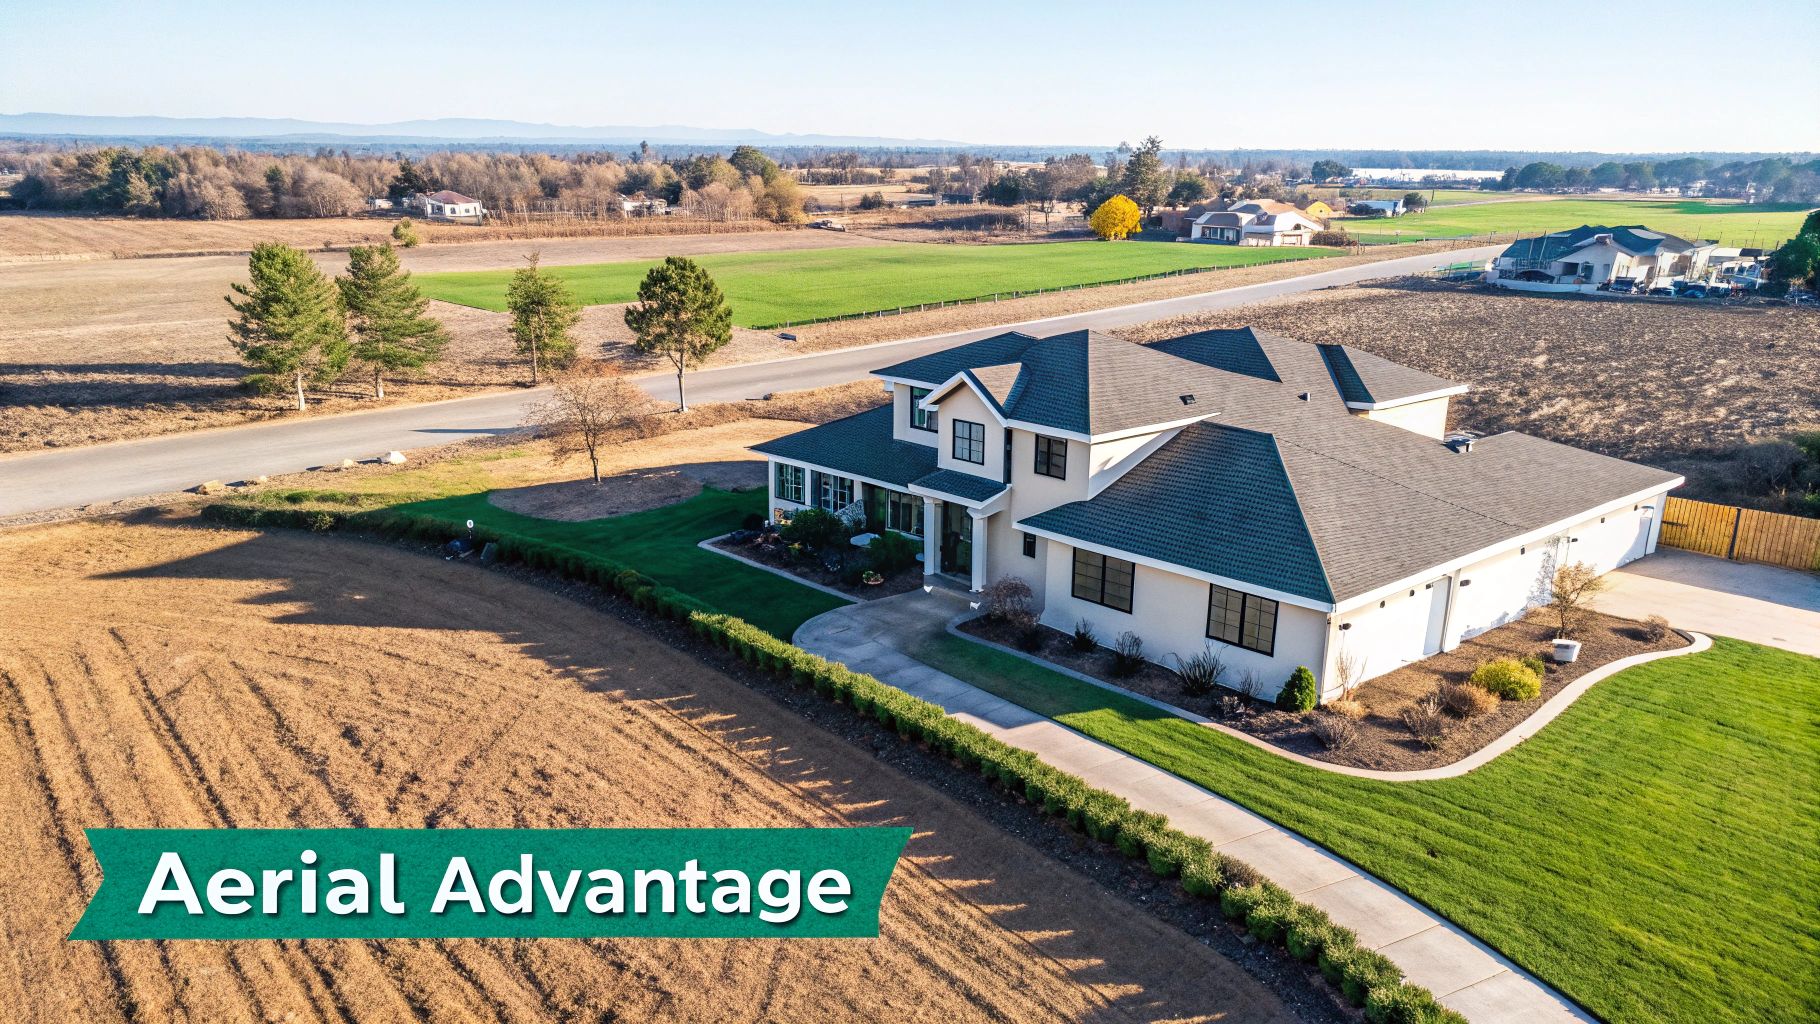
In a market where buyers form their first impressions online, standard photos just don't cut it anymore. What was once a luxury add-on is now a core marketing tool. Aerial imaging has become essential for building a visual narrative that a simple ground-level shot could never convey.
Drone photography gives you the power to show potential buyers exactly what they want to see before ever setting foot on the property. You're not just showing a house; you're selling the scale, the context, and the lifestyle. For professional photographers, mastering this skill is a surefire way to land higher-paying clients and book more jobs.
Drive Engagement and Faster Sales
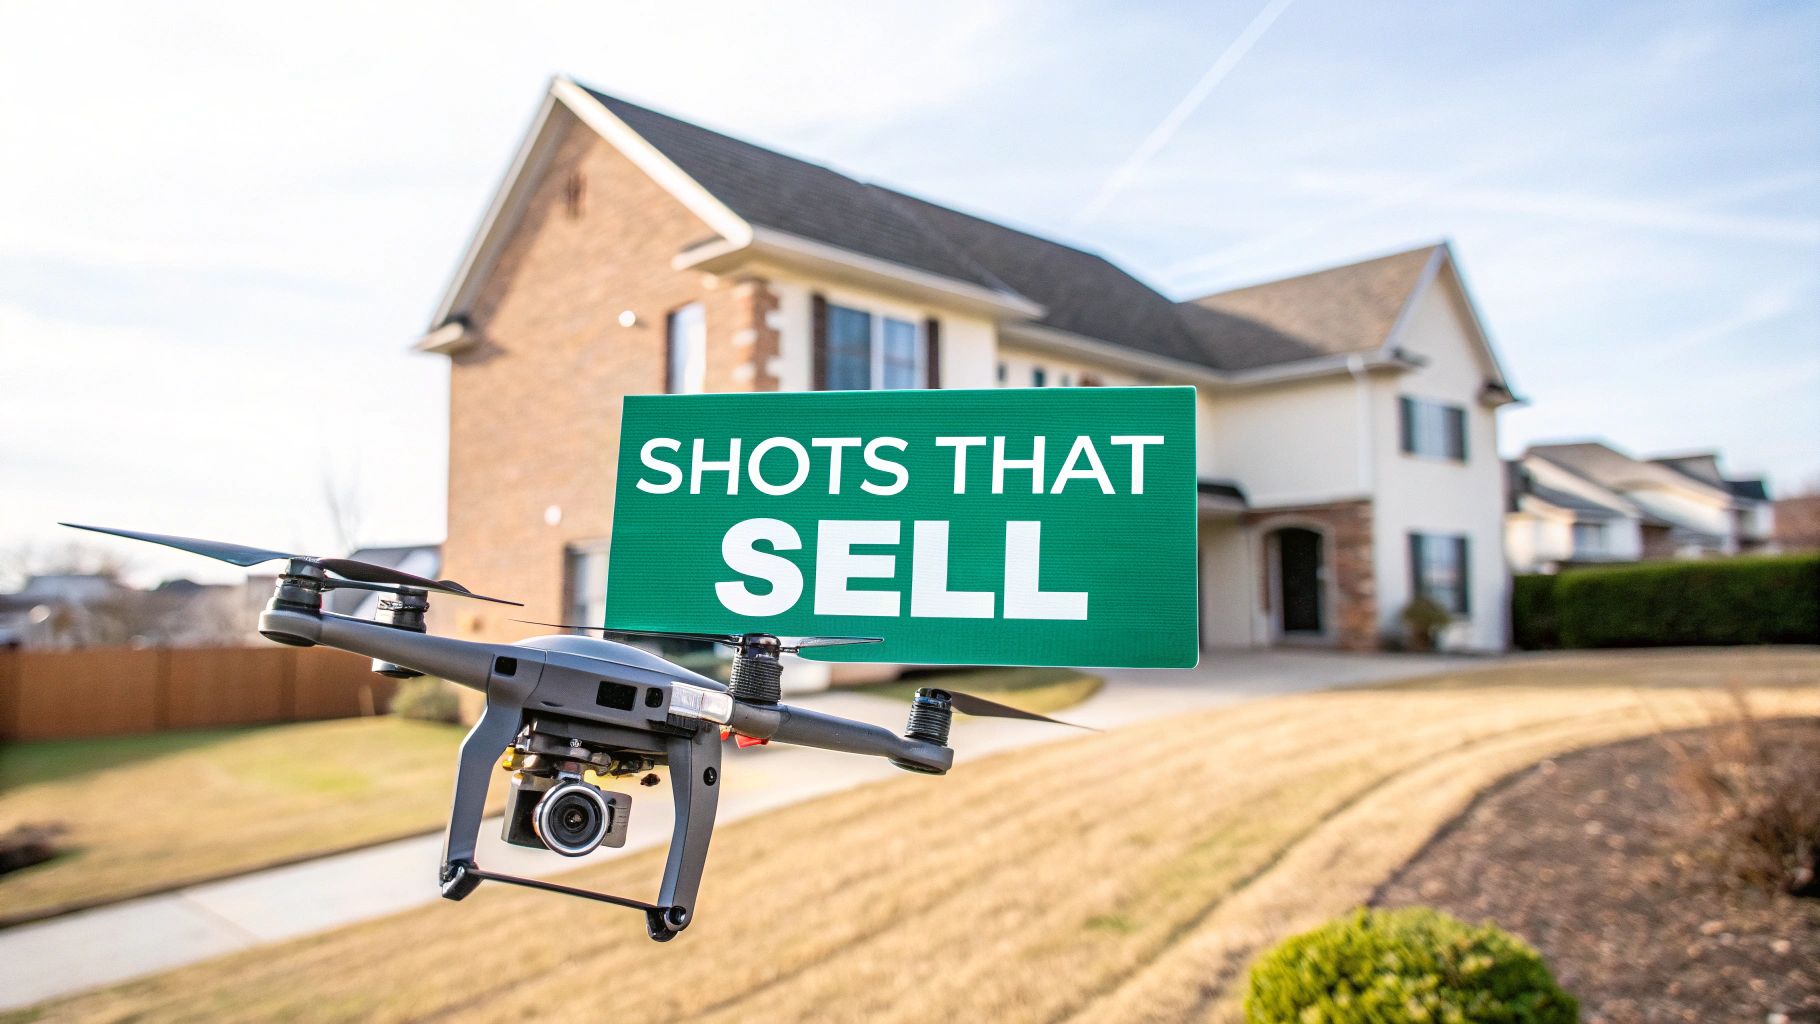
The effect of great aerial shots on a listing's performance is hard to overstate. High-quality drone photos create an immediate "wow" factor that stops the scroll, keeping potential buyers engaged with the property for longer. This isn't just about pretty pictures—it drives real results and can seriously speed up the sales process.
In fact, one key report showed that listings with drone photography sell an incredible 68% faster than those without. In a tight market, that can mean the difference between a property sitting for months or selling in a matter of weeks. That’s a huge value-add for any real estate agent.
Showcase Properties in Their Best Light
A drone gives you a perspective that highlights a property's most valuable features in a way that's impossible from the ground. You can capture the entire lot, the surrounding neighborhood, and nearby amenities, giving buyers a complete picture that answers their biggest questions from the get-go.
- Illustrate Property Scale: Show off the full size of a sprawling backyard, the layout of a large estate, or its proximity to a beautiful park or waterfront.
- Highlight Unique Features: Get the perfect angle on a stunning pool, an intricate patio design, or elaborate landscaping that needs to be seen from above to be fully appreciated.
- Provide Neighborhood Context: Frame the home within its community to show how close it is to great schools, shopping, or other local attractions.
When you master aerial photography, you're not just taking pictures; you're selling a vision. You give potential buyers the context they need to imagine themselves living in the space, which is the most powerful sales tool there is.
This ability to tell the full story makes you an invaluable partner to agents who need to move properties quickly and for the best possible price.
Evaluating the Drone Specs That Actually Matter for Property Photography
Picking the right drone for real estate work isn't about chasing the flashiest model; it's about zeroing in on the specific features that deliver stunning property photos and video. When you know what to look for, you can invest in a tool that will make your job easier and your final product look incredibly professional.
At the core of any great aerial shot is the camera sensor. It’s easy to get caught up in megapixel counts, but the real star of the show is sensor size. A larger sensor, especially a 1-inch sensor, is a game-changer. It pulls in way more light, giving you superior dynamic range. This is absolutely critical in real estate, where you're constantly fighting to expose a bright sky properly without crushing the shadows on the front of a house.
Keeping Your Shots Rock-Steady
What good is a fantastic camera if the video is jittery? That's where the gimbal comes in, and for professional work, a 3-axis mechanical gimbal is non-negotiable. It physically moves to counteract wind and the drone's own motion, ensuring your video is buttery smooth and your photos are tack-sharp, even when shooting those beautiful twilight shots that require a slightly longer shutter speed.
Beyond the camera, you need to think about the practicalities of being on-site.
- Flight Time: Look for drones that offer at least 30+ minutes of flight time per battery. Anything less and you'll find yourself constantly landing to swap out power, which really breaks your creative flow, especially on larger properties.
- Transmission Reliability: A solid video feed between the drone and your controller is your lifeline. A robust system, like DJI’s OcuSync, gives you a dependable long-range connection, so you don’t have to worry about the signal dropping as you fly around a big house or navigate an area with potential interference.
A drone's spec sheet tells you everything you need to know. A 1-inch sensor says it can master tricky lighting. A 3-axis gimbal promises stable, cinematic footage. A 30-minute flight time means you can work efficiently. These are the details that elevate a drone from a fun toy to a professional tool.
Flying Smarter and Safer
Today's best drones are packed with features that make your life easier while protecting your expensive gear (and your client's property). Intelligent flight modes are a perfect example. Automated shots like "Orbit" or "Point of Interest" let you create a perfect, smooth circle around the home with just a few taps. It’s a simple way to add that high-end, polished feel to your listing videos.
To see how these specs compare to ground-level gear, our guide on the best cameras for real estate photography offers a great parallel look.
Finally, never overlook safety features. When you’re flying a drone near a million-dollar home, there's zero room for error. Drones equipped with multi-directional obstacle avoidance sensors are a must. They constantly scan for hazards like tree branches, power lines, or the house itself, giving you the confidence to nail those dynamic, close-up shots without risking a costly collision.
Comparing the Top Drones for Real Estate Professionals
Picking the right drone isn't just about buying new gear; it's a serious business decision. The best drone for your real estate photography business is the one that lines up perfectly with the clients you serve, the properties you shoot, and the final product you want to deliver. What works for a quick social media blast on a standard home won't cut it for a high-end commercial property at twilight.
This guide breaks down the top contenders—the DJI Mini 4 Pro, DJI Air 3, and DJI Mavic 3 Pro—from the perspective of a working real estate photographer. We'll go beyond the spec sheets and look at how these tools perform in the real world, helping you figure out which investment makes the most sense for your business.
This simple decision tree is a great starting point, separating the professional-grade tools from hobbyist models right at the budget line where serious quality begins.
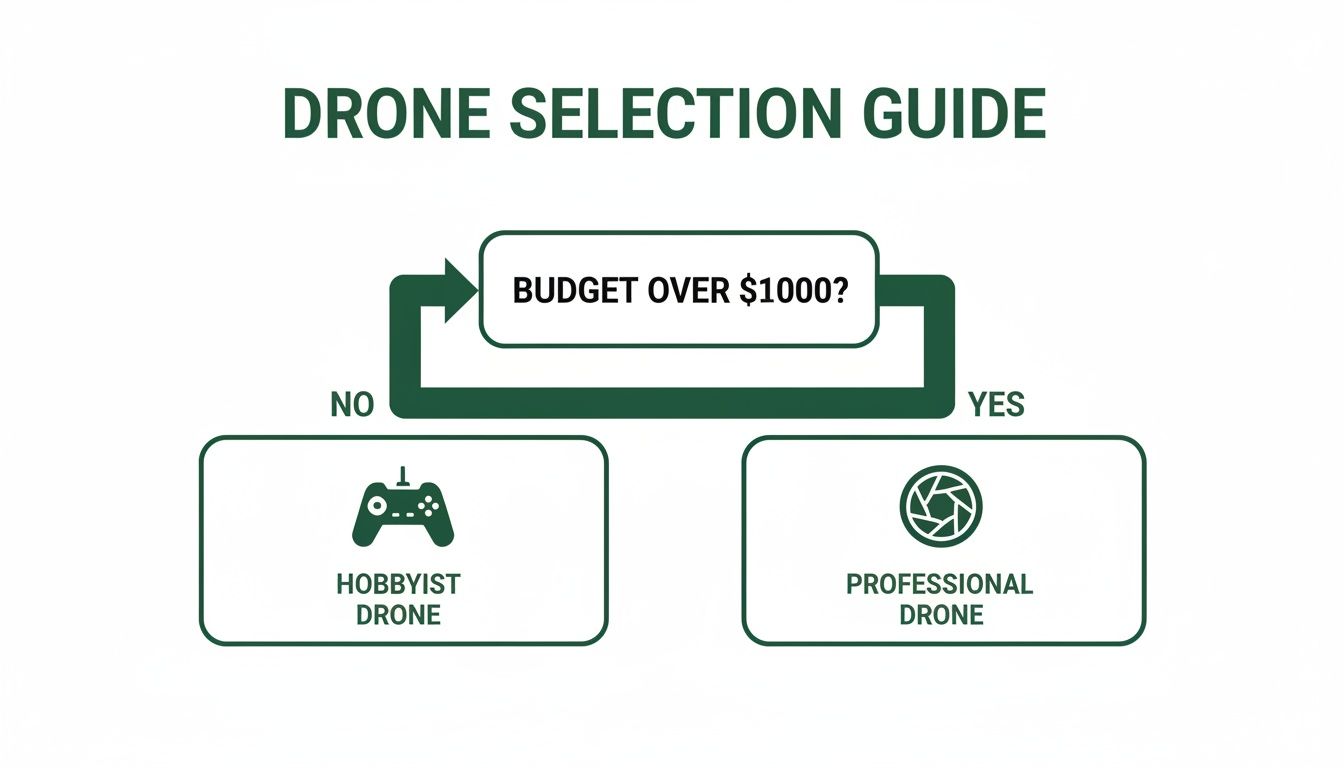
As the chart shows, once you cross that $1,000 threshold, you're stepping into the kind of camera quality and flight performance needed to produce client-ready, professional results.
DJI Mini 4 Pro: The Social Media Specialist
The DJI Mini 4 Pro has become an indispensable tool for real estate pros focused on creating fast, eye-catching content for social media. Its biggest perk is its weight—at under 250g, it often dodges stricter registration and operational rules. But its real magic lies in its agility and unique camera.
Real-World Scenario
You're shooting a modern condo in a bustling city center. The agent's main goal is to create a viral-worthy reel for Instagram and TikTok. This is where the Mini 4 Pro shines.
- True Vertical Shooting: The gimbal physically rotates 90 degrees, letting you capture native 9:16 vertical video and photos. No cropping, no quality loss—just perfect formatting for mobile.
- Discreet Operation: It’s small and quiet, which is a huge plus in dense neighborhoods. You can get the shot without drawing a crowd or annoying the neighbors.
- Agility in Tight Spaces: Need to navigate between buildings or get a creative shot of a balcony? The Mini’s compact frame makes these tight maneuvers much less stressful.
The Mini 4 Pro isn't just the 'budget' choice; it's a strategic one. For photographers serving clients who live and breathe social media, its native vertical shooting is a game-changer that saves a ton of time in post and delivers a far more polished final product.
Sure, its sensor is smaller than the big boys, but in good daylight, the results are fantastic. For your bread-and-butter daytime shoots aimed at digital marketing, this little drone offers incredible value.
DJI Air 3: The Versatile Workhorse
Stepping up to the DJI Air 3 is a major leap in versatility. Frankly, it’s probably the most balanced and practical option for most real estate photographers. Its standout feature is the dual-camera system, which completely changes how you can shoot a property in a single flight.
The Air 3 pairs a wide-angle camera with a 3x medium telephoto lens. This combo lets you grab both the sweeping, context-setting shots and the tight, architectural details without ever landing the drone.
Real-World Scenario
You're at a large suburban home with beautiful landscaping and a unique roofline. The agent needs a full media package for the MLS.
- The Establishing Shot: Use the wide-angle camera for a high reveal, showing the entire lot, its boundaries, and how it sits in the neighborhood. This is the money shot for context.
- Architectural Details: Without flying dangerously close to the house, just switch to the 3x telephoto lens. Now you can get crisp, compressed shots of the stonework, the elegant front door, or the patio out back.
- Highlighting Features: That telephoto lens is also perfect for isolating key selling points like a swimming pool or tennis court, making them the undeniable hero of the shot.
This workflow is a massive time-saver on site. The Air 3’s larger size also means it’s far more stable in windy conditions than any Mini, giving you more confidence and smoother footage.
DJI Mavic 3 Pro: The Premium Imaging Powerhouse
When a project demands zero compromises on image quality, especially in tricky lighting, the DJI Mavic 3 Pro is in a league of its own. It's built around a massive Micro Four Thirds (MFT) sensor, making it the go-to drone for luxury listings, high-end commercial properties, and magazine-quality stills.
That MFT sensor is a light-gathering beast. The result is incredible dynamic range and stunning low-light performance. This is what truly separates the Mavic 3 Pro from everything else.
Real-World Scenario
Your client is selling a multi-million dollar lakefront estate. They need dramatic "golden hour" and twilight shots to create an emotional, aspirational mood for their marketing campaign.
- Golden Hour Excellence: As the sun dips, the Mavic 3 Pro’s sensor effortlessly handles the high contrast between the bright sky and the dark shadows on the property, holding detail in both without turning into a noisy mess.
- Twilight Ambiance: For those iconic twilight shots—where the interior lights glow against a deep blue sky—this drone captures clean, vibrant images that would look muddy and grainy from a lesser sensor.
- Professional Video: Its triple-camera system, which includes a powerful 7x telephoto lens, gives you the kind of cinematic flexibility needed to produce property videos that feel like a movie.
The investment in a Mavic 3 Pro pays for itself by giving you the confidence to take on the most challenging—and profitable—jobs. This level of quality has a real impact on a listing's performance. In fact, professional drone photography doesn't just help sell homes faster; it can boost views by up to 94%. This visibility spike on Zillow and social media attracts 61% more attention than listings with amateur photos, turning a simple listing into a must-see property. You can find more data on how drone imagery elevates real estate listings by checking out HomeJab's research. For photographers on a platform like PropPhoto, showing off this premium capability is a surefire way to attract top-tier brokerages.
Real Estate Drone Feature Comparison at a Glance
To make the choice clearer, here’s a side-by-side look at the key specifications that matter most to real estate photographers. This table cuts through the noise and focuses on the features that will directly impact your workflow and final product.
| Feature | DJI Mini 4 Pro (Entry-Level Pro) | DJI Air 3 (Mid-Range Workhorse) | DJI Mavic 3 Pro (High-End Professional) |
|---|---|---|---|
| Primary Camera Sensor | 1/1.3-inch CMOS | 1/1.3-inch CMOS (Wide & Tele) | 4/3 CMOS (Main Camera) |
| Max Photo Resolution | 48 MP | 48 MP | 20 MP |
| Key Differentiator | Sub-250g weight, True Vertical Shooting | Dual-camera system (1x, 3x) | Triple-camera system (1x, 3x, 7x), MFT Sensor |
| Best For | Social media, vertical content, quick shoots | All-around versatility, detailed shots from afar | Luxury listings, twilight & low-light, cinematic video |
| Wind Resistance | Good (Level 5) | Better (Level 6) | Best (Level 6) |
| Price Point | ~$759+ | ~$1,099+ | ~$2,199+ |
Ultimately, the best drone is the one that fits your business model. The Mini 4 Pro is a social media machine, the Air 3 is the do-it-all workhorse, and the Mavic 3 Pro is the undisputed king for high-end, cinematic results.
Navigating FAA Rules and Safety Protocols
Flying a drone for real estate photography is about much more than getting a great shot. It’s about being a responsible, professional pilot, and that starts with a solid understanding of the law and safety. In the U.S., the Federal Aviation Administration (FAA) sets the rules, and for anyone getting paid for aerial work, those rules are not optional.
Ignoring these regulations is a fast track to hefty fines and a damaged reputation. Following them, on the other hand, signals to clients that you're a serious professional they can trust. It’s a crucial part of building a sustainable business in this field.
The Mandatory Part 107 Certification
Here's the bottom line: if you earn money from your drone imagery, you must have an FAA Part 107 certificate. It's the official license for any commercial drone pilot in the United States and the foundation of your aerial business.
To get certified, you'll need to pass an aeronautical knowledge test. The exam costs about $175 and covers the essentials you need to know to fly safely and legally.
- Airspace Classifications: You'll learn to read aviation maps and understand where you can fly, where you need authorization, and where it's completely off-limits.
- Operating Rules: This section covers the core regulations, like keeping your drone within your visual line of sight (VLOS), staying below 400 feet, and never flying over people.
- Weather and Micrometeorology: The test ensures you understand how wind, visibility, and other weather phenomena can impact your drone's performance and safety.
Passing this exam proves you have the knowledge to operate safely in the national airspace. To dig deeper into the process, you can learn more about what it takes to become a licensed drone pilot and what to expect.
Airspace Awareness and Liability
Your Part 107 license is just the beginning. Every single flight requires due diligence. Before you even think about launching, you have to confirm you’re clear to fly in that specific location.
Thankfully, there are great tools for this. The FAA's own B4UFLY app is a must-have. It uses your phone's GPS to give you a clear, instant readout on any airspace restrictions, temporary flight restrictions (TFRs), or warnings for the area. It takes seconds and can save you from a massive headache.
Professionalism in drone photography is a blend of creative skill and operational discipline. Your Part 107 license is your entry ticket, but consistent safety checks and proper insurance are what sustain a successful career.
Beyond following the rules, you have to protect your business. Liability insurance is non-negotiable. Think about it—you’re flying a piece of equipment over someone's most valuable asset. A standard policy that covers property damage or injury is an absolute must. Flying uninsured is a risk that simply isn't worth taking. Companies like SkyWatch even offer on-demand coverage, so you can insure a single flight if needed.
The Pre-Flight Checklist: A Non-Negotiable Ritual
Finally, every professional pilot lives by their checklist. This isn't just a box-ticking exercise; it’s a critical routine that catches small problems before they become big ones in the air.
Your Pre-Flight Checklist Should Include:
- Hardware Inspection: Give the drone a once-over. Check the propellers for nicks, inspect the arms and body for cracks, and make sure the gimbal is moving freely.
- Battery Check: Are the drone and controller batteries fully charged? More importantly, are they clicked in securely?
- Firmware Updates: Before leaving for the job, make sure both the drone and controller have the latest firmware. An unexpected update prompt on-site can ruin a shoot.
- Environmental Scan: Walk the property. Look for potential hazards like thin power lines, dead tree branches, or antennas that might be invisible from your launch spot.
- Set Return-to-Home (RTH): Always double-check that your RTH altitude is set high enough to clear the tallest obstacle on the property, whether it's the roof, a tree, or a chimney.
Making these safety and legal steps a core part of your workflow does more than just keep you out of trouble. It builds a reputation for reliability and meticulousness—qualities that attract and retain the best clients.
Mastering Aerial Shots That Sell Properties
Having a great drone is just the starting line. The real money is made in the pilot's skill and the quality of the final images. If you want to move beyond basic aerial views and deliver a premium package, you have to master the techniques that turn standard shots into stunning visuals. This is how you justify higher rates and land discerning clients.
The secret to any incredible aerial shot begins with the camera settings. Pros always shoot in RAW format. Why? Because it captures every bit of data the sensor can see, giving you massive flexibility in post-production. You can pull details out of deep shadows and bright highlights that are completely lost in a compressed JPEG.
You also absolutely have to fly in manual exposure mode. Leaving the camera on auto is a rookie mistake. As the drone flies, auto settings will constantly adjust, causing that distracting "flicker" in your videos that screams amateur. Lock in your ISO, aperture, and shutter speed to get smooth, consistent lighting from start to finish.
Core Camera Settings for Real Estate
Before your drone even leaves the ground, get your settings dialed in. This saves a ton of time and prevents you from coming back with unusable footage. Every day is different, but this is a solid starting point for bright, clear conditions.
- ISO: Always keep this as low as you can—ideally 100. This guarantees the cleanest image possible with minimal digital noise.
- Aperture: I find the sweet spot for sharpness is usually between f/4 and f/8. This range keeps the entire property and its surroundings in crisp focus.
- Shutter Speed: For video, stick to the 180-degree rule. Your shutter speed should be double your frame rate, like 1/60s for 30fps video. This produces a natural, cinematic motion blur.
- White Balance: Never use auto white balance. It will shift colors mid-flight. Set it manually with a Kelvin value or a preset like "Sunny" or "Cloudy" for consistent color.
Essential Shots Every Pro Should Master
Your flight plan needs to be just as intentional as your camera settings. Having a shot list ensures you capture the key angles that agents need and buyers want to see. These three shots are the foundation of any great real estate drone package, each one telling a unique part of the property's story.
1. The Bird’s-Eye View (Nadir Shot)
This is your straight-down, top-down shot. Its job is to provide pure context. It clearly shows the property lines, the layout of the lot, and where features like the pool, deck, or garden sit. It's less about art and more about delivering crucial, map-like information.
2. The Orbital Shot
An orbital is a classic for a reason. You fly a perfect, smooth circle around the home, revealing it from every angle. This dynamic shot showcases the property’s 360-degree appeal and how the outdoor spaces connect. Modern drones with "Point of Interest" modes make this shot incredibly easy to nail every time.
The orbital shot is a client favorite because it feels like a personal tour. It transforms a static building into a three-dimensional home, allowing potential buyers to see how the morning sun hits the patio or how private the backyard truly is.
3. The Dramatic Reveal
This is your money shot for video intros. You start low, maybe behind a line of trees or a small hill that obstructs the view of the house. As you ascend and fly forward, the property is "revealed" from behind the obstruction. It’s a powerful, cinematic way to make a great first impression and grab a viewer's attention right away.
Frequently Asked Questions About Real Estate Drones
When you're looking to add aerial imaging to your real estate photography business, a lot of questions come up. From legal hurdles to the nitty-gritty of camera specs, let's clear the air on some of the most common things photographers ask.
Getting these details right isn't just about following rules; it's about building a solid, professional business that clients trust.
Do I Really Need a Part 107 License for Real Estate Photography?
Yes, absolutely. There's no gray area here. The moment you accept payment for drone photos or videos, the FAA considers it a commercial operation. Flying without a Part 107 certificate isn't just risky—it can lead to serious fines.
Think of it this way: being certified is a massive selling point. It tells real estate agents you're a professional who takes safety and compliance seriously. That credential alone builds instant credibility and separates you from the amateurs.
Is Sensor Size More Important Than Megapixels?
For real estate work, a bigger sensor almost always beats a higher megapixel count. Drones with larger sensors, like the 1-inch or Micro Four Thirds models, are simply better at gathering light, which is everything in property photography.
This translates into better dynamic range, meaning you can capture the bright, blue sky and the deep shadows under an awning in the same shot without losing detail in either. It also means cleaner, less noisy images for those beautiful twilight shoots when the light is low but the "wow" factor is high. The quality of your final image really hinges on the sensor's performance.
A larger sensor buys you creative freedom. It gives you the confidence to shoot in tough lighting—like golden hour or dusk—and still deliver the dramatic, high-end shots that clients are willing to pay a premium for.
How Should I Price My Drone Photography Services?
Pricing really depends on your local market, but the smartest move is to bundle drone work into packages. The biggest mistake you can make is offering aerial shots as a cheap, standalone add-on. That completely devalues the skill, expensive gear, and legal hoops you had to jump through.
Start by seeing what other certified pilots in your area are charging. Then, build tiered packages that merge your aerial photos and video with your standard interior/exterior work.
- Standard Package: Your full ground-level photo set, plus 5-10 professionally edited aerial stills.
- Premium Package: Everything in the standard package, plus a polished, 60-second aerial video tour ready for social media.
- Luxury Package: The works. Includes everything from the premium tier, but adds stunning twilight aerials and more advanced video editing.
This approach frames drone services as the high-value offering they are. Always remember to account for the property's size, how complex the flight will be, and your video editing time when setting your final prices.
Are There Restrictions on Flying in Residential Areas?
Flying in most residential neighborhoods for a shoot is generally fine, but you have to operate by the book—no exceptions. Following FAA regulations to the letter is non-negotiable for safety and legal reasons.
The big rules are: always keep the drone within your visual line of sight, never fly directly over people who aren't involved in the shoot, and stay at a safe altitude. Before you even think about taking off, you must check for airspace restrictions using an FAA-approved app like B4UFLY. You’d be surprised how many neighborhoods are near airports or other no-fly zones.
As a matter of professional courtesy, it’s also a great idea to give the immediate neighbors a quick heads-up. Just letting them know you'll be flying for a few minutes to photograph the property can prevent a lot of headaches and keeps things friendly for your client.
Ready to connect with top real estate agents and get more bookings for your photography services? Join the PropPhoto marketplace today. Build your profile, showcase your portfolio, and let high-value clients find you. Sign up for free at PropPhoto.com.

