When you’re starting a real estate photography business, the camera you choose is easily the single most important decision you'll make. The best setup, hands down, is a full-frame mirrorless or DSLR camera matched with a top-notch wide-angle lens. This combination gives you the incredible image quality and expansive field of view you need to make any property shine.
Why the Right Camera Is Your Most Important Tool
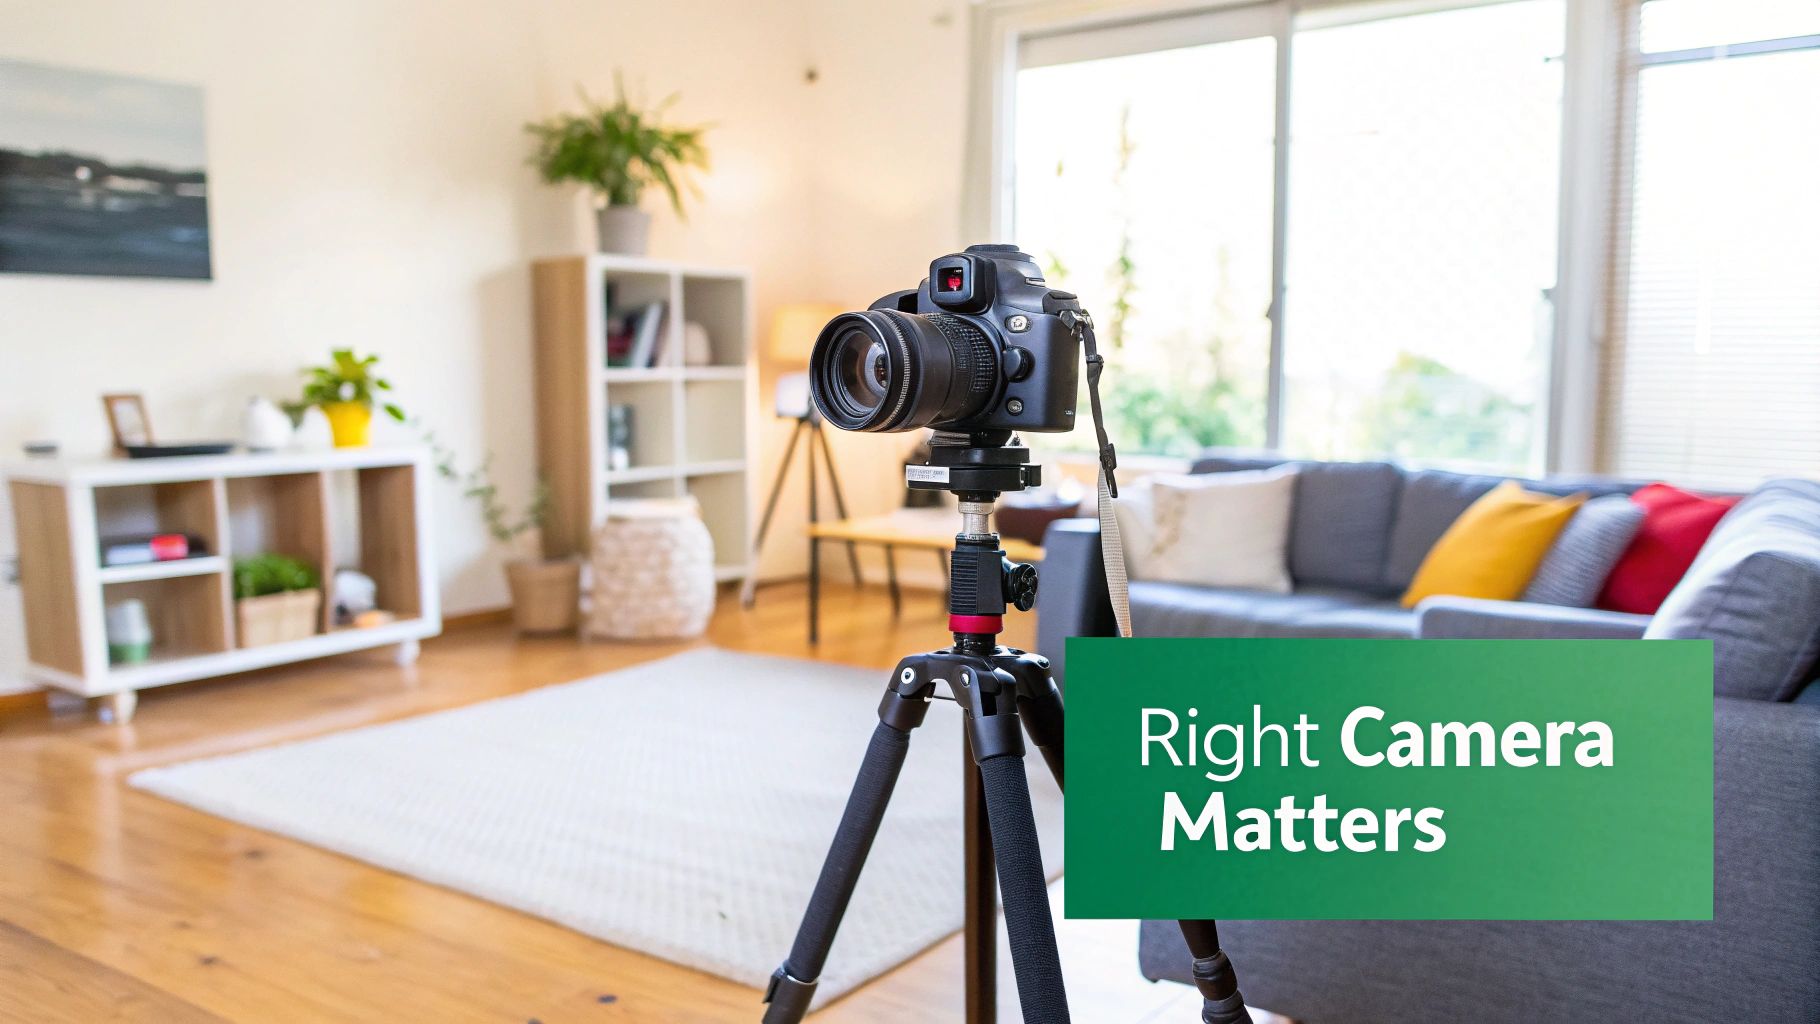
Your camera isn't just a gadget; it's the heart of your business. It's the one tool that takes a real, three-dimensional space and transforms it into a flat, two-dimensional image that makes a potential buyer stop scrolling and book a showing. In today's property market, stunning visuals aren't just a nice-to-have—they're the absolute standard.
Great photos do more than just show what a room looks like. They stir up emotion and build a sense of value before anyone even steps through the door. It's a proven fact: listings with professional photos get way more clicks, more calls, and often sell for more money. Your camera is what makes all of that happen.
Moving Beyond Brand Names
This guide isn't about pushing one brand over another. Sure, Canon, Sony, and Nikon all make fantastic cameras, but the logo on the body matters a lot less than the technology packed inside. Instead, we're going to focus on the specific features you actually need to capture those jaw-dropping property shots that agents and sellers love.
To make a smart choice, you need to get a handle on what really makes a camera great for this job. We're talking about:
- Sensor Size: This is all about how much light and detail your camera can soak up. A bigger sensor means better quality, especially when you're shooting in tricky lighting.
- Dynamic Range: Think of this as your camera's ability to see everything in a room at once—from the bright light streaming through a window to the dark details in the corners.
- Lens Compatibility: The camera body is only half the story. You need access to tack-sharp, wide-angle lenses that can make even smaller rooms feel open and inviting.
Your camera is the bridge between a physical property and a potential buyer's first impression. Investing in the right tool ensures that impression is a powerful and positive one, directly contributing to faster sales and happier clients.
Setting the Stage for Your Investment
Before we get into specific models, let's talk about the two biggest forks in the road you'll encounter: camera type and sensor format. We'll walk through the real-world differences between DSLR and mirrorless systems, so you can weigh the pros and cons of size, technology, and how they feel to shoot with.
Then, we'll dive into the crucial distinction between full-frame and crop sensor cameras. This decision impacts everything from your budget and lens choices to the final look of your photos, particularly when you’re trying to capture a wide interior scene. Nailing these fundamentals first will put you in the perfect position to pick the camera that will launch or level up your real estate photography career.
Decoding Key Camera Features for Property Photos
Walking into a camera store can feel like trying to decipher a secret code. You’ll hear terms like "full-frame," "megapixels," and "dynamic range" thrown around, but what do they actually mean for the photos you'll be taking day in and day out? Getting a handle on these core features is what separates the pros from the amateurs. It’s how you move beyond brand loyalty and choose the right tool for the job.
Don't get bogged down by the technical jargon. Think of these features as the essential ingredients you need to capture a property's best light and make every space look its most inviting. Let's pull back the curtain on the four specs that truly matter.
Sensor Size: The Foundation of Image Quality
At the heart of every digital camera is the sensor, which is basically the modern equivalent of film. When it comes to real estate photography, the size of this sensor is probably the single most important factor.
I like to think of a sensor as a bucket in the rain. A bigger bucket naturally catches more raindrops. In the same way, a larger camera sensor captures more light. This has two massive advantages on a property shoot:
- Better Low-Light Performance: Interiors are almost always darker than they look to the naked eye. A larger sensor produces cleaner, less grainy images in those dim corners, cutting down on the digital "noise" that screams unprofessional.
- A Wider View: Big sensors—specifically full-frame sensors—let your wide-angle lenses do their job properly, capturing a much broader perspective. This is the secret to making rooms feel spacious and airy, which is exactly what agents and sellers want to see.
While smaller "crop sensor" cameras are a decent place to start, there's a reason the industry standard for high-end work is a full-frame sensor. The difference in light-gathering and perspective is just that significant.
Megapixels: The Detail in Your Image
If the sensor is your canvas, then megapixels are the fineness of the weave. A megapixel is simply one million tiny dots (pixels) that make up a digital photo. The more you have, the more detail you capture, and the sharper your final image will be.
For real estate, this detail is non-negotiable. It’s what lets potential buyers zoom in on online listings to inspect the kitchen countertops or the bathroom tile. It also gives you the flexibility to crop a photo later without turning it into a blurry mess.
A camera in the 24 to 45 megapixel range hits the sweet spot. It delivers more than enough detail for professional use without creating monstrously large files that will bring your editing workflow to a crawl.
Dynamic Range: Seeing into Shadows and Highlights
Dynamic range is all about your camera's ability to see detail in the very brightest and darkest parts of a room at the same time. This is, without a doubt, the biggest headache in interior photography. You’re constantly fighting a battle between blown-out, super-bright windows and the deep, dark shadows in the corners.
A camera with great dynamic range is like having a superpower. It can see the beautiful blue sky outside the window and the rich texture of the dark hardwood floors inside—all in one shot. This is a defining feature of professional cameras for real estate photography because it makes creating natural, balanced images so much easier. It drastically reduces the need for complicated lighting setups and makes your life simpler when blending exposures in post-production.
ISO Performance: Your Camera’s Night Vision
ISO is a measure of your sensor's sensitivity to light. A low ISO number, like 100 or 200, means the sensor is less sensitive—perfect for a bright, sunny day. A high ISO, like 3200 or 6400, cranks up the sensitivity, letting you shoot in near darkness.
But there’s a catch. Pushing the ISO too high introduces digital "noise," a distracting, grainy texture that cheapens the look of a photo. A camera with solid ISO performance can shoot at higher numbers while keeping that graininess under control.
Even though you'll be on a tripod and should aim for the lowest ISO possible, having a camera that still looks clean at ISO 800 or 1600 is a lifesaver. It gives you the flexibility to grab a quick, handheld shot of a small detail when you don't have time for a full setup.
Full-Frame vs Crop Sensor Cameras
One of the biggest crossroads you'll hit when buying gear is deciding between a full-frame and a crop sensor camera. Honestly, the "right" choice isn't about which is technically better, but which is right for you—your budget, your ambitions, and the kinds of homes you plan to shoot. This decision directly shapes not just your image quality, but also your field of view, which is everything when it comes to making a room look spacious and inviting.
Think of it this way: a full-frame sensor is like standing in front of a massive picture window overlooking a beautiful living room. You see everything, from wall to wall, in one expansive view. A crop sensor is like looking at that exact same room, but through a smaller porthole. You can still see the room, but the view is tighter, or "cropped," making the space feel a bit more confined.
This narrowing effect is what we call the crop factor. It’s a multiplier—usually 1.5x for brands like Nikon, Sony, and Fuji, or 1.6x for Canon—that changes how your lens "sees" the world. Slap a 16mm wide-angle lens on a crop sensor camera, and it suddenly behaves more like a 24mm lens. That’s a huge difference, and it significantly cuts down how much of a room you can fit into a single shot.
The Professional Standard: Full-Frame
For high-end real estate gigs, full-frame cameras are the undisputed champs, and for good reason. Their much larger sensors are light-gathering powerhouses. This means they perform brilliantly in dimly lit interiors, producing clean, crisp images with far less of that ugly digital grain or "noise," even when you have to crank up the settings.
But the real game-changer is how they work with wide-angle lenses. When you mount a 16-35mm lens on a full-frame body, you get the full, unadulterated 16mm perspective. That’s the magic that makes cozy bedrooms feel open and airy and makes luxury properties look truly grand.
- Superior Low-Light Capability: Way less noise means cleaner, more professional images.
- Wider Field of View: You get the true focal length of your wide-angle lenses, maximizing space.
- Higher Dynamic Range: It captures a greater range of detail in the deep shadows and bright highlights, which is critical for window views.
Of course, all that performance comes with a price tag. Full-frame systems are a serious investment, making them a better fit for established pros or newcomers who are dead-set on targeting the luxury market right out of the gate.
The Smart Starting Point: Crop Sensor
While full-frame might be the benchmark, don't for a second think a modern crop sensor camera can't do the job. These cameras are incredibly capable and offer a fantastic, budget-friendly path into the industry. You can build out a complete, professional-quality kit for a fraction of what a full-frame setup would cost, and still produce images that will knock the socks off most real estate agents.
The trick is simply to account for that crop factor. Instead of a 16-35mm lens, you'll want an even wider one, like a 10-22mm or 10-18mm. These ultra-wide lenses are designed specifically for crop sensors and will give you those broad, inviting shots every listing needs. For someone just starting out, this is the smartest way to get in the game, start earning, and build a portfolio without breaking the bank.
And it’s a great game to be in. The real estate photography market was valued at $2.4 billion globally and is projected to skyrocket to $4.5 billion by 2035. That growth is fueled by a simple fact: listings with professional photos get 47% more online views and up to 39% more inquiries. You can read the full analysis of this market growth and see what it means for working photographers.
This decision tree can help you see the path forward based on what you're ready to invest.
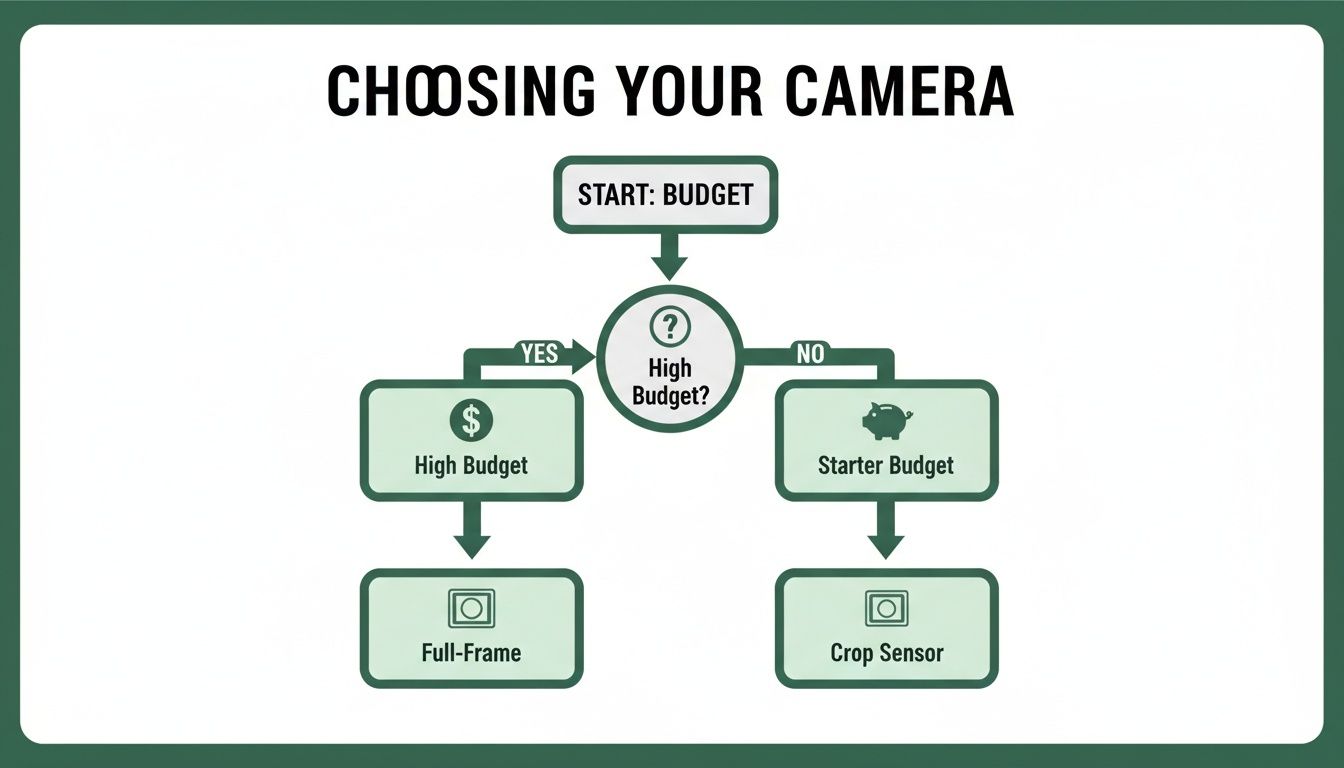
The flowchart lays it out perfectly: if you've got the budget and are aiming for high-end clients, full-frame is your fast track. If you're starting out and want a more cost-effective entry, a crop sensor is the intelligent choice.
To make it even clearer, let's break down the key differences side-by-side.
Full-Frame vs Crop Sensor At a Glance
| Feature | Full-Frame Camera | Crop Sensor Camera |
|---|---|---|
| Field of View | True to the lens's focal length. A 16mm lens gives a true 16mm view. | "Cropped" view. A 16mm lens behaves like ~24mm, making rooms feel tighter. |
| Low-Light Quality | Excellent. Larger sensor captures more light, resulting in less noise and cleaner images. | Good to very good. Modern sensors are great, but can show more noise in dark spaces. |
| Cost | High. Both the camera bodies and the dedicated lenses are a significant investment. | Affordable. A fantastic entry point with a much lower overall kit cost. |
| Lens Choice | Requires full-frame specific lenses (e.g., 16-35mm) to get the wide-angle benefit. | Needs ultra-wide crop-specific lenses (e.g., 10-18mm) to compensate for the crop. |
| Ideal User | Established professionals, luxury property specialists, or those with a larger starting budget. | New photographers, those on a tighter budget, or anyone shooting standard residential properties. |
Ultimately, both systems can deliver fantastic results. The key is understanding the trade-offs and choosing the right tool for your specific business goals.
The Takeaway: Don't get "gear acquisition syndrome." A skilled photographer with a crop sensor camera will consistently produce better images than a rookie with a top-of-the-line full-frame. Focus on mastering your craft—composition, lighting, and editing. Your gear can always grow alongside your business.
Choosing Lenses for Architectural Photography
You’ll often hear photographers say, "date your camera body, but marry your lenses." It's a bit of a cliché, but for real estate photography, it’s gospel. A great camera is fantastic, but the lens you put on it is what truly shapes the final image. Think of it this way: you’ll likely upgrade your camera body every few years to get the latest tech, but a truly stellar lens can be a cornerstone of your kit for a decade or more.
When it comes to shooting properties, your lens choice is arguably more important than the camera itself. The right glass is what makes a cramped powder room feel functional or captures an entire kitchen in one beautiful, inviting shot. If you want to see a dramatic, immediate improvement in your work, investing in good lenses is the place to start.
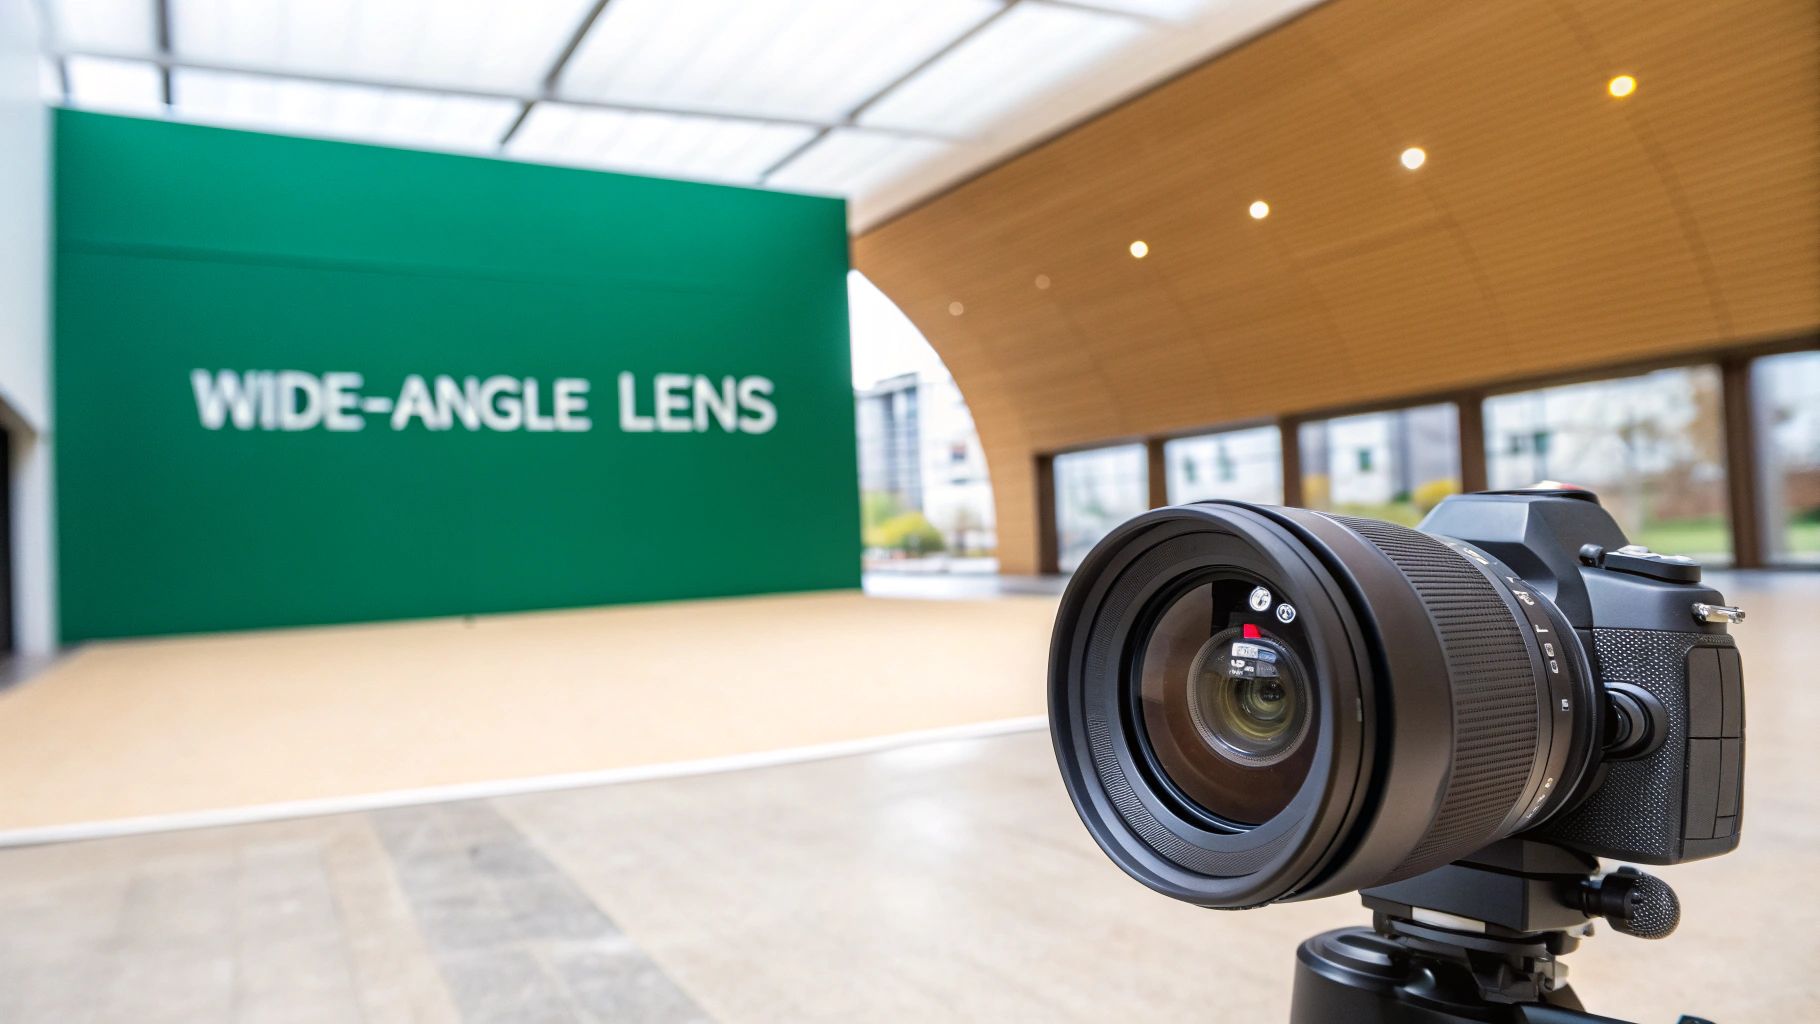
The Essential Wide-Angle Lens
Before you buy anything else, you need a solid wide-angle lens. This is your workhorse, the lens you’ll use for 90% of your interior shots. It's the tool that lets you capture the full scope and feel of a room, showing how all the pieces fit together. Trying to shoot interiors without one is like trying to describe a whole house by showing pictures of doorknobs.
A good wide-angle lens is what makes a space feel open, airy, and welcoming. It allows you to stand in a corner and get the bed, the windows, and the entry all in one shot. For a potential buyer scrolling online, this context is everything—it helps them understand the layout and imagine themselves moving through the space.
The exact focal length you need depends on your camera’s sensor size:
- Full-Frame Cameras: The gold standard is a zoom lens in the 16-35mm range. This gives you incredible flexibility, letting you go super-wide for a big living room or zoom in slightly to frame a kitchen island perfectly.
- Crop Sensor Cameras: Because of the "crop factor," you need a wider lens to get the same effect. Look for something in the 10-22mm or 10-18mm range. This will give you that expansive field of view essential for making rooms look their best.
A wide-angle lens isn't just about cramming more stuff into the photo. It’s about creating an experience. It pulls the viewer in and lets them feel the flow of the home, which is the whole point of great real estate marketing.
The Secret Weapon: Tilt-Shift Lenses
As you start to take on bigger, higher-end jobs—think luxury homes, commercial buildings, or shoots for architects—you'll run into a classic problem: converging vertical lines. When you point a regular wide-angle lens up at a tall building, the sides seem to pinch in toward the top, making it look like it’s falling backward. This distortion, called keystoning, instantly screams "amateur."
Enter the tilt-shift lens. This is a highly specialized piece of gear that lets you physically shift the lens elements up or down, independent of the camera body. This means you can keep your camera perfectly level and still capture the top of the building. The result? Perfectly straight, true vertical lines that look powerful and professional.
There's no sugarcoating it: tilt-shift lenses are expensive. But they are the ultimate tool for achieving architectural perfection. Showing up to a job for an architect or a high-end builder with one of these sends a clear message: you're a serious professional who delivers flawless results. Learning to use one is a major step up that can help you land more prestigious and profitable work, making it a critical component when considering the best cameras for real estate photography and the kits that support them.
Essential Gear to Elevate Your Property Photos
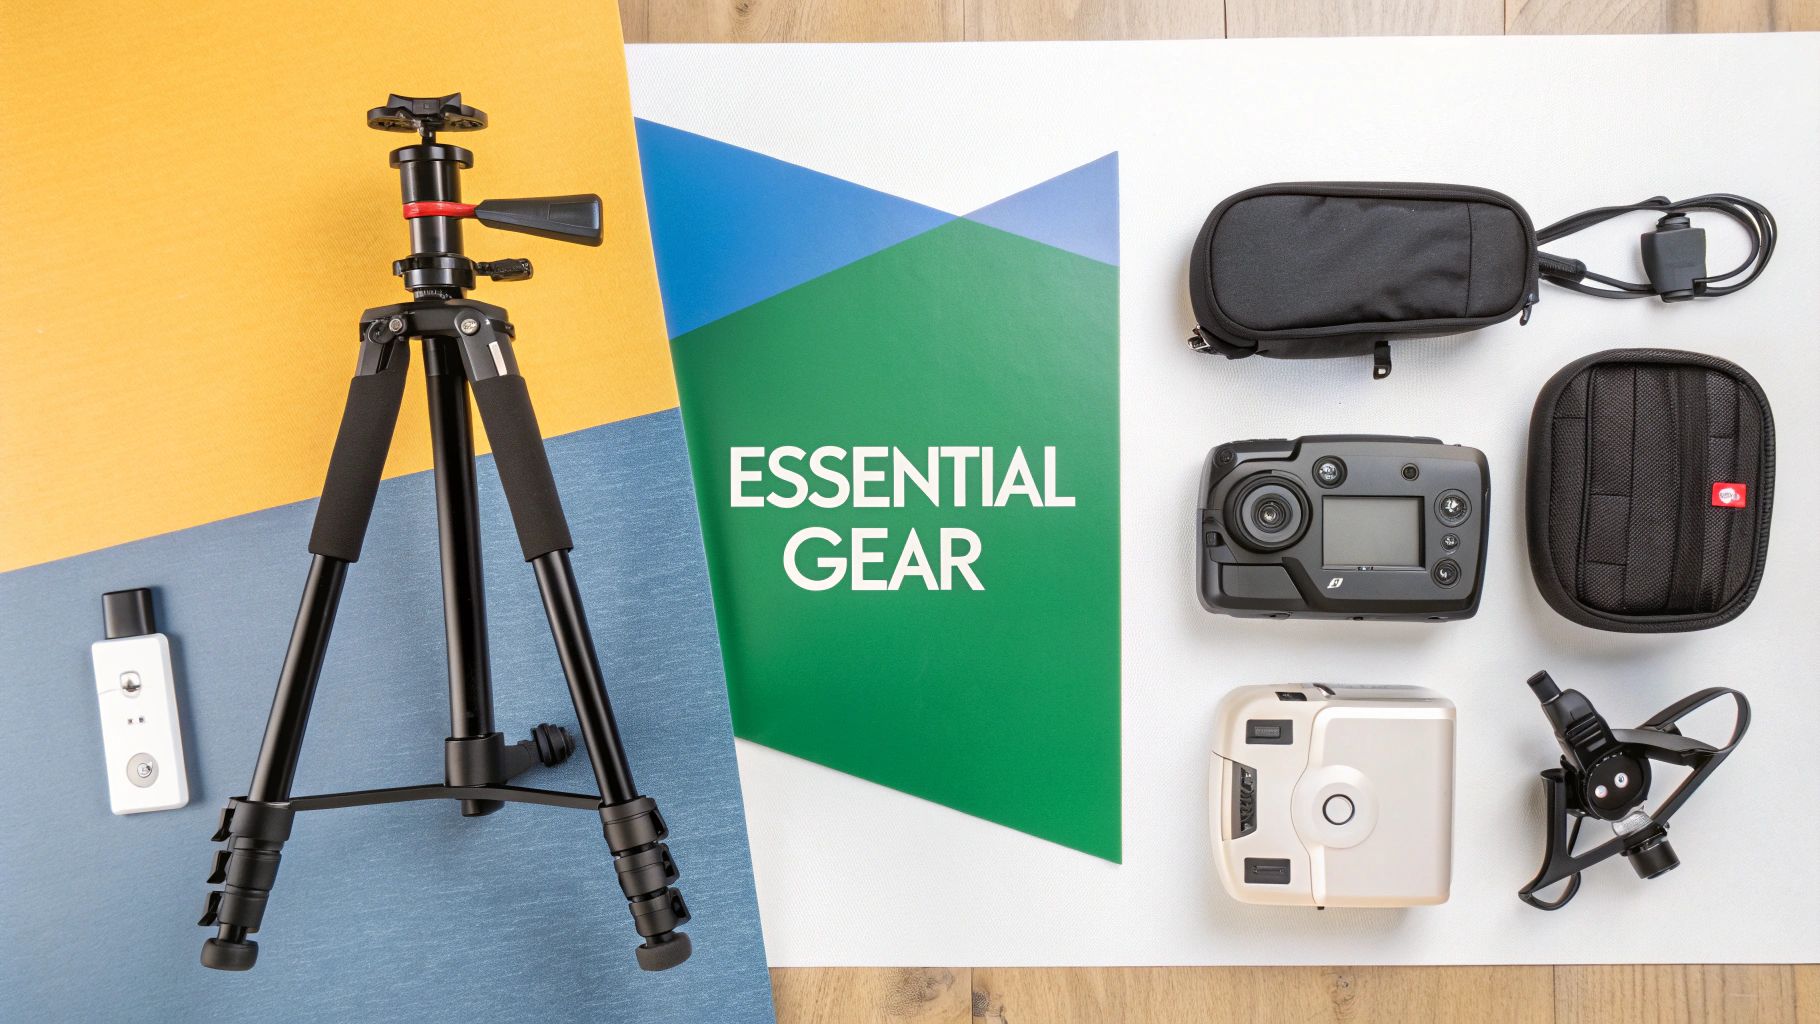
While the camera and lens are the heart of your setup, it’s the supporting cast of accessories that really separates the pros from the amateurs. These tools are what allow you to nail those tricky shots with precision and consistency, turning good photos into incredible ones.
Investing in these key pieces isn't about hoarding gear. It’s about building a reliable system that lets you walk into any property, under any lighting condition, and confidently deliver stunning results. Mastering this full toolkit is what produces the high-quality images that agents demand and buyers can't ignore.
The Unshakable Foundation: A Sturdy Tripod
If you buy only one accessory, make it a high-quality tripod. Seriously. It's the single most non-negotiable piece of equipment for a real estate photographer. Think of it as your portable, rock-steady foundation that makes impossibly sharp images possible.
A solid tripod is your ticket to maximum sharpness. By locking the camera in place, you can use a low ISO and drag the shutter a bit longer to soak in more light—all without introducing motion blur. It's also the only way to effectively execute techniques like exposure bracketing, where the camera absolutely cannot move between shots.
The Importance of Hands-Off Shooting
Once your camera is securely on the tripod, the next step is to make sure you don't touch it when you take the picture. Even the tiny vibration from pressing the shutter button can introduce a hint of softness, robbing your image of that crisp, professional look.
You have two easy ways to get around this:
- Remote Shutter Release: This is a small wired or wireless device that fires the camera for you. It’s what most pros use because it's fast, convenient, and keeps you from bumping the camera.
- Camera Self-Timer: A perfectly good (and free!) alternative is your camera's built-in two-second or ten-second timer. This gives the camera a moment to settle after you press the button, ensuring any vibration has dissipated.
Professional real estate photography is built on a foundation of sharpness and stability. Using a tripod and a remote shutter for every single shot is a simple discipline that guarantees your images are as crisp and detailed as possible.
Mastering Light with Off-Camera Flash
One of the biggest headaches in this job is dealing with bright windows and dark interior corners in the same shot. Relying on natural light alone often leaves you with blown-out highlights or murky, uninviting shadows. This is where learning to use an off-camera flash becomes a complete game-changer.
By placing one or more flashes (often called strobes or speedlights) away from the camera, you can paint light exactly where you need it. You can bounce a flash off the ceiling to gently lift the brightness of an entire room or aim it into a dark hallway to reveal hidden details. This technique, known as "flambient" (a blend of flash + ambient), lets you merge multiple exposures into a final image that looks bright, natural, and perfectly lit—just like the human eye would see it. For specific lighting recommendations, check out our complete real estate photography gear guide.
Taking Your Visuals to New Heights with Drones
Nothing captures a property's true scale, location, and curb appeal like an aerial shot. What was once a high-end novelty is now an expected part of any premium real estate marketing package. Drones provide a powerful perspective that ground-level shots simply can't compete with.
The impact is huge. Listings that feature drone photography have a 68% higher chance of selling, and today, a massive 82% of real estate agencies use drones in their marketing. Buyers have come to expect this bird's-eye view, with studies showing they are 65% more likely to book a viewing after seeing compelling aerial shots. Adding a drone to your toolkit not only wows clients but opens up new revenue streams and higher-value bookings on platforms like PropPhoto.
Your Go-To Camera Settings and Workflow
Great gear is just the starting point. Knowing exactly how to set up that gear is what separates the pros from the amateurs and turns a good camera into a money-making tool. In real estate photography, consistency is everything. The goal is to build a reliable, repeatable process so you can walk into any property and nail the shot.
Think of this as your recipe for success. It’s a straightforward workflow that cuts through the technical jargon and gets you crisp, professional images every single time.
First things first: always, always shoot in RAW format. A RAW file is like a digital negative—it holds every last bit of data your sensor captured, completely untouched. A JPEG, on the other hand, is like a finished print. The camera has already made permanent choices about color, brightness, and contrast. Shooting in RAW gives you the ultimate freedom in editing to tweak exposure, fix white balance, and pull details out of the shadows and highlights.
The Settings That Really Matter
With your camera set to RAW, it's time to switch off the autopilot. We're going to put you in control of the creative decisions and let the camera handle the simple math.
Here’s the setup I use on virtually every shoot:
- Shooting Mode: Switch your dial to Aperture Priority (A or Av). This mode is a game-changer. You set the aperture you need for sharpness, and the camera automatically figures out the right shutter speed. It’s the perfect blend of manual control and on-the-fly efficiency.
- Aperture: Dial it in somewhere between f/8 and f/11. For most wide-angle lenses, this is the magic range. It creates a deep depth of field, keeping everything from the chair in the foreground to the painting on the back wall perfectly sharp.
- ISO: Keep your ISO as low as it can go, ideally 100, but no higher than 400. Low ISO means less digital noise (that ugly, grainy texture) and a cleaner final image. Since your camera will be living on a tripod, you can afford a longer shutter speed without cranking up the ISO.
Bracketing: Your Secret to a Perfect Exposure
Let’s be honest—cameras have a tough time with interior spaces. You've got a dimly lit room and a blindingly bright window in the same frame. It’s a huge dynamic range, and a single shot just can't capture it all. The solution? Auto-exposure bracketing (AEB).
This feature is a lifesaver. It tells your camera to take a quick burst of photos at different exposures—usually one that’s just right, one that's darker (to capture the bright window), and one that's brighter (to see into the dark corners).
By taking a bracketed series of three to five images, you’re capturing all the light information in the scene. Later, in post-processing, you can blend them into a single High Dynamic Range (HDR) photo where the room is perfectly lit and the view outside the window is crystal clear. We dive deep into this technique in our guide on mastering interior lighting.
This technique isn’t just a neat trick; it's the foundation of modern, high-end real estate photography. It’s how you create those bright, airy, true-to-life images that agents and homeowners love. Pro tip: set your camera’s drive mode to continuous shooting. That way, the bracketed shots fire off in a rapid sequence, ensuring the frames are perfectly aligned.
Frequently Asked Questions
Diving into the world of real estate photography gear can feel a bit overwhelming, and you're bound to have questions. Let's tackle some of the most common ones that pop up for photographers who are just getting started.
Do I Really Need a Full-Frame Camera to Start?
Not at all. While you'll see full-frame cameras used on high-end luxury shoots, you absolutely do not need one to get started and build a successful business. A good, modern crop-sensor camera is more than powerful enough to deliver beautiful, professional photos that will wow the vast majority of real estate agents.
The real secret is the lens you pair it with. Grab an ultra-wide-angle lens made for crop sensors—something in the 10-18mm or 10-22mm range—and you'll capture those expansive, room-defining shots perfectly. Plenty of pros built their entire portfolio on crop-sensor gear before ever upgrading.
Should I Upgrade My Camera Body or My Lens First?
The lens, every single time. It's not even a close call. The quality of your glass—your lens—has a far greater impact on your final image than the camera body it's attached to. Think sharpness, color accuracy, and distortion control.
A great lens on a decent, mid-range camera will always produce better results than a brand-new, top-tier camera body using a cheap, basic kit lens.
Lenses are a long-term investment. They hold their value and you can bring them with you as you upgrade camera bodies over the years. Putting your money into quality glass is the smartest move you can make.
If you want to see an immediate, noticeable improvement in your real estate photos, invest in a sharp, reliable wide-angle lens. It’s the tool that truly shapes how a buyer sees and feels a space.
What Is HDR Bracketing and Why Is It So Important?
HDR stands for High Dynamic Range, and the technique of "bracketing" is the absolute cornerstone of modern real estate photography. It’s how you get those perfectly lit shots where you can see both the details inside a room and the view outside the window.
In practice, it’s simple: you take several pictures of the exact same scene, but at different exposure levels. A typical bracketed set includes three to five photos:
- One normal exposure, which is what your camera thinks is the "correct" brightness.
- One or two underexposed shots (darker) to capture all the detail in the bright areas, like the sky seen through a window.
- One or two overexposed shots (brighter) to pull out all the detail from the darkest shadows, like the corner of a room or under a table.
A single shot just can't capture that huge range of light. Later, you'll blend these bracketed photos together in software to create one final, flawless image where every part of the scene is perfectly exposed and crystal clear. Getting this process down is a huge step in learning how to become a real estate photographer.
Ready to connect with real estate agents who need your skills? Join PropPhoto to create your free professional profile, showcase your portfolio, and get booked directly by clients in your area.

