So you want to become a real estate photographer? It's about a lot more than just pointing a nice camera at a house. To really succeed, you need to be a unique mix of artist, technician, business owner, and marketing guru.
It all boils down to mastering architectural composition, truly understanding lighting and editing, and building solid relationships with the real estate agents who desperately need great photos to move properties. This is where you start building a business that actually makes money.
Your Blueprint for a Thriving Photography Business
Let's be direct—this guide is your roadmap to becoming a real estate photographer who stays consistently booked. We’re going to cover the core skills that make the difference between a pro and a hobbyist, and I'll walk you through the gear you actually need to get the job done right.
The goal here isn't just taking pretty pictures. It's about building a real, sustainable business that agents in your area come to rely on.
First things first, you have to understand your own value. Professional photos aren't just a "nice-to-have" for real estate agents; they are a mission-critical sales tool. Your work has a direct impact on how fast a home sells and for how much money.
The numbers don't lie. Listings with professional photos sell a staggering 32% faster. They spend an average of 89 days on the market, while homes with amateur shots sit for 123 days. Think about that. When buyers look at a listing, they spend 60% of their time looking at the photos, often just skimming the text.
Even with these stats, only about 35% of agents hire professional photographers. That's a massive opportunity for anyone with the right skills. If you're curious, you can dive into more real estate photography statistics that really drive home the demand.
Setting the Foundation for Success
Before we get into cameras and marketing tactics, let's talk mindset. When you become a real estate photographer, you're an artist, yes, but you're also a service provider. Your clients—the agents, developers, and property managers—are running their own businesses with insane deadlines and a lot on the line.
Your success will hinge on your ability to:
- Deliver Consistency: Agents need to trust that every single shoot will meet a high standard. No exceptions.
- Be Reliable and Punctual: Time is literally money in real estate. Showing up on time and hitting your delivery deadlines isn't just nice, it's non-negotiable.
- Solve Problems: You’re being hired to make a property look its absolute best. That means knowing how to use angles, light, and composition to play up a home's strengths and downplay its weaknesses.
"Your brand as a real estate photographer is built on two pillars: the quality of your images and the professionalism of your service. Neglect one, and the other can't support your business for long."
This guide will give you a clear, actionable overview of the entire journey. We'll cover everything from the technical side of shooting interiors to creating pricing packages and getting your name out there. Consider this your roadmap to becoming the go-to expert in your local market.
Getting the Right Gear and Mastering Your Craft
Let's be blunt: you can't build a top-tier real estate photography business with a smartphone. Your success boils down to two things: having the right tools for the job and knowing exactly how to use them. While you don’t need a five-figure setup on day one, investing in a solid, professional kit is non-negotiable if you want to be the photographer agents trust with their listings.
Think of it this way—an agent isn’t just paying for your time. They’re investing in the polished, magazine-quality look that only specific gear and techniques can produce.
Your Camera and Lens: The Heart of Your Kit
Your camera body is where it all starts. You'll see a lot of debate online about full-frame versus crop-sensor cameras, and honestly, you can start with a good crop-sensor (APS-C) body. But if you're serious about this business, a full-frame camera is the long-term professional standard. Its larger sensor pulls in so much more light and detail, which is a lifesaver in the tricky, mixed-lighting situations you’ll constantly face inside homes.
But here’s a pro secret: your lens is actually more important than your camera body. A wide-angle lens is the single most crucial piece of glass you will own. It’s what lets you capture an entire room without making it look distorted or warped, giving spaces that open, airy feel agents and buyers love.
- For full-frame cameras: Look for something in the 16-35mm range. This is the sweet spot.
- For crop-sensor cameras: You'll need to go even wider to compensate for the crop factor, so aim for a lens in the 10-22mm range.
This isn’t just a friendly suggestion; it's a fundamental requirement for producing the clean, expansive shots that define professional real estate photography.
The Unsung Hero: A Rock-Solid Tripod
A sturdy tripod isn't optional; it's essential. Most of your time will be spent shooting multiple exposures of the same scene to blend later in post-production (a technique called bracketing). If your camera moves even a millimeter between those shots, the final image is ruined. Simple as that.
A reliable tripod guarantees every frame is perfectly aligned, which is the secret to creating those crisp, flawless HDR images. Find one that’s light enough to haul through a two-story house but beefy enough to keep your camera perfectly still. A geared head can also be a game-changer, letting you make tiny, precise adjustments to get your lines perfectly straight in-camera. This little detail can save you a ton of time during editing. You can find more specific recommendations in our guide on the essential gear for real estate photography.
A tripod does more than just hold the camera steady; it forces you to slow down, breathe, and perfect your composition. This deliberate approach is what separates a professional from an amateur just taking snapshots.
To help you get started, here's a breakdown of the gear you'll need.
Essential Gear for New Real Estate Photographers
| Gear Category | Starter Recommendation (Budget-Friendly) | Professional Upgrade (Long-Term Investment) | Why It's Important |
|---|---|---|---|
| Camera Body | A recent APS-C (crop-sensor) DSLR or mirrorless camera. | A full-frame mirrorless or DSLR camera. | Full-frame offers superior low-light performance and image quality, a must for interior shots. |
| Wide-Angle Lens | A 10-22mm lens for crop-sensor or a third-party 16-35mm. | A native 16-35mm f/4 or f/2.8 lens from your camera's brand. | The single most important lens for capturing entire rooms without distortion. |
| Tripod | A sturdy aluminum tripod with a reliable ball head. | A lightweight carbon fiber tripod with a geared head for precision. | Absolutely critical for sharp, multi-exposure HDR shots (bracketing). |
| Lighting | An on-camera flash/speedlight you can bounce off ceilings. | 2-3 off-camera flashes (strobes) with wireless triggers and stands. | Gives you full control over lighting, eliminating harsh shadows and creating bright, even exposures. |
| Drone | DJI Mini 2 SE or similar entry-level drone. | DJI Air 3 or Mavic 3 Pro. | Aerial shots are a high-demand add-on that showcases the entire property and its location. |
This setup will cover you for the vast majority of jobs you’ll encounter as you get your business off the ground.
Mastering the Craft: It's More Than Just Gear
Having professional equipment is only half the equation. To really stand out, you have to master the technical side of photography. That means getting out of "Auto" and learning to live in Manual Mode.
Shooting in Manual gives you total command over the three pillars of every photo:
- Aperture: Lock this in between f/8 and f/11. This keeps everything in the frame, from the vase on the coffee table to the tree in the backyard, perfectly sharp.
- ISO: Keep this as low as your camera will go, usually ISO 100 or 200. This guarantees you get clean, noise-free images.
- Shutter Speed: This is what you'll adjust from shot to shot to get the perfect brightness.
This level of control is essential for bracketing. This is the core technique where you take several photos of the same scene at different exposures—one dark, one normal, one bright. Later, you merge them into a single High Dynamic Range (HDR) image that beautifully balances the dark shadows of the interior with the bright view outside the windows. This is the look agents expect.
Growing Your Toolkit with High-Value Services
Once you've nailed still photography, you can seriously boost your income by adding services that agents are actively looking for. They require some extra investment in gear and training, but the payoff is huge.
Drone photography, for instance, is practically a standard request now. It gives buyers a powerful perspective, showing off the property's layout, yard size, and proximity to neighborhood perks. To do this legally, you must get your FAA Part 107 certificate in the US. It’s a straightforward process of passing a written test and registering your drone.
Another big one is offering 3D virtual tours with a camera from a company like Matterport. Agents absolutely love these. They let potential buyers walk through a home from their couch, anytime. Mastering this tech doesn't just make you a photographer; it makes you a valuable marketing partner who understands what it takes to sell a home today.
Designing Your Shoot and Edit Workflow
If you want to make real money in real estate photography, efficiency is the name of the game. A rock-solid, repeatable workflow is what separates the pros from the amateurs. It’s the secret to handling a higher volume of properties, delivering consistently killer results, and actually protecting your profit margins. Without a system, you'll just end up wasting hours on-site and even more time glued to your computer.
A streamlined process doesn’t start when you walk through the door. It starts with clear client communication and a simple pre-shoot checklist. This is a game-changer. Just email a short guide to the agent a day or two before the shoot, outlining how the home needs to be prepped—decluttered, cleaned, and with every single light turned on. This one step can save you from walking into a complete mess.
The whole point is to move through the property methodically. You want to capture everything you need for the final gallery without having to double back. Think of it like a production line; every step should be deliberate and predictable.
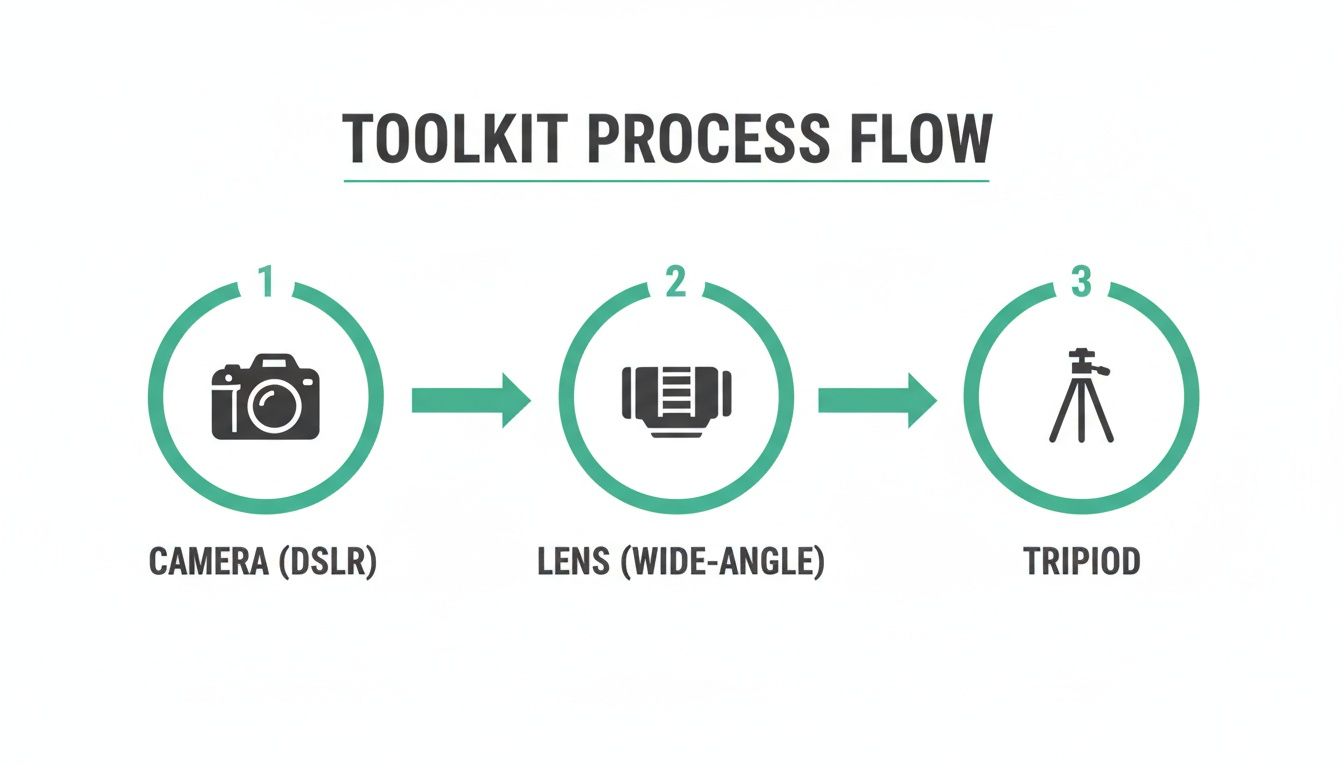
This high-level view shows how your essential tools—the camera, lens, and tripod—are the foundation of every single shot. They have to work together seamlessly in the field for a smooth, efficient process.
A Repeatable On-Site Shooting Process
When you first arrive at a property, fight the urge to start snapping away. Instead, take five minutes. Just walk through the entire home with the lights on. Get a feel for the place, identify the money shots—usually the living room, kitchen, primary bedroom, and front exterior—and mentally map out your route. I’ve found that starting with the interiors and finishing outside is usually the most efficient path.
Once you’re ready, work your way systematically from one end of the house to the other. For each room, the process should be almost second nature:
- Stage and Prep: Do a quick scan. Tidy any minor clutter the homeowner missed. Turn off ceiling fans (they create motion blur), hide ugly trash cans, and straighten any crooked picture frames. These 30 seconds of prep can save you 10 minutes of tedious work in Photoshop later.
- Find Your Composition: Get that tripod set up in a corner or doorway. This is the oldest trick in the book for making a room feel as spacious as possible. Your goal is to show off the room's layout and how it flows into the next space.
- Dial in Settings: Switch your camera to Manual mode. Set your aperture somewhere between f/8 and f/11 to keep everything sharp from front to back, and lock your ISO at 100 for the cleanest images. From here, you should only need to adjust your shutter speed to get the right brightness.
- Execute the Shots: Fire off your bracketed exposures. A five-shot bracket is pretty standard: -2, -1, 0, +1, and +2 exposure values. This gives you all the dynamic range data you'll need to create a perfectly balanced HDR image in post-production.
Then, you just move to the next room and do it all over again. This disciplined approach makes sure you never miss a critical shot and that every image has the technical precision needed for a professional edit.
By standardizing your on-site actions, you free up mental energy to focus on what truly matters: composition and lighting. A repeatable workflow isn't about being robotic; it's about being consistently excellent.
Mastering Different Shooting Techniques
While bracketing for HDR will be your bread-and-butter, you can charge a lot more by mastering a few premium techniques. Agents love having options that make their listings stand out from the crowd.
- The Flambient Method: This sounds fancy, but it's a powerful technique that blends a natural light shot with a flash-lit shot. You take one bright, ambient exposure to capture the natural window light and atmosphere. Then, you take a second, darker exposure where you fire a flash at the ceiling. This "flash pop" evenly lights the room and brings out true-to-life colors. Blending them together in post-production creates a clean, vibrant, and incredibly natural-looking photo that high-end agents absolutely love.
- Twilight Shoots: These are fantastic, high-margin add-ons. That "magic hour" is a very brief 20-30 minute window right after the sun sets. The key is to get your tripod set up while it's still light out. Then, turn on all the interior and exterior lights and use long exposures to capture that stunning deep blue sky against the warm, inviting glow of the home.
Knowing how to pull these off gives you more to offer and immediately increases your average price per shoot.
Building an Efficient Editing Workflow
Your job is only half-finished when you pack up your gear. A lightning-fast editing workflow is just as critical as your on-site process. The entire goal here is to minimize tedious, one-by-one adjustments and lean into automated, batch processes wherever you can.
The undisputed industry standard for this is Adobe Lightroom Classic. Its real power comes from its ability to apply edits to hundreds of photos at once. After you import all your images from a shoot, your very first step should be to cull them—go through and pick only the best compositions from your bracketed sets.
From there, your editing process will generally follow these stages:
- HDR Blending: Select your bracketed series for each final shot and let Lightroom do the heavy lifting with its "Photo Merge > HDR" function. This will automatically combine your exposures into a single file that has all the detail from the darkest shadows to the brightest highlights.
- Batch Corrections: Before you do anything else, apply lens corrections and chromatic aberration removal to all your newly merged photos at the same time. This is a massive time-saver.
- Global Adjustments: Pick one representative photo and get the general look right. Tweak the white balance, exposure, contrast, highlights, and shadows. Once it looks good, you can sync those exact settings across all the other photos from the shoot.
- Fine-Tuning: Finally, go through each image one last time for minor tweaks. This is where you straighten your vertical lines using the Transform tool, crop for a tighter composition, or use brushes to brighten up a dark corner.
For those looking to really dig in and master the post-production side of things, it’s worth exploring different tools. You can learn more about what’s out there in our guide to the best real estate photo editing software. Ultimately, you need to build a system that lets you edit a full property in 1-2 hours, not an entire day. That’s how you scale.
Showcasing Your Work and Setting Your Prices
You can be the best photographer in the world, but without a portfolio, you're invisible. And without clients, a portfolio is just a nice collection of photos. This is the classic chicken-and-egg problem every new photographer faces, but it's easier to solve than you think.
Your first portfolio isn’t about quantity; it’s about proving you can deliver the goods. You just need a small, curated set of images—think 10-15 knockout photos—that show a real estate agent you have the skills to make their listings shine. It needs to scream quality, consistency, and a professional eye.
How to Build a Portfolio When You Have No Clients
Getting your foot in the door of a property is the first challenge. The good news is, you don't need a paying gig to start building your book. It’s time to get a little creative.
- Your Own Place: Start right where you are. Shoot your own home or apartment as if it were a client's listing. This is the perfect, no-pressure environment to nail down your lighting, angles, and editing process.
- Friends & Family: Got a friend with a beautifully renovated kitchen or a family member thinking about selling? Offer them a completely free, professional photoshoot. All you ask in return is their permission to use the best shots for your portfolio.
- Team Up with New Agents: Search for real estate agents who are also just starting out. They're in the exact same boat—trying to build a brand and attract clients. Propose a win-win: you shoot one of their first listings for free, they get amazing photos for their marketing, and you get killer content for your portfolio.
No matter the property, treat every single shoot like it’s a million-dollar listing. Capture all the essential rooms, get the key exterior shots, and deliver a final gallery you’re proud of. This isn’t just about getting pictures; it’s about perfecting your entire workflow.
Your portfolio is more than just a gallery—it's a promise. It clearly tells a potential client, "This is the level of quality you can expect from me, every single time."
Pricing Your Services for a Sustainable Business
With a solid portfolio in hand, the next big hurdle is figuring out what to charge. It’s easy to feel intimidated, but pricing shouldn't be a random guess. A smart pricing strategy is what separates a hobby from a business.
The biggest mistake new photographers make is plucking a number out of thin air. Instead, your pricing needs to cover your costs, value your time, and make sense for your local market. Get this right, and you'll build a business that can actually last.
Common Ways to Price Real Estate Photography
There are a few tried-and-true methods for structuring your fees in this industry. Let’s break them down so you can figure out what works for you.
- Price Per Photo: Simple, but often too simple. Charging something like $10 per photo is easy for an agent to understand, but it doesn't account for the fact that a small, complex luxury condo can take way more time than a large, empty house.
- Price by Square Footage: This is a really popular and effective model. It links your fee directly to the size of the property, which is a pretty good indicator of how much work is involved. You could create tiers for homes under 2,000 sq. ft., 2,000-3,500 sq. ft., and so on.
- Package Deals: Honestly, this is where most successful photographers land. You create a few clear packages that bundle a set number of photos with other services. This approach makes it easy for clients to choose, encourages them to buy more, and clearly communicates the value they're getting.
Here’s a simple example of what a package structure could look like:
| Package Tier | Photos Included | Included Add-ons | Ideal For |
|---|---|---|---|
| Standard | 25 HDR Photos | Basic Photo Delivery | Smaller homes or condos |
| Premium | 35 HDR Photos | 5 Drone Aerials | Standard family homes |
| Ultimate | 50 HDR Photos | Drone, Video, 3D Tour | Luxury or large properties |
Figuring Out Your Base Rate
Before you can price your packages, you absolutely have to know your Cost of Doing Business (CODB). This is everything: your camera gear, software subscriptions (Adobe Lightroom & Photoshop are standards), insurance, gas for your car, website hosting—all of it.
Once you know your annual expenses, you can work backward to find a minimum price per shoot that keeps you profitable.
Start by doing some recon. See what other photographers in your city are charging. A brand new but skilled photographer can often start in the $150-$250 range for a basic photo package. Remember to factor in your time on-site plus your editing time—a good goal is to keep post-production to 1-2 hours per property.
Finally, make sure you price your add-on services individually. Things like drone photos, walkthrough videos, and Matterport 3D tours are high-value services that can seriously boost your revenue on each job. Offer them on their own, but also bundle them into your higher-tier packages to make them an irresistible deal. This is how you go from just taking pictures to running a truly successful real estate photography business.
Marketing Your Services and Finding Clients
Having a portfolio of incredible photos is a fantastic start, but let's be honest—it's only half the battle. To build a real, thriving business, you need a steady, reliable stream of clients. This is where you have to shift your mindset from being just an artist to becoming a savvy marketer for your own services.
The good news? You don't need a massive marketing budget to get noticed. Your initial strategy should be focused and direct, targeting the very people who hire photographers every single day: real estate agents. It all comes down to building genuine relationships that lead to recurring work.
Build Your Online Headquarters
Before you reach out to a single agent, you need a professional online space to send them. Don't overthink this—it doesn't need to be a complex, multi-page website right away. A clean, simple, and mobile-friendly one-page site is more than enough to show you're a legitimate professional.
Make sure your website nails these three key elements:
- Your Portfolio: Feature your best 15-20 images right up front. This is the first thing an agent will look at to judge the quality of your work.
- Your Services and Pricing: Clearly list your packages. Agents are incredibly busy, so they appreciate transparency and don't want to hunt for basic information.
- A Clear Contact Method: Make it painfully easy for them to get in touch. A simple contact form or a highly visible phone number and email address is perfect.
Beyond your own site, creating a profile on a specialized marketplace like PropPhoto is a smart move. It puts your portfolio directly in front of agents who are actively searching for photographers in your specific area. Think of it as a powerful lead-generation tool working for you from day one.
Direct Outreach to Local Agents
Once your online presence is solid, it's time for proactive outreach. This is, hands down, the most effective way to land your first few paying clients. Just don't send a generic blast email—your approach needs to be personal and targeted.
Start by making a list of 20-30 local real estate agents or small brokerages in your area. Look for agents who are active but whose current listing photos are just "okay." These are your biggest opportunities.
Next, craft a concise and professional email. The goal here is to introduce yourself, showcase your work, and offer a clear call to action. Avoid going on about yourself or your gear. Instead, focus on how your photography will help them sell homes faster and for more money.
"Your initial outreach should be a conversation starter, not a hard sell. Position yourself as a potential partner who can help elevate their brand and listings, and you'll get a much warmer reception."
Networking and Building Relationships
The most successful real estate photographers I know are the ones who become trusted partners, not just one-off vendors. The secret to this is building genuine relationships within the local real estate community.
Social media, especially Instagram and Facebook, is fantastic for this. Follow local agents, engage with their content authentically (no generic "great post!" comments), and share your own best work using location-specific hashtags. This keeps you top-of-mind and shows you're an active part of the industry.
Try attending local real estate meetups or even just popping into open houses. A brief, in-person introduction can be far more memorable than an email. Bring a few business cards, be friendly, and focus on listening to what agents need.
Here are a few actionable tips that have always worked for me:
- Offer an Intro Deal: Propose a one-time discount for a first-time client. It lowers the barrier for them to give you a shot.
- Highlight Your Value: When you talk to agents, mention the benefits of premium services like drone photos or twilight shoots. Explain how these add-ons can make their high-end listings pop.
- Ask for Referrals: After you've delivered a gallery and have a happy client, don't be shy. Ask if they know any other agents who might need your services.
Ultimately, your reputation will become your most powerful marketing tool. Delivering stunning photos on time, every time, and simply being a pleasure to work with is what turns a single booking into a long-term client relationship. For a deeper dive into winning over agents, our guide on how to get real estate clients offers even more advanced strategies. The journey is built one successful shoot—and one happy client—at a time.
Your Top Questions Answered
Jumping into real estate photography brings up a ton of questions. It's completely normal to feel a bit lost at first, but getting clear on a few key things can save you a lot of headaches and help you start off on the right foot.
Let’s tackle some of the most common questions I hear from photographers who are just getting started.
How Much Can I Realistically Earn?
This is the big one, right? The truth is, your income can vary wildly depending on your market, your skill, and the services you offer. When you're brand new, a good starting point for a standard photo package on a typical home is somewhere in the $150-$250 range. This is a great price to get your foot in the door and start building a solid portfolio.
Once you’ve got some experience under your belt, the numbers start looking a lot better. Established pros in bigger cities, especially those offering premium add-ons like video, drone shots, and 3D tours, can easily pull in $500 to $1,500+ for a single property. The real secret to a six-figure income? It's all about building relationships with top-producing agents and brokerages who need a reliable, high-quality photographer on a regular basis.
Do I Really Need a Drone License?
Yes. 100%. This isn't even a question. If you plan to fly a drone for any kind of paid work in the U.S., you absolutely must get your Part 107 certificate from the FAA. It involves studying the rules of the sky and passing an aeronautical knowledge test.
Flying for money without it can land you in some serious hot water with massive fines. But beyond that, it’s about professionalism. Agents are asking for aerials more and more to show off a property's location and lot size. Having that license tells them you're a serious professional they can trust.
Getting your Part 107 isn't just about checking a legal box. It's a signal to clients that you're a legitimate business owner who respects the rules and is committed to providing a safe, professional service.
What's the Best Way to Deliver Photos to Clients?
How you deliver your photos says a lot about your business. Slapping them in an email attachment or a generic Google Drive link just doesn't cut it. It can look amateurish and often creates headaches with file sizes and download permissions.
The industry standard is to use a dedicated online gallery platform built for photographers. These services give your clients a clean, branded, and professional-looking gallery where they can easily do everything they need to.
- Flick through all the images in a beautiful layout.
- Pick their favorites for the MLS.
- Download different photo sizes on demand (like web-res for the MLS and high-res for print flyers).
This approach makes the whole experience feel premium and effortless for your client, which makes you look like a pro.
What Do I Do If the House Isn't Ready When I Arrive?
It’s going to happen, and it's always frustrating. The best way to deal with this is to be proactive. Your pre-shoot checklist and confirmation email should make it crystal clear that the home needs to be clean, decluttered, and photo-ready before you get there.
But when you show up to a mess anyway, your contract needs to have your back. Here are a few standard ways to handle it:
- Shoot 'As-Is': You photograph the property exactly as you found it, after letting the agent know the results won't be ideal.
- Wait (for a fee): You might agree to wait for 30 minutes or so while they tidy up, but you should charge a waiting fee for the delay.
- Reschedule: If the place is a total disaster, the only real option is to reschedule. This should always come with a rescheduling fee to compensate you for the lost time and travel.
Putting these policies in writing from day one protects your time, sets clear boundaries, and shows clients that preparation is key to getting the amazing photos they want.
Ready to get noticed by local agents? Create your free profile on PropPhoto and start connecting with clients who are actively looking for skilled photographers. Join our marketplace at https://propphoto.com and take the next step in your career.

