Starting your career as a real estate photographer really comes down to three things: getting the right gear, nailing down a consistent shooting process, and figuring out how to get in front of local agents. You don't need a massive loan to get started, either. A solid camera, a good wide-angle lens, and a sturdy tripod are the absolute non-negotiables that will form the foundation of your business.
Building Your Essential Photography Toolkit
Jumping into real estate photography isn’t just about having a camera; it’s about having the right tools for a very specific job. This isn't like portrait or landscape work where you have tons of creative freedom. Here, the goal is to create clean, bright, and accurate photos that make a space look its best. The gear you choose has a direct impact on your ability to deliver those professional, wide-angle shots that agents need to attract buyers.
The good news? You don’t need to break the bank. The idea is to build a reliable, efficient kit that helps you produce consistent results, shoot after shoot. Think of your gear as business assets. Every single piece in your bag should have a clear purpose: to make a property look incredible and to help you work quickly and professionally on-site.
The Non-Negotiable Core Gear
Your journey starts with three pieces of equipment. These are the absolute backbone of any real estate photographer's setup. Honestly, trying to shoot professionally without them is just setting yourself up for a struggle.
- A Capable Camera Body: You need a camera that gives you full manual control and, crucially, shoots in RAW format. While full-frame cameras are fantastic in low light and produce amazing quality, plenty of successful photographers get their start with a more budget-friendly crop-sensor (APS-C) model. The key is simply learning how to get the most out of what you have. For a deeper dive, check out our guide on the best cameras for real estate photography.
- A Wide-Angle Lens: This is arguably the single most important piece of gear you'll buy. To capture the full feel of a room without making it look warped, you need a wide-angle lens—typically something in the 16-35mm range for full-frame cameras or 10-24mm for crop-sensor bodies. This is what allows you to make rooms feel spacious and inviting, which is exactly what agents are paying you for.
- A Sturdy Tripod: Please, do not skimp on this. A solid tripod is the unsung hero of sharp, perfectly aligned photos. It completely eliminates camera shake, lets you shoot multiple exposures for HDR, and guarantees your vertical lines are straight—a dead giveaway of professional work.
To help you get started, here's a quick-reference guide to the must-have equipment that balances performance and budget.
Essential Gear Checklist for New Real Estate Photographers
| Gear Category | Essential Item | Why It's Critical |
|---|---|---|
| Camera | DSLR or Mirrorless with Manual Mode | Gives you full control over exposure and is necessary for shooting in RAW. |
| Lens | Wide-Angle Zoom (16-35mm or 10-24mm) | Captures the entire room, making spaces feel larger and more appealing. |
| Tripod | Sturdy, with a reliable head | Ensures sharp, blur-free images and perfect alignment for bracketed shots. |
| Accessories | Remote Shutter, Extra Batteries, Lens Cloth | Small items that prevent major on-site headaches and improve image quality. |
Having this foundational kit means you're ready to walk into almost any property and deliver professional results.
Why Your Gear Choices Matter
Investing in the right equipment from day one isn't just about taking better pictures; it's about setting a strong foundation for your business. It's a smart move in an industry that's only getting bigger. The real estate photography market was valued at $2.4 billion globally and is expected to nearly double to $4.5 billion by 2035. This boom is driven by a simple fact: properties with high-quality photos get 47% more online views and up to 39% more inquiries. Your gear is what enables you to meet this massive demand.
A classic rookie mistake is blowing the budget on a high-end camera body but then skimping on the lens and tripod. I guarantee you'll get consistently better results from a mid-range camera with an excellent wide-angle lens and a rock-solid tripod than you will from a top-tier camera with a cheap lens and a wobbly tripod.
Essential Accessories for a Smooth Workflow
Once you have the big three, a few smaller accessories will make your shoots so much smoother and more professional. These are the little things that solve common on-site problems, helping you move through a property efficiently without cutting corners on quality.
I'd strongly recommend adding these to your bag:
- Remote Shutter Release: Whether it’s wired or wireless, a remote trigger lets you fire the camera without touching it. This eliminates even the tiniest vibration and ensures your shots are as sharp as possible.
- Extra Batteries and Memory Cards: There is nothing worse than running out of power or space halfway through a shoot. Always, always carry at least one fully charged backup battery and a handful of high-capacity memory cards.
- Lens Cleaning Kit: Dust, smudges, and fingerprints are just a part of life. A simple microfiber cloth and an air blower are must-haves for keeping your glass clean and your images free of distracting spots.
- A Reliable Camera Bag: You've invested in your gear, so protect it. A well-padded camera bag that’s comfortable to carry will keep everything organized, safe, and easy to grab when you need it.
Executing the Perfect Property Photoshoot
Having the right gear in your bag is just the starting line. How you actually perform on-site—that’s what separates the amateurs from the pros and keeps clients coming back. Executing the photoshoot is where your preparation meets your skill, turning what could be a chaotic hour into a smooth, efficient process that produces those stunning images agents need.
The best shoots begin long before you even arrive at the property. One of the smartest things you can do is give your client a simple pre-shoot checklist. This little document empowers the homeowner or agent to handle the decluttering and basic staging, saving you a ton of time and letting you focus on photography, not moving personal items.
For a great starting point, check out this real estate photography preparation checklist. Sending this over a day or two in advance sets a professional tone and makes sure the home is ready for its close-up the moment you walk in.
Crafting Your Standard Shot List
Every agent has a mental checklist of the photos they need to market a listing. Your job is to nail that list every single time. Having a standard shot list of your own is your roadmap—it ensures you never miss a critical angle, even when you're in a rush.
Here’s what your go-to list should always cover:
- The "Hero" Shots: Grab at least 2-3 amazing photos of the front exterior from different angles. This is almost always the main photo on the listing, so it has to be perfect.
- Outdoor Living: Don't forget the backyard, patio, pool, or any other features that make the property special.
- Main Living Areas: Get those wide shots of the living room, family room, and dining room to show how the space flows.
- The Kitchen: This room sells houses. Capture multiple angles, including wide shots and details of the countertops and appliances.
- Bedrooms & Baths: A good, wide shot of every bedroom and bathroom is a must. For the master suite, take a few extra angles to highlight its size.
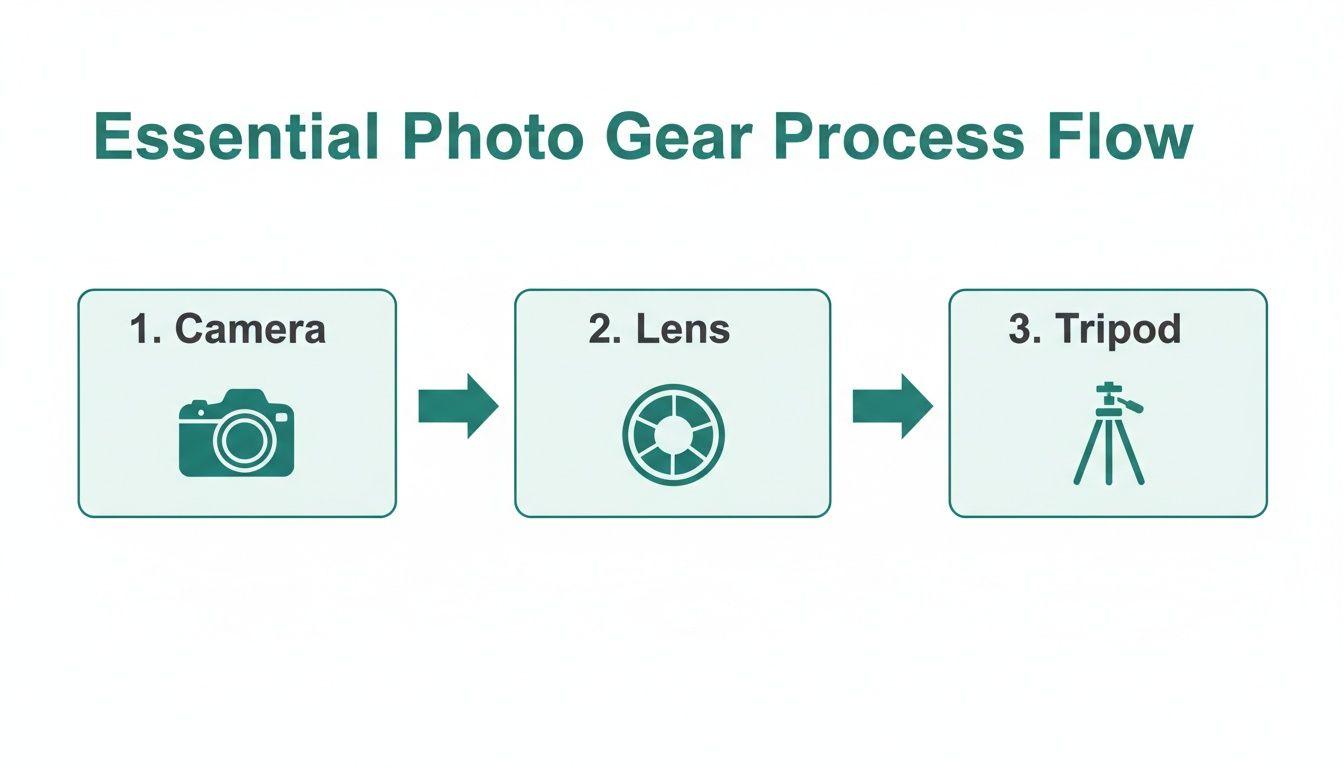
This is a great visual reminder of how your core tools—the camera, lens, and tripod—work together to bring that shot list to life.
Mastering Bracketing for Perfect Exposures
Let’s talk about the biggest headache in interior photography: bright windows. If you expose for the room, the windows become blindingly white. If you expose for the beautiful view outside, the room turns into a dark cave. The professional solution is bracketing.
Bracketing is just a fancy term for taking several photos of the exact same scene at different brightness levels. I typically shoot a set of three: one dark, one just right, and one bright. This is where your tripod becomes non-negotiable; the camera absolutely cannot move an inch between these shots.
Later, in editing, you'll blend these images together into a single High Dynamic Range (HDR) photo. The result? A perfectly exposed image where you can see all the detail inside the room and the view outside the window.
Learning to bracket properly is the secret sauce. It's the technique that creates those bright, crisp, and professional images that agents expect to see on the MLS.
Developing an Efficient On-Site Workflow
In this business, time is money. Agents are on tight schedules, and your own profitability depends on how quickly you can shoot a property without cutting corners. A good goal to aim for is finishing a standard home (around 2,500 sq. ft.) in under 90 minutes.
Here's a field-tested workflow that works:
- The 5-Minute Walk-Through: The first thing I do is a quick lap around the entire property without my gear. I turn on every light, open all the blinds, and start mapping out my key shots in my head.
- Exterior First (20 Mins): I almost always start outside. The light is usually best early on, and it lets me nail that crucial "hero" shot right away.
- Systematic Interior Shooting (55 Mins): I start at the front door and work my way through the house in a logical circle, one room at a time. This stops me from running back and forth and ensures I don't accidentally miss a room.
- The Final Check (10 Mins): Before packing up, I do a quick scroll through the images on my camera's screen. It's a final sanity check to make sure I've got every shot the agent will need.
This systematic approach keeps you focused and efficient. It shows the client you know what you're doing, and it gets you on to the next job faster—which is key to building a real business.
Expanding Your Services to Increase Revenue
Once you've nailed the art of delivering consistently beautiful photos, you've built the foundation of your real estate photography business. But let's be real—to build a profitable, sustainable career, you have to think bigger than a basic photo package. The real money and long-term client relationships come from positioning yourself as an indispensable media partner for your agents.
Expanding your offerings isn't just about tacking on a few extras. It’s a strategic move that meets a very real market demand. Agents are constantly hunting for an edge, and high-impact visuals like aerial shots, dramatic twilight photos, and immersive 3D tours are exactly what they need to stand out. When you offer these in-house, you solve a major headache for them. They don't have to juggle three different vendors; you become their one-stop shop.
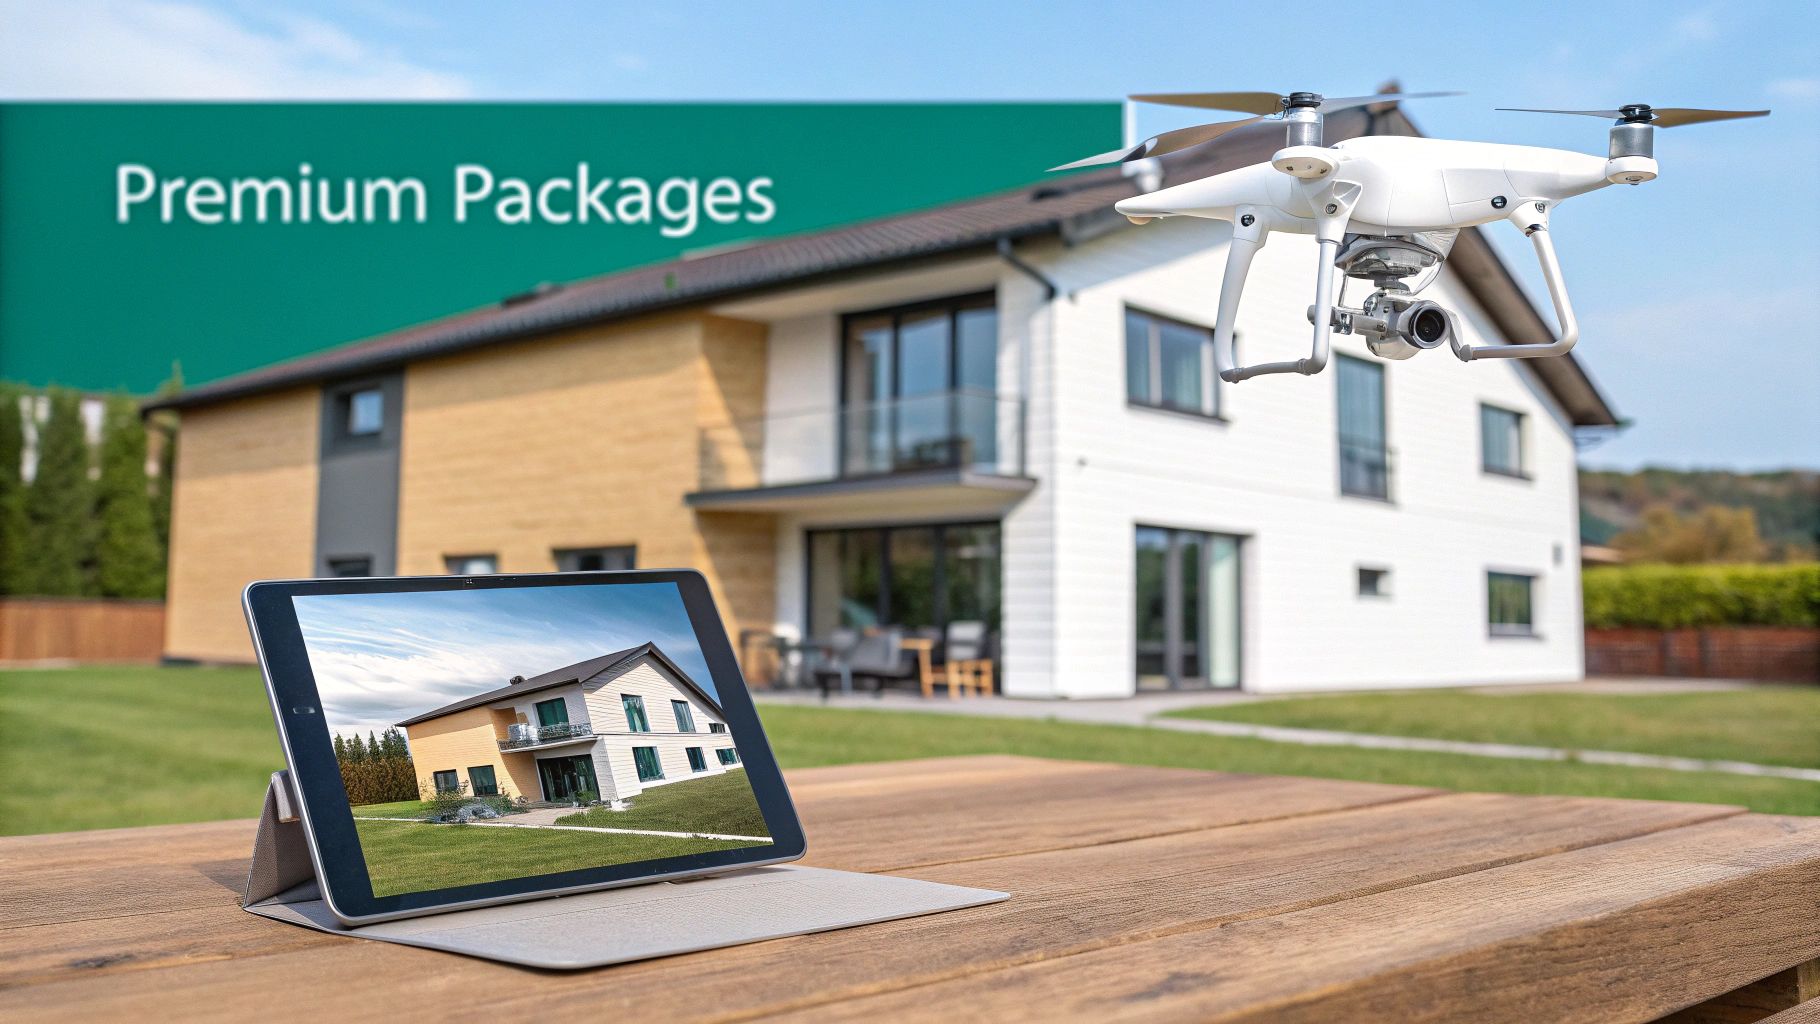
Taking Flight with Drone Photography
Nothing shows off a property's scale, the lay of the land, and its place in the neighborhood quite like an aerial view. Drone photography has quickly gone from a luxury add-on to a must-have for many listings, especially those with acreage, unique features, or a prime location.
Getting started has a few non-negotiable steps:
- The Right Gear: A great starting point is an entry-level drone like a DJI Mini. It's surprisingly affordable, easy to fly, and captures fantastic quality images and video.
- Licensing and Insurance: This is where you can't cut corners. You must get your FAA Part 107 license to fly a drone commercially in the US. On top of that, you'll need a separate liability insurance policy that specifically covers your drone operations.
- Pricing It Right: As an add-on service, a set of 5-10 aerial photos can easily command an extra $100-$250. That’s a simple addition that can dramatically boost your revenue on a single job.
And this isn't just a hunch; the data backs it up. According to the National Association of Realtors, listings with drone photography sell 68% faster and see 65% higher showing rates. The team at Extreme Aerial Productions has some great insights on just how powerful aerials can be.
Capturing the Magic of Twilight Shoots
Twilight photography delivers those scroll-stopping, magazine-quality exterior shots that make a property look absolutely luxurious. These shoots happen during the "blue hour"—that small window right after sunset when the sky glows a deep, rich blue and the home’s interior and exterior lights create a warm, inviting ambiance.
Twilight shots are pure visual drama. They communicate a sense of warmth, elegance, and high-end appeal that a standard daytime photo simply can't match. It’s an easy upsell for agents who want to make a premium listing feel truly special.
The best part? This service requires no new camera gear, just your tripod and a bit of patience. The real skill is in the timing and the editing. You’ll bracket your exposures just like you do for interiors to capture the entire dynamic range, from the bright lights inside to the deep blue of the sky. Because it means a separate trip to the property in the evening, you can comfortably charge $150-$300 for this premium add-on.
Offering Immersive 3D Virtual Tours
If you're ready for the ultimate service expansion, it's time to look at 3D virtual tours. These immersive walkthroughs give potential buyers a genuine feel for a property's layout and flow, letting them explore every nook and cranny from their couch. This isn't just a slideshow; it's a fully navigable digital twin of the home.
Matterport is the undisputed leader here. While their specialized cameras are a bigger investment, the return can be huge. If you're just starting, a more accessible entry point is a 360-degree camera, which can produce excellent tours as well. We cover the entire process in our guide on creating a compelling house virtual tour.
Pricing for 3D tours is usually based on square footage, often starting in the $200-$400 range for a typical home. When you start packaging these services—drone, twilight, and a 3D tour—with your standard photos, you can turn a $250 job into a $750+ premium media package. This doesn't just triple your revenue from one client; it solidifies your status as an indispensable real estate marketing expert.
Setting Up Your Business Operations
Taking incredible photos is the fun part, but it's the business side of things that will actually make you money. Think of it this way: your photography is the product, but a solid business structure is what turns your passion into a profitable career.
Without a plan for getting paid, protecting yourself legally, and delivering your work, even the best photographers burn out. The key is to create simple, repeatable systems that make you look like a pro from day one. You don't need a fancy MBA or complex software—just a clear blueprint for your pricing, contracts, and workflow.
Developing Your Pricing Strategy
One of the first and most nerve-wracking questions you'll get is, "So, what are your rates?" Getting your pricing right is a delicate dance. You need to cover your costs and time, reflect the quality you bring to the table, and still be competitive in your local market.
While you'll see a few different models out there, pricing by the home's size is almost always the best way to go.
- Charging by the hour? I'd steer clear of this. It actually penalizes you for being fast and efficient, which is the opposite of what you want.
- What about per photo? This can work, but it often invites clients to haggle over every single shot to save a few bucks, which can hurt the final quality of the gallery you deliver.
- Pricing by square footage is the industry standard for a reason. It's simple, fair, and easy for both you and the agent to understand. The price automatically scales with the amount of work required.
For a new photographer just starting out, a good range to aim for is $150 to $350 for a standard shoot on an average-sized home. National data shows that a basic package of 10-25 photos hovers around $230, so use that as your baseline. From there, you can adjust based on your specific area and what you're offering.
Don't fall into the trap of being the cheapest photographer in town. Top agents don't hire the cheapest; they hire the most reliable and the one who delivers the best quality. Compete on value, not price.
Creating a Simple and Professional Contract
Let’s be clear: a contract isn't about distrust—it's about creating clarity. A simple agreement protects both you and your client by putting all the expectations in writing. It’s your professional safety net, and you should never do a paid shoot without one. Don't worry, you don't need a lawyer to draft a 20-page document; a solid one-page agreement is usually all you need.
Make sure your contract covers these essentials:
- Scope of Work: What, exactly, are you providing? List the number of photos, the property address, and any extras like drone shots or a twilight session.
- Payment Terms: How much does it cost? When is the payment due (I recommend upon delivery or even before the shoot)? What payment methods do you take?
- Image Licensing: This part is critical. You are granting the client a license to use the photos only for marketing that specific property. The copyright—the actual ownership of the images—always stays with you. This prevents them from selling your photos to a builder or stager without your permission.
- Cancellation Policy: What if the agent cancels an hour before the shoot? It happens. A simple clause stating that cancellations within 24 hours of the appointment will incur a fee is completely fair and standard practice.
Streamlining Your Editing and Delivery Workflow
Once you've packed up your camera bag, the job is only halfway done. An efficient post-processing and delivery system is what allows you to hit your deadlines and give your clients a polished, professional experience. The name of the game here is speed and consistency.
Most pros, myself included, use Adobe Lightroom Classic as the command center for editing. The trick is to build a routine. You’ll import your photos, blend your bracketed shots into HDRs, and then apply consistent edits—like correcting colors and straightening walls—across the entire set.
When the edits are done, how you deliver the images matters. Please, don't just email a zip file of JPEGs. It's clumsy and unprofessional. Instead, use an online gallery service. These platforms give your clients a beautiful, branded web page where they can easily view, download, and share their photos in both web-ready and high-resolution sizes. It’s a small touch that makes a huge difference in the client experience.
Marketing Your Services and Finding Clients
You've got the gear and you've nailed the technical side of things. Now comes the real challenge: getting paid for it. This is where many talented photographers get stuck, but it’s where your business truly begins.
Effective marketing isn't about just hoping people find you. It’s a deliberate strategy to connect with the right agents who see professional photos not as an expense, but as a critical investment. Your goal is to go from being just another person with a camera to the go-to expert agents in your area trust with their listings.
Build a Portfolio Before You Have Clients
Every new photographer faces the same classic paradox: you need a portfolio to get jobs, but you need jobs to build a portfolio. The trick is to stop waiting for permission and start creating your own opportunities.
Here are a few proven ways to build a killer starter portfolio from scratch:
- Offer a Free "Spec" Shoot: Find a newer agent with a great listing but a tight budget. Offer to shoot it for free in exchange for a glowing testimonial and the rights to use the photos. It's a fantastic win-win that gives you real-world shots.
- Lean on Your Network: Have a friend or family member who just redecorated or is thinking about selling? Ask to photograph their home. Treat it like a real, paid gig from start to finish to practice your entire workflow.
- Shoot a Vacant New Build: New housing developments often have beautifully staged model homes. Drop by the sales office, be polite and professional, and ask if you can photograph one for your portfolio. The worst they can do is say no.
Your first portfolio doesn't need to be massive. Ten absolutely stunning photos from two or three different properties will do more to impress an agent than 50 mediocre shots ever could. Focus on quality, not quantity.
Create a Standout Online Presence
When an agent hears your name, their first move will be to Google you. What they find needs to scream "professional" from the first click. Your online presence is your digital handshake, and it has to be firm.
A clean, modern website is non-negotiable. It's your home base. Make sure your best work is front and center, your services and packages are easy to understand, and your contact info is impossible to miss. Platforms like Squarespace or Wix are perfect for building a great-looking site without any coding knowledge.
Beyond your own site, get listed on a specialized marketplace like PropPhoto. These platforms are a game-changer because they put your work directly in front of agents who are actively looking to hire a photographer. It’s a direct line to qualified leads and adds a layer of credibility to your new business.
Identify and Connect with Top Agents
Don't waste your time with a shotgun approach, emailing every agent in the phone book. The secret is to focus your energy on the top producers—the agents who are closing multiple deals a month and already understand the power of great marketing.
Start by researching the top real estate brokerages in your town. Browse their websites and see who has the most listings. More importantly, look at the photos they’re using. If you spot listings with dark, blurry smartphone pictures, you've just found a golden opportunity.
When you reach out, make it personal. A generic "Dear Agent" email is a one-way ticket to the trash folder. A little research goes a long way.
Try a subject line that grabs their attention, like: "A photography idea for your 123 Maple Street listing"
This immediately shows you've done your homework and aren't just spamming them. You’re not asking for a handout; you’re offering a specific solution to make their current listing look better. After all, professional photos are a huge sales driver. Viewers spend 60% of their time on images and just 20% on the property description. Great photos get noticed—listings with high-quality images receive 61% more views. You can learn more about the powerful impact of professional real estate visuals from PhotoUp.
Client Acquisition Channels Comparison
Deciding where to focus your marketing energy is key. Some methods provide quick wins, while others are about building long-term relationships. Here's a look at the most common channels and how they stack up.
| Method | Pros | Cons | Best For |
|---|---|---|---|
| Direct Agent Outreach | Highly targeted; allows for personalized communication; can build strong, direct relationships. | Time-consuming; high rejection rate initially; requires research and persistence. | Photographers who are proactive and want to build a core group of loyal, high-volume clients. |
| Marketplaces (PropPhoto) | Puts you directly in front of motivated clients; adds credibility; handles some marketing for you. | Platform may take a commission; you're competing with other listed photographers. | New photographers needing to land their first few clients quickly and build a reputation. |
| Networking Events | Face-to-face interaction builds trust; great for meeting multiple agents at once. | Can be intimidating; requires strong "people skills"; may not yield immediate results. | Building a long-term presence in the local real estate community. |
| Referrals | High trust factor (warm leads); clients are often pre-sold on your value; very low cost. | Cannot be controlled or forced; requires an existing happy client base to get started. | Photographers who have already completed a few jobs and delivered an excellent experience. |
Ultimately, a mix of these strategies will serve you best. Start with a combination of direct outreach and a marketplace profile to get the ball rolling, and then nurture those relationships to start generating powerful word-of-mouth referrals.
Common Questions from New Photographers
Starting out in real estate photography, you're bound to have a ton of questions. What can you actually make? How do you handle the business side? It's completely normal. Getting solid answers to these early questions is key to building the confidence you need to walk onto that first job looking and feeling like a pro.
Let's dive into some of the most common things aspiring photographers ask.
How Much Can I Realistically Earn as a Beginner?
When you're just starting, a realistic price for a standard shoot on an average-sized home is somewhere between $150 and $350. Where you land in that range really depends on your local market, what services you're offering, and how quickly you can get the job done.
A great way to bump up your income right away is by bundling services. For example, tacking on a set of drone photos can easily add another $100 to $250 to the invoice. As you build a killer portfolio and agents start to see you as reliable and consistent, you can start pushing those rates up. It's not uncommon for experienced, full-time photographers in busy markets to clear six figures by working with high-volume agents and offering premium services like video tours and 3D scans.
What Is the Biggest Mistake New Real Estate Photographers Make?
Hands down, the most common (and most avoidable) mistake is not keeping your vertical lines straight. In any kind of architectural photography, things like walls, door frames, and window edges must be perfectly vertical.
When those lines are leaning, even just a little, the photo instantly screams "amateur." It makes a room feel warped and just... off. This usually happens when the camera isn't perfectly level on the tripod. Always, always use your camera’s built-in digital level or a cheap hot-shoe bubble level. You also need to master the transform and lens correction tools in Lightroom, because fixing small imperfections in post-processing is an essential skill.
Getting your verticals right is a small detail that makes a massive difference. It's one of the clearest signs that separates an amateur from a professional and instantly elevates the perceived quality of your work.
Do I Need a Business License and Insurance to Start?
Yes. Don't even think about skipping this. Operating as a legitimate business is crucial for your protection and your professional reputation. You'll almost certainly need to register your business (as a sole proprietorship or LLC) and get any local licenses required to operate legally.
Even more important is having liability insurance. This is what saves you if you accidentally knock over your tripod and it shatters a priceless glass table. Many real estate brokerages and commercial clients won't even consider hiring you without proof of insurance, so it’s a non-negotiable part of being a pro.
How Many Photos Should I Deliver for a Standard Listing?
For a typical single-family home (think 2,000-3,000 sq. ft.), aim to deliver between 25 and 40 polished images. That’s usually the sweet spot for giving a comprehensive tour of the property.
Your final gallery should cover all the bases:
- A few great shots of the front and back exterior.
- Wide shots of all the main rooms—kitchen, living room, master bedroom, etc.
- A couple of detail shots that highlight unique features or new upgrades.
The goal is to give potential buyers a complete picture without drowning them in photos. It's always a good idea to talk with the agent beforehand, as huge luxury properties will naturally require a much bigger shot list.
Ready to get your work in front of agents who are actively looking to hire? PropPhoto is a marketplace built to connect photographers like you with real estate professionals. Create your free profile, showcase your best shots, and start getting booked.

