A stellar house virtual tour doesn’t just happen on the day of the shoot. It's born from meticulous planning. The prep work you do beforehand is what separates an okay tour from one that genuinely captivates buyers and makes them feel like they're already home.
The Pre-Shoot Blueprint for a Perfect Tour
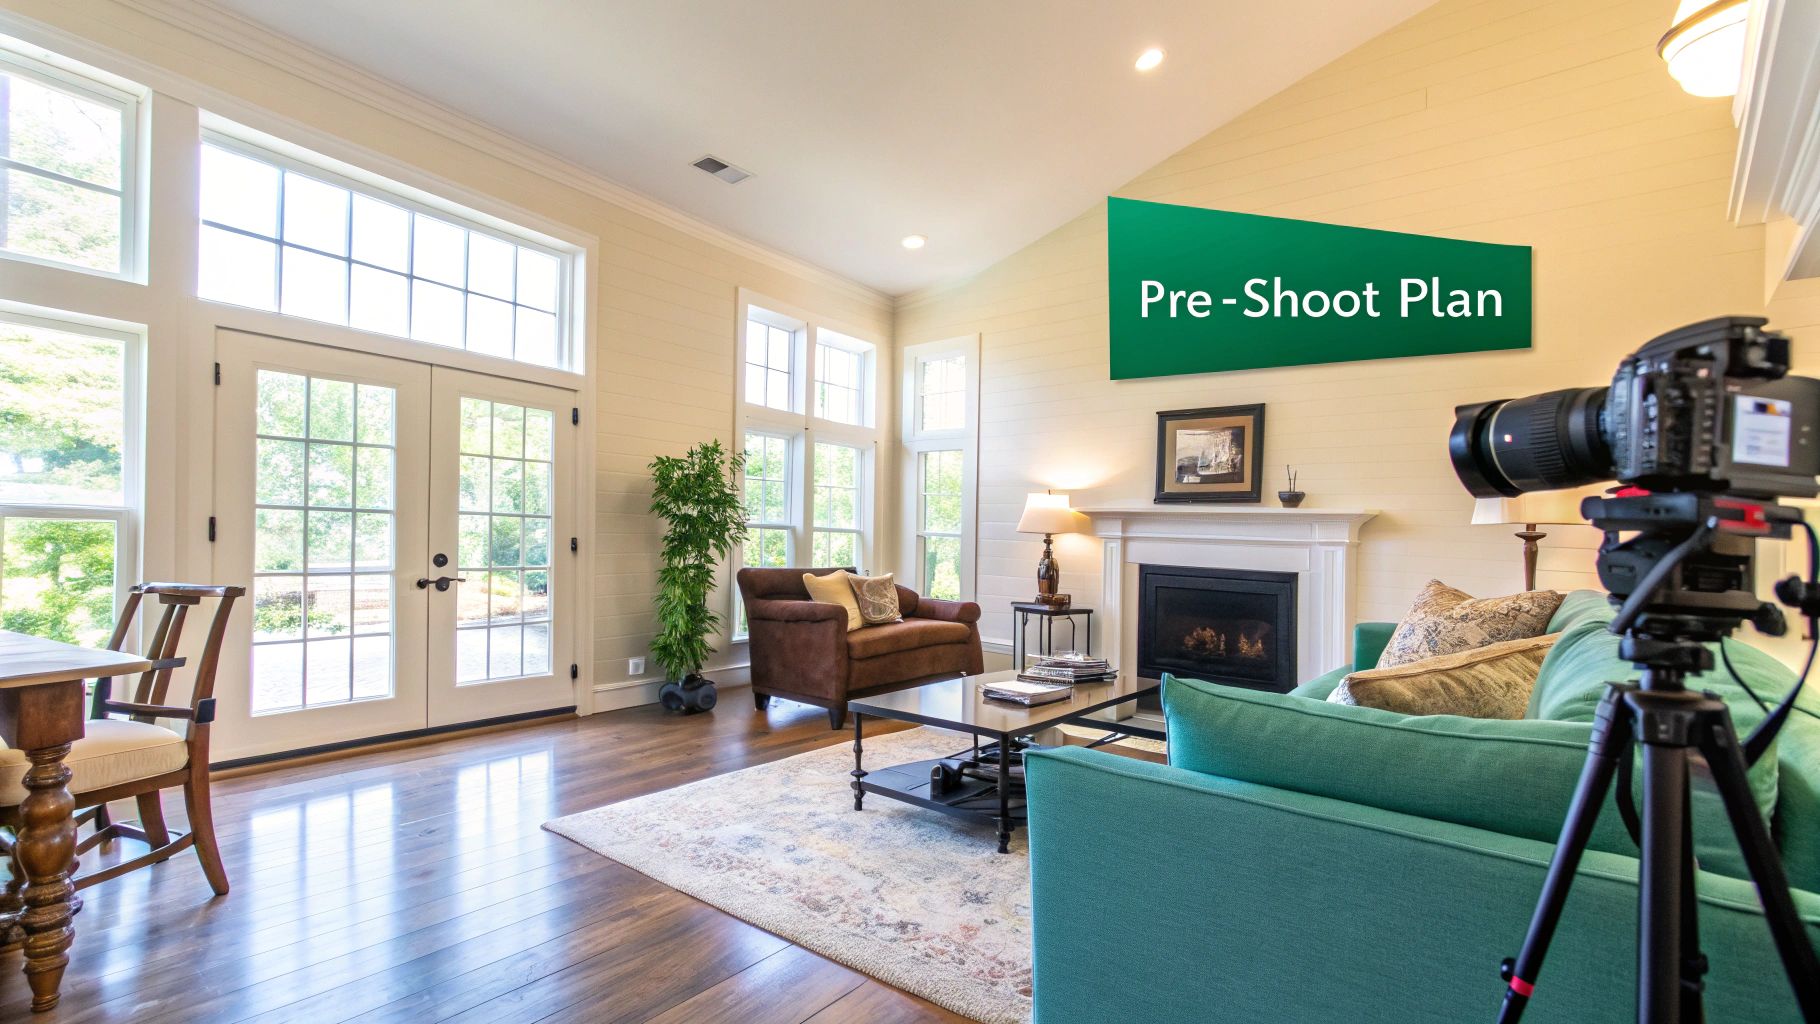
Long before you even think about setting up a tripod, your job begins with a strategic chat with the real estate agent or homeowner. This isn't just a discovery call; it's where you shift from being a service provider to a marketing partner. Your mission is to get to the heart of the property's story.
What are the home’s biggest selling points? You need to ask. Is it the brand-new chef’s kitchen with its gleaming quartz countertops? Or maybe it's that incredible backyard deck that just screams "summer BBQs." By identifying these hero features upfront, you can map out a tour path that showcases exactly what makes this property a must-see.
Staging for a 360-Degree Perspective
Here’s where virtual tours change the game. With standard photos, you can frame out a messy corner. But a 360-degree camera sees everything. This demands a totally different staging mindset. You need to coach your client on preparing the space for an experience where viewers can—and will—look in every single direction.
The two most important words are depersonalization and decluttering. Advise them to pack away family photos, kids' artwork from the fridge, and piles of mail. This is crucial because it helps potential buyers mentally move in, instead of feeling like they're just guests in someone else's house.
I can't tell you how many times I've seen people just shove clutter to one side of the room. A 360° camera has no blind spots. Every corner has to be ready for its close-up, which means stuff needs to be moved out of the room entirely, not just out of one specific shot.
A Room-by-Room Preparation Strategy
The best way to get a home ready without overwhelming the seller is to give them a clear, actionable checklist. It prevents last-minute scrambling on shoot day and shows you’re a pro who’s thought of everything. You can find some great examples online to create your own, and our guide on real estate photography preparation is an excellent place to start.
Here's a simple framework you can share with your clients:
- Living Areas: Furniture should be arranged to show clear, walkable paths. This helps viewers understand the flow of the space. Ditch the extra throw pillows and old magazines.
- Kitchens & Dining: Clear every single countertop. A fruit bowl or a nice vase is fine, but that's it. Hide the trash can, dish soap, and sponges. Make sure all dining chairs are pushed in and straight.
- Bedrooms: Every bed should be made perfectly—think hotel-style, with smooth comforters. Nightstands need to be tidy, and all clothes should be put away.
- Bathrooms: This is a big one. Remove all personal toiletries. No shampoo bottles in the shower, no toothbrushes by the sink. And always, always put the toilet seat down. Hang fresh, clean towels neatly.
Finally, let's talk about light. Have the homeowner open every blind and curtain to flood the space with natural light. Then, turn on every single light in the house. This is the time to replace any burnt-out bulbs. That bright, airy, and welcoming vibe is what makes a virtual tour truly shine.
Choosing the Right Gear for Your Virtual Tour Business
The camera system you choose is the backbone of your virtual tour service. This decision directly impacts your on-site efficiency, the quality of your final product, and even your business model. It's not just about picking the "best" camera; it's about picking the right tool for the job you want to do.
Let's walk through the three main approaches I see out in the field, from the all-in-one systems to the fully manual setups.
H3: The All-in-One Powerhouse: Matterport
You can't talk about virtual tours without mentioning Matterport. They've built a brand that agents and clients recognize on sight. Their Pro-series cameras are designed from the ground up to create dimensionally accurate “digital twins” of a property, complete with that famous dollhouse view.
The real magic of Matterport is its streamlined workflow. You get to the property, scan each room, and upload the data. Their cloud software handles all the heavy lifting, stitching everything together automatically. This process is incredibly fast and minimizes the chance of human error, which is a huge plus when you're shooting multiple properties a day.
The catch? It’s a closed ecosystem. You’re paying for the premium hardware upfront, and then you’re locked into their monthly subscription plans to host the tours. You get less creative control, but what you get in return is a highly consistent, professional product every single time.
For photographers who want to build a business around volume and reliability, Matterport is essentially a business-in-a-box. The brand recognition alone helps justify a higher price point to agents.
H3: The Flexible Competitor: Dedicated 360° Cameras
If the Matterport ecosystem feels too restrictive or costly, dedicated 360° cameras are your sweet spot. This is where you find a fantastic balance of quality, speed, and affordability. Cameras from brands like Ricoh (with its popular Theta line) or Insta360 are portable, powerful, and much easier on the wallet.
Going this route hands the control back to you. You're no longer tied to a single platform. You can choose from dozens of third-party virtual tour software providers, many of which offer more flexible pricing or even one-time fees. This freedom allows you to fully brand your tours, embed interactive hotspots, and deliver the final product without ongoing hosting costs.
The trade-off is that the post-production is a bit more hands-on. You'll be the one uploading the spherical images and building the tour yourself. For many photographers, myself included, that extra control is well worth the effort.
H3: The Ultimate Quality Setup: DSLR and Mirrorless Systems
When a client demands the absolute highest image quality, nothing beats a proper DSLR or mirrorless camera. By mounting your camera on a panoramic tripod head, you can capture a series of high-resolution photos and stitch them together into a flawless 360° panorama using software like PTGui.
The detail, dynamic range, and sheer crispness you can achieve with this method are simply on another level. It’s the go-to approach for luxury real estate, architectural portfolios, and high-end commercial spaces where every pixel matters. To dive deeper into the gear itself, check out our guide on the best cameras for real estate photography.
Be warned, though: this is not the path of least resistance. It's by far the most time-consuming workflow, both on-site and in post-production. The learning curve is steep, and it demands precision. This method is reserved for those premium projects where the budget and timeline can accommodate true craftsmanship.
Virtual Tour Camera System Comparison
To make the decision a bit easier, I've put together a table that breaks down the core strengths and weaknesses of each system. Think about the kind of clients you want to serve and how you want to spend your time.
| Camera System | Key Advantages | Key Disadvantages | Best For |
|---|---|---|---|
| Matterport | Automated processing, dollhouse view, dimensional accuracy, brand recognition. | High initial cost, mandatory subscription, closed ecosystem. | High-volume photographers seeking speed, consistency, and a premium branded product. |
| Dedicated 360° Camera | Excellent balance of quality and speed, affordable, portable, platform flexibility. | Requires more hands-on post-processing, no automated floor plans. | Professionals wanting control over branding and hosting without a massive budget. |
| DSLR/Mirrorless | Unmatched image quality, ultimate creative control, high dynamic range. | Slowest workflow, steep learning curve, significant post-processing time. | Luxury listings, architectural photography, and high-end commercial projects. |
Ultimately, your choice will define your service. Do you want to be the fast and reliable option, the flexible and custom solution, or the high-end artisan?
No matter which camera you pick, a rock-solid tripod is absolutely essential for sharp, level shots. I also recommend investing in some portable lighting. A couple of small LED panels can make all the difference in lifting shadows and ensuring every room in the house virtual tour looks bright, clean, and inviting.
Nailing the On-Site Shoot: A Pro's Workflow
Alright, you've planned, you've staged, and now you're on-site. This is where the magic happens, but it's also where small mistakes can create huge headaches later. Your goal here is simple: capture clean, consistent, high-quality images. Every decision, from where you plant your tripod to how you handle the light, will make or break the final tour.
Before you even think about pressing the shutter button, do a walkthrough. Seriously. Walk the property like a potential buyer would. Where do they go first? How do they move from the living room to the kitchen? This mental map will become your shooting plan, ensuring the final tour flows naturally and doesn't feel like a confusing maze.
This diagram breaks down the different gear workflows you might encounter, from the set-it-and-forget-it systems to the fully manual professional rigs.
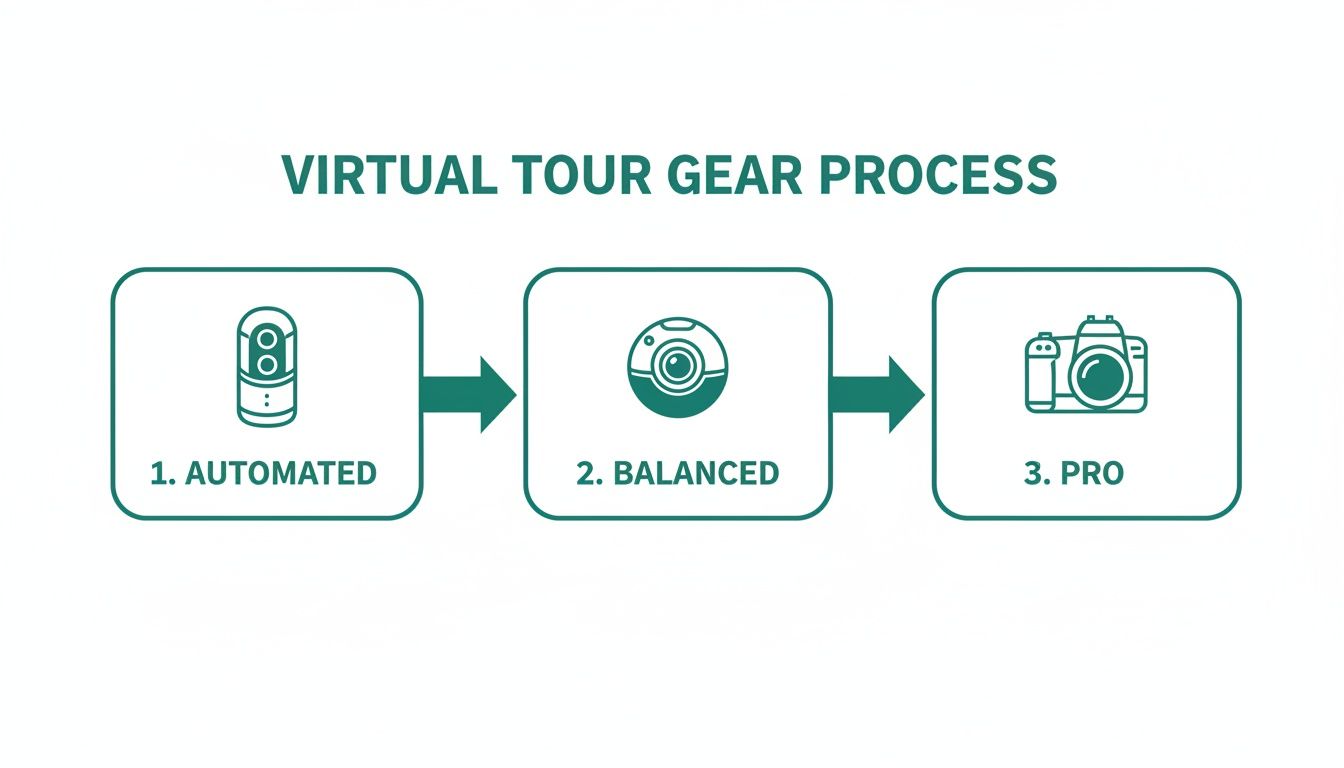
As you can see, your choice of camera really dictates your on-site process. A Matterport camera automates much of the work, while a full DSLR setup puts every decision right in your hands.
Consistency is Everything
If there's one secret to a polished virtual tour, it's consistency. The single most important rule? Lock in your tripod height and don't change it. I set mine to a natural eye level, usually somewhere between 5 and 5.5 feet (150-165 cm), and it stays there for the entire property.
Why is this so critical? It means that as a viewer moves from one scan point to another, their perspective doesn't suddenly jump up or down. This creates a smooth, immersive "walking" experience instead of a jarring, disorienting one.
Think of your scan points as digital footsteps. You need enough to guide the user, but not so many that they're tripping over them.
- Smart Placement: In small rooms like bathrooms or hallways, one shot in the center is usually enough. For large, open-plan spaces, you'll need to create a logical path with scans about 8-10 feet apart. Always make sure you have a clear line of sight from one scan to the next.
- The Doorway Rule: This one is non-negotiable. Always place a scan on both sides of a doorway. It's the only way to create a seamless transition as users move between rooms.
Taming Tricky Lighting with HDR
Real estate photography is a battle against light. You’ve got bright sunlight streaming through a window right next to deep, dark shadows in the corners of the room. A single photo can't capture both extremes; one will be blown out, and the other will be crushed to black. The solution is exposure bracketing, which is the technique behind High Dynamic Range (HDR) images.
Nearly all 360° cameras and every DSLR/mirrorless camera can do this. You simply tell it to take a series of photos back-to-back at different brightness levels—one dark (to capture the details outside the window), one normal, and one bright (to see into the shadows).
In post-production, these individual shots get merged into one perfectly exposed image. Suddenly, you can see the beautiful landscaping outside the window and the rich detail of the hardwood floors in the corner. It's a game-changer.
This isn't an optional step for high-end work. It's what produces that bright, airy, and evenly lit look that agents and buyers expect.
On-Site Habits of an Efficient Pro
As you move through the home, you'll develop a rhythm. A good system saves time and prevents a lot of common, tour-ruining mistakes.
Here are a few habits I've baked into my own workflow:
- Be a Ghost: Before hitting capture, do a quick 360-degree scan for your own reflection. Check mirrors, windows, stainless steel appliances, even framed art. The best move is to trigger the camera remotely with your phone or tablet and duck out of the room or hide behind a pillar.
- Spot-Check Your Stitches: Most 360° cameras give you a live preview on your connected device. Use it. After each scan, take two seconds to swipe around the image and make sure there aren't any glaring stitching errors or weird parallax effects, especially around nearby objects like furniture or doorways.
- Work Methodically: Don't just wander around. Start at the front door and work your way through the house in a logical pattern, like going clockwise. This simple system ensures you never accidentally miss a room, a walk-in closet, or that all-important pantry.
By being deliberate and consistent on-site, you’re not just taking pictures; you’re building the foundation for a stunning final product.
Turning Raw Scans Into an Immersive Experience
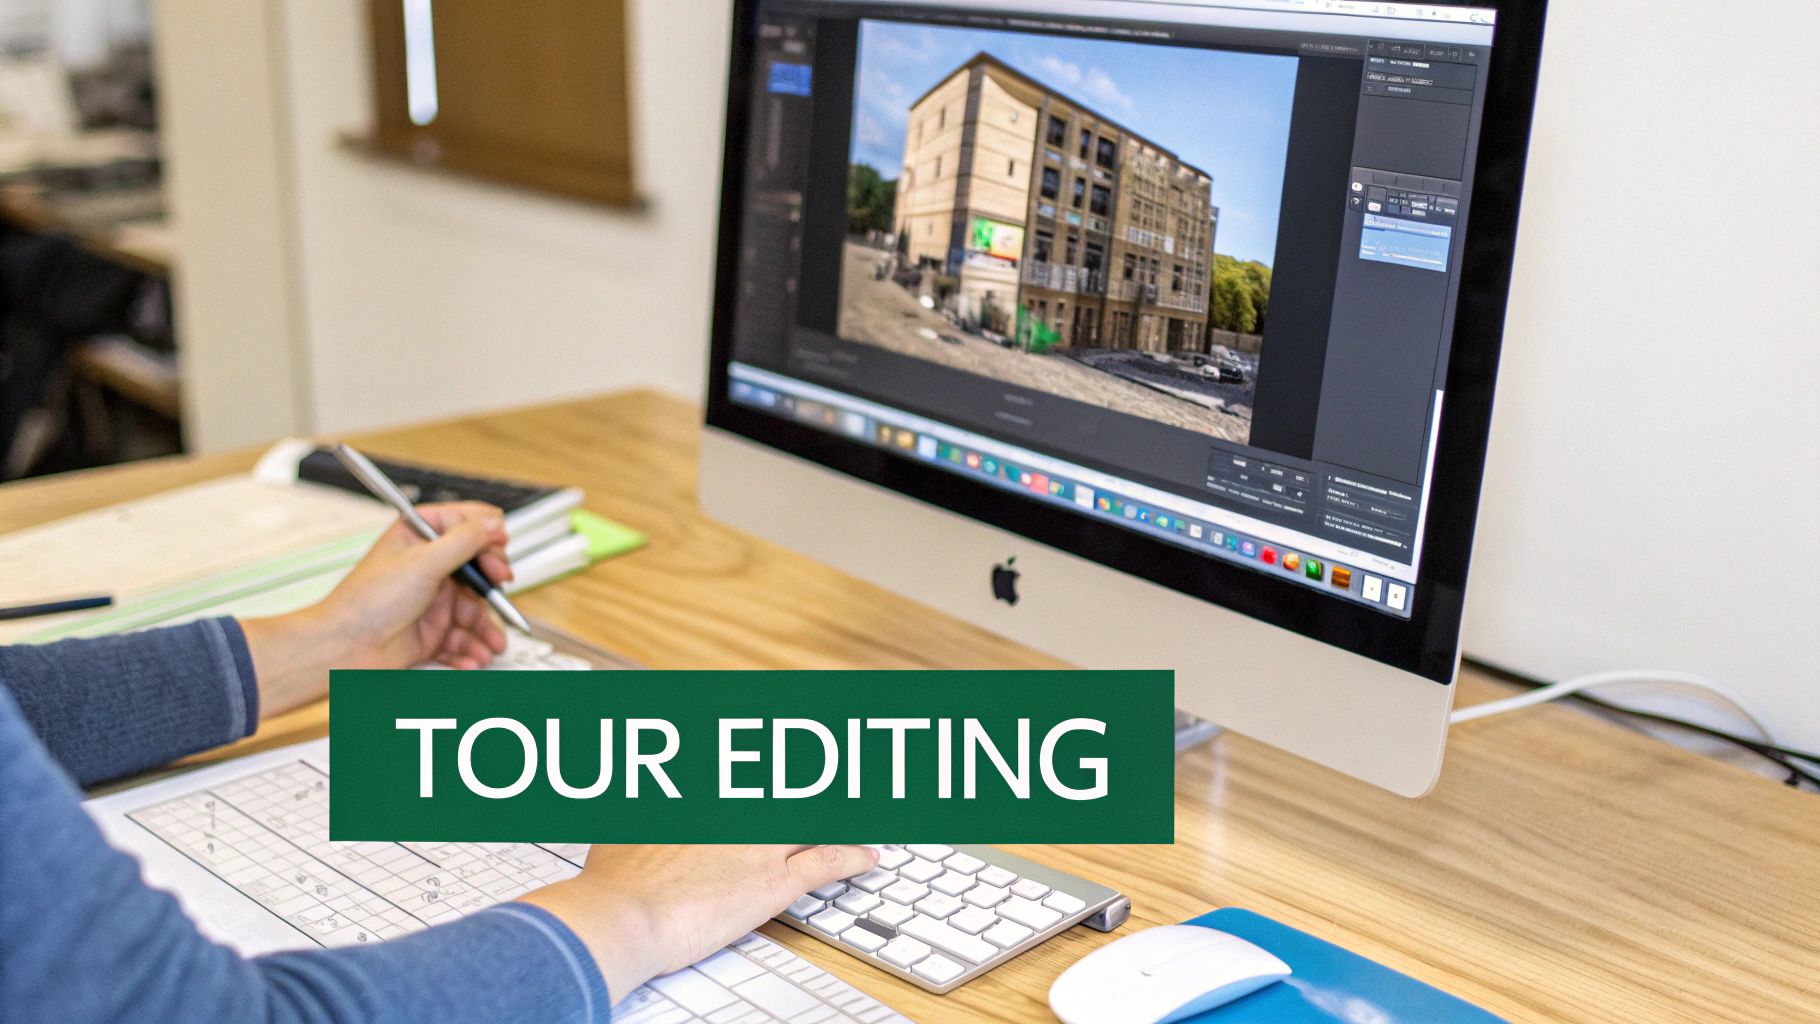
This is where the magic happens. You’ve captured all the raw data on-site, but now it’s time to transform those individual 360° photos into a polished, interactive experience. Think of it as moving from raw ingredients to a finished meal—this post-processing workflow is what elevates a collection of scans into a compelling house virtual tour that tells a story and helps sell a lifestyle.
How you approach this stage really depends on the gear you used for the shoot.
If you went the DSLR route for that top-tier image quality, your first job is stitching. This is the meticulous process of merging all your bracketed, high-resolution photos into a single, seamless panoramic image.
Software like PTGui is the undisputed king here for a reason. It gives you incredible control over every detail, from setting control points to blending exposures and leveling the horizon, ensuring you create a flawless 360° sphere. Once stitched, you can bring these panoramas into a program like Adobe Lightroom for final color correction, making the property's best features truly shine.
Refining Automated and 360 Camera Scans
Used a Matterport or a dedicated 360° camera? Good news—the heavy lifting of stitching is usually done for you. Your focus shifts from the technical side of image assembly to refining the user experience inside the tour’s software. This is where you layer in the value that real estate agents and potential buyers absolutely love.
These platforms are designed to let you enrich the tour with interactive elements that provide context and answer questions before they're even asked.
- Informational Tags: Add hotspots or "Mattertags" to highlight specific features. You can drop in text descriptions about the brand of kitchen appliances, link out to a manufacturer's website, or even embed a video showcasing the home's smart features.
- Measurement Tools: This is an incredibly powerful tool. It lets potential buyers measure walls, windows, and doorways on their own, helping them visualize where their furniture will go. It's a small thing that moves them from being a passive viewer to an active planner.
- Floor Plan Generation: Many systems can automatically generate 2D and 3D floor plans directly from your scan data. This gives the listing agent another valuable marketing asset to use.
If you're weighing your options, now's a great time to explore our guide on the best virtual tour software for real estate. It breaks down which platforms offer the features that will best suit your business.
Choosing Your Hosting Platform
Once your tour is built, it needs a place to live online. This decision is more critical than it seems, as it impacts branding, functionality, and your long-term costs. You've basically got two paths: stick with a proprietary system or go with a more versatile third-party host.
Proprietary platforms like Matterport Cloud are tightly integrated with their own cameras, which means a very smooth, all-in-one workflow from capture to delivery. The trade-off? You’re locked into their ecosystem and their subscription pricing model.
On the other hand, third-party hosts like Kuula or 3DVista offer freedom and flexibility. These platforms let you upload panoramas from any camera—DSLR, Ricoh, Insta360—and build your tour from there. This approach gives you complete control over your branding and often comes with more flexible pricing, including one-time purchase options for the software.
When picking a host, look beyond the price tag. Consider features like custom branding (can you add your client's logo?), analytics (who's viewing the tour and for how long?), and MLS compatibility. Your choice should directly reflect the level of service you want to provide.
The demand for these services is exploding. The global virtual tour market was valued at $1,219.1 million in 2023 and is projected to hit a staggering $15,923.0 million by 2034. The 360 virtual tour segment is leading the way with a dominant 43.9% market share, all because it creates an experience that feels like you're actually walking through the home. You can read more about these virtual tour market findings on market.us.
This massive growth just highlights how important it is to choose a robust, scalable hosting solution. As more agents make virtual tours a standard part of their marketing, your ability to offer flexible, feature-rich tours will be what sets you apart.
How to Price and Package Your Virtual Tour Services
So you've figured out how to create a killer virtual tour. That's a huge step, but now comes the tricky part: how much do you charge? Getting your pricing right is what separates a fun hobby from a sustainable business. Don't just pull a number out of thin air; you need a solid strategy that reflects your skill, the value you bring to the table, and what your local market will support.
There’s no magic number, but most pros lean into one of a few proven models. You could charge by the square foot, which makes a lot of sense since bigger homes take more time and effort. Another popular route is offering flat-fee packages. Agents love this because it’s simple, predictable, and easy to bake into their marketing budget for a new listing.
Building Your Core Packages
From my experience, the smartest way to structure your offerings is with tiered packages. This approach isn't about being cheap or expensive; it's about giving clients options that fit their specific needs and budget. It also makes it much easier to upsell them on more comprehensive services. I always think of it as a "Good, Better, Best" model.
Here’s a simple framework you can run with:
- Essential Package: This is your foot-in-the-door offer. It should cover the basics: the virtual tour itself, plus maybe 15-20 clean HDR photos. It’s the perfect fit for a smaller condo or for an agent who's just dipping their toes into professional media.
- Pro Package: This should be your workhorse, the one you sell most often. It takes everything from the Essential package and adds more value—think more photos, a slick 2D floor plan, and maybe a few aerial shots from a drone. This is the go-to for the vast majority of listings.
- Premium Package: This is your "all-in" marketing machine. You're including everything from the Pro package and then some: dramatic twilight photos, a cinematic video walkthrough, and a guaranteed 24-hour turnaround. Reserve this for the high-end luxury properties where clients expect the absolute best.
See what we did there? You’re not just selling a tour; you’re positioning it as the anchor of a complete visual marketing strategy.
Justifying Your Rates with Real Value
Setting your prices is only half the battle. You have to be able to confidently explain to a real estate agent why your services are worth the investment. Let's be honest, virtual tours typically cost more than a standard photo shoot, with prices often falling between $200 and $800, depending on the home's size and the package details.
So, don't sell the "virtual tour." Sell the results the tour gets.
A professional house virtual tour isn't just a gimmick; it's a powerful lead-qualification tool. It lets serious buyers explore the property on their own time, 24/7. That means the people who actually book a showing are already sold on the layout and are far more likely to make an offer.
This is your most important selling point. The real estate world is the biggest consumer of this technology, claiming a huge 31.71% market share of the entire virtual tour industry. Why? Because buyer behavior has completely changed. A staggering 92% of home buyers start their search online now, long before they ever pick up the phone to call an agent. If you're curious about the numbers, you can dig deeper into the virtual tour software market on fortunebusinessinsights.com.
When you’re talking to potential clients, frame it this way. Your tours make their listings pop online, grab more attention, and filter out the tire-kickers. When you directly connect your work to their bottom line—a faster, more profitable sale—your price tag stops looking like an expense and starts looking like a no-brainer investment.
Marketing Your Services to Win Real Estate Clients
Creating a technically flawless virtual tour is a fantastic skill, but it’s only half the battle. If agents don't know you exist, that masterpiece of a tour won't do anyone any good. The final, and arguably most important, step is getting your work in front of the right people and showing them why they can't afford not to hire you.
Your professional website is ground zero. Think of it as your digital business card and portfolio all in one. It needs to be sharp, professional, and easy for local agents to find when they search for things like "real estate virtual tour in [Your City]." But more than anything, it has to showcase your best work with a stunning portfolio that immediately demonstrates the quality you bring to the table.
Prove the Return on Investment
Real estate agents are entrepreneurs. They live and die by their numbers, so when they consider a new service, their first question is always, "What's the ROI?" A cool-looking tour is nice, but a tour that gets results is a must-have. This is where you need to build a rock-solid case for your value.
Start tracking the performance of every listing you shoot. Collect the data and turn it into compelling case studies that speak an agent's language.
Focus on the metrics that directly impact their wallet:
- More Eyeballs on the Listing: Did online views spike after your tour went live? Show them the percentage increase.
- Fewer Wasted Showings: Your tours act as a 24/7 open house, filtering out casual lookers. This means agents only spend their time with serious, pre-qualified buyers who have already "walked" the home.
- Quicker Sales: If a home you shot sold in 10 days while the neighborhood average is 30, that’s your headline. Nothing gets an agent's attention like a faster commission check.
When you present this kind of data, you change the conversation from an expense into a strategic investment.
The modern homebuyer expects a digital experience first. If a listing doesn't have a virtual tour, many potential buyers will simply scroll past it without a second thought. Your service isn't a luxury anymore; it's an essential part of getting a home seen by the right people.
Get in Front of Local Agents
Your marketing needs to be laser-focused on the real estate community right in your backyard. Social media, especially Instagram and LinkedIn, is perfect for this. Post behind-the-scenes videos from a shoot or share a slick, short clip of a finished tour. Don't forget to tag the listing agent—they'll often share it with their network, giving you a free signal boost.
This kind of consistent online activity builds your brand and establishes you as the local go-to pro. But don't stop there. Good old-fashioned networking still works wonders. Show up at local real estate association meetings. Walk into a brokerage and offer to host a "lunch and learn" to demonstrate your tech and answer questions. A little face-to-face connection goes a long way.
The stats back this up completely. Listings featuring 360-degree tours get a staggering 87% more views. On top of that, more than half of all buyers admit they’ll just skip over listings that don't have one. With 67% of buyers now saying they want virtual tours, you’re not just offering a nice-to-have feature; you're providing an indispensable tool for any agent who wants to compete.
You can dig deeper into how these trends are reshaping the industry by checking out the full virtual tour market report on stellarmr.com. By proving your value and making genuine connections, you’ll become the expert every top agent needs on their team.
Common Questions About House Virtual Tours
Once you start offering virtual tours, you'll find that agents (and even other photographers) tend to ask the same handful of questions. Getting your answers dialed in ahead of time will make you sound like the pro you are.
How Long Does It Take to Create a Tour?
This is always the first question, and the honest answer is: it depends. The two biggest factors are the size of the house and the gear you're using.
For a pretty standard 2,500 sq ft home, if you're running a system like Matterport, you can usually get all your scans done in about 60-90 minutes. But if you're going the high-end DSLR route for maximum image quality, you need to budget more time on site—think closer to 2-3 hours.
Then you've got the desk work. Post-processing, stitching, and building out the final tour can easily add another 2-4 hours. A safe bet is to promise clients a 24-48 hour turnaround. Real estate agents live and die by speed, so that timeline is usually music to their ears.
Can Virtual Tours Be Viewed on Any Device?
Yes, and this is a huge selling point you should emphasize. Modern virtual tours are built with web-native tech like HTML5, meaning they run smoothly in any browser.
That means potential buyers can explore a property from their desktop at work, their laptop at home, or their tablet or smartphone on the go. There are no clunky apps to download or special software to install. It just works.
For an extra "wow" factor, many tour platforms are also compatible with VR headsets like the Meta Quest. This gives serious out-of-town buyers a chance to feel like they're actually standing inside the home.
What Is the Difference Between a Video and a Tour?
It’s really important to draw a clear line here for your clients, as they often use the terms interchangeably.
A video walkthrough is a passive, linear experience. It's a movie. The videographer decides where the camera goes, what it looks at, and for how long. The viewer is just a passenger.
A house virtual tour, on the other hand, is an active, self-directed experience. It puts the potential buyer in the driver's seat. They have total freedom to move from room to room, look up at the crown molding, zoom in on the kitchen countertops, and explore at their own pace. This control creates a much deeper connection to the property and a better understanding of the layout, making it a far more effective sales tool.
Ready to connect with top real estate agents and get booked for your virtual tour services? Join PropPhoto today to build your professional profile, showcase your portfolio, and receive direct inquiries from clients looking for your exact skills. Find your next project at https://propphoto.com.

