Architectural photography is more than just documenting a space; it's about conveying its essence, functionality, and emotional impact. Whether you're shooting a residential home for a real estate listing or a commercial skyscraper for an architect's portfolio, the principles of precision, light, and composition are paramount. In a competitive market, however, mastering the technical basics isn't enough to stand out. The most successful photographers blend technical skill with an artistic eye and a streamlined business workflow to deliver images that not only look incredible but also drive tangible results for their clients.
This guide offers seven crucial, in-depth tips for architectural photography designed to elevate your work. We'll move beyond the obvious, covering everything from foundational composition rules and advanced lighting techniques to essential post-processing workflows and business strategies. These actionable insights will help you refine your craft and secure more and better bookings, especially on platforms like PropPhoto where quality and professionalism directly impact your success. Prepare to transform your approach, moving from simply taking pictures to creating powerful architectural narratives that capture attention and command value.
1. Master Composition and Keep Lines Straight (Rule of Thirds, Leading Lines, Alignment)
Strong composition is the bedrock of compelling architectural photography. Unlike other genres where organic shapes dominate, architecture is defined by lines, forms, and geometry. Your primary job is to organize these elements within the frame to create a sense of order, space, and appeal. This starts with ensuring all vertical and horizontal lines are perfectly straight, a non-negotiable standard in professional work.
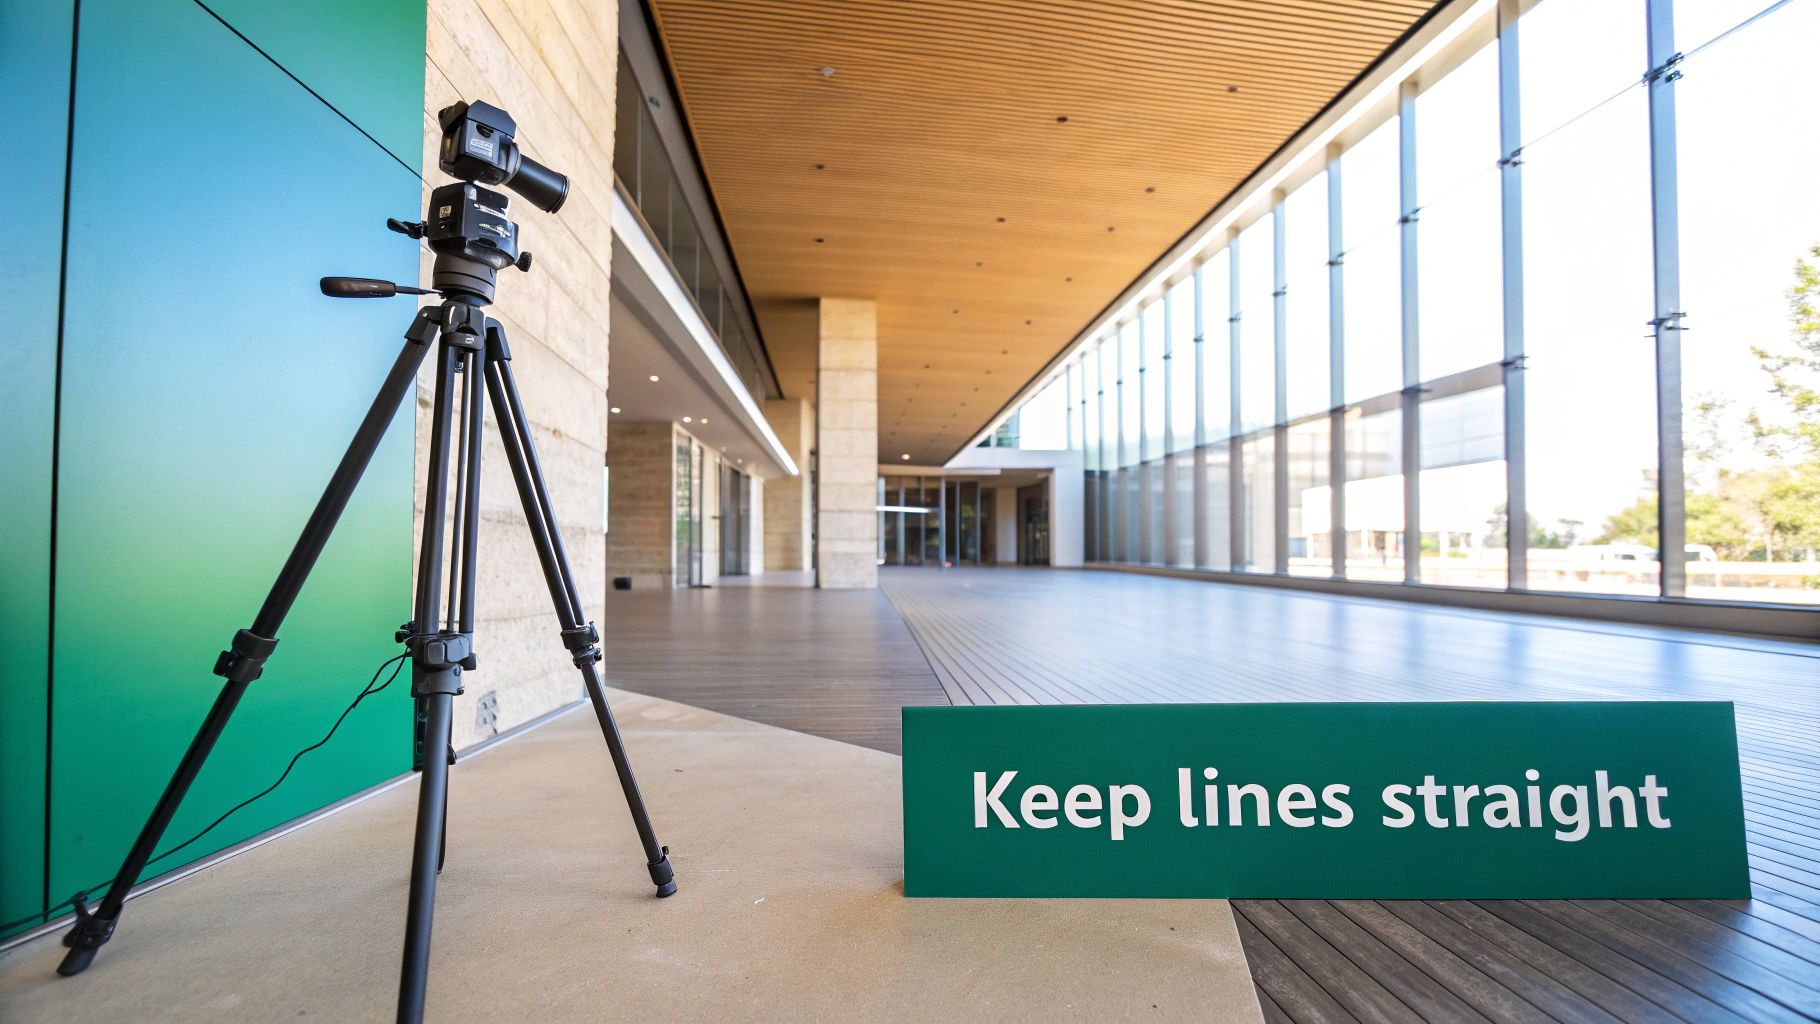
Tilted walls or converging vertical lines, known as keystoning, create a disorienting, unprofessional look that can make a space feel smaller or unstable. This is why precise alignment is one of the most fundamental tips for architectural photography. By keeping your camera sensor perfectly parallel to the subject, you convey stability, professionalism, and an accurate representation of the property.
Applying Compositional Rules
Beyond straight lines, classical composition rules guide the viewer's eye and create visual harmony.
- Rule of Thirds: Imagine a 3x3 grid over your image. Placing key elements, like a statement fireplace or a prominent structural column, along these lines or at their intersections creates a more dynamic and balanced composition than simply centering the subject.
- Leading Lines: Use natural lines within the architecture, such as hallways, countertops, or rooflines, to draw the viewer's eye toward a focal point. A classic example is shooting down a long hallway where the walls converge, leading the viewer deeper into the home.
- Symmetry and Framing: Architecture often presents opportunities for perfect symmetry. Centering a shot on a grand entryway or a symmetrical façade can create a powerful, balanced image. You can also use elements like doorways or windows to frame a view, adding depth and context.
Actionable Tips for Perfect Alignment
Achieving precise composition in-camera saves significant time in post-processing.
- Always Use a Tripod: A sturdy tripod is essential. It locks your camera in place, allowing you to make micro-adjustments to achieve perfect leveling.
- Enable In-Camera Grids: Turn on your camera’s grid overlay. This visual guide makes it easy to align vertical and horizontal elements with the grid lines before you take the shot.
- Use a Bubble Level: Attach a hot-shoe bubble level to your camera. This simple tool provides an immediate, accurate reference for ensuring your camera is perfectly level both horizontally and vertically.
- Shoot at the Right Height: For most interior shots, positioning your camera at chest or light-switch height (around 4-5 feet) often provides the most natural perspective and minimizes distortion.
2. Utilize Wide-Angle Lenses and Understand Lens Distortion
A wide-angle lens, typically in the 14-35mm range, is an indispensable tool in architectural photography. Its ability to capture a broad field of view is crucial for showcasing the full scale of a building's exterior or the entirety of an interior space in a single shot. This expansive perspective can make rooms feel larger and more open, a significant advantage in real estate marketing where conveying a sense of space is paramount.
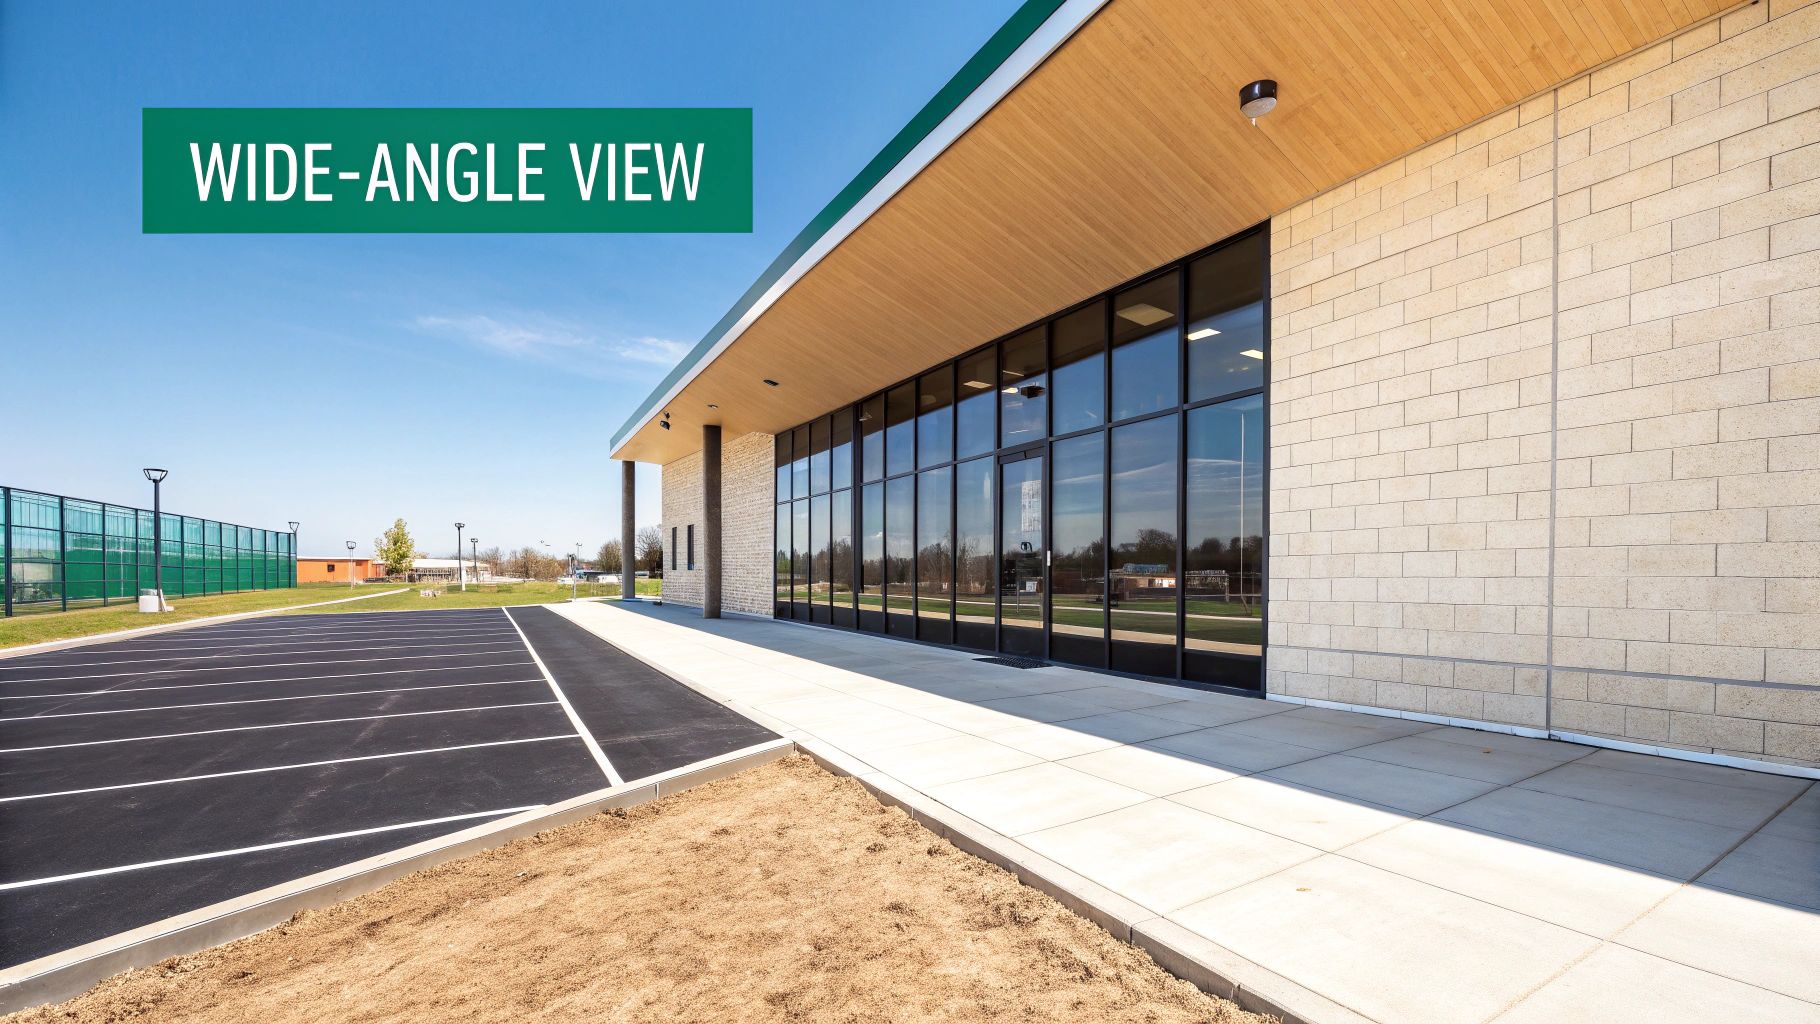
However, this powerful tool comes with a significant challenge: lens distortion. Wide-angle lenses can stretch objects near the edges of the frame and exaggerate perspective, causing straight lines to appear curved or bent. Mastering this lens means not just using it to go wide, but actively controlling its distorting effects to produce clean, professional, and realistic images that honor the architect's design.
Managing Wide-Angle Distortion
The key to professional results is mitigating distortion both in-camera and in post-processing. This ensures that while the space feels grand, it doesn't look unnatural or warped.
- Barrel Distortion: This common effect makes straight lines appear to curve outwards, as if they were wrapped around a barrel. It's most noticeable in lenses at their widest focal length.
- Perspective Distortion: When shooting from a low angle or too close to a subject, objects can appear stretched and disproportionate. For example, a chair in the corner of a room might look unnaturally long.
- Vertical Convergence: If the camera is tilted up or down, vertical lines like walls and doorways will appear to converge, creating the "keystoning" effect discussed earlier. A wide lens can amplify this issue significantly.
Actionable Tips for Effective Wide-Angle Use
Using a wide-angle lens effectively is one of the most important tips for architectural photography for achieving a professional look.
- Stay Level and Centered: Always keep your camera perfectly level with the horizon to prevent vertical lines from converging. Shooting from a central position within a room, rather than a deep corner, helps minimize extreme stretching at the edges.
- Invest in Quality Glass: Professional-grade wide-angle lenses, like a 16-35mm, are engineered to minimize distortion and maintain sharpness across the entire frame.
- Use Lens Correction Profiles: Software like Adobe Lightroom has built-in profiles for most lenses that can automatically correct for known barrel distortion and vignetting with a single click.
- Consider a Tilt-Shift Lens: For high-end commercial work where perfect lines are non-negotiable, a tilt-shift lens is the ultimate tool. It allows you to shift the lens vertically while keeping the camera sensor parallel to the building, correcting perspective distortion in-camera.
3. Perfect Your Lighting: Natural Light, Golden Hour, and HDR Techniques
Lighting is the element that breathes life into an architectural space, defining its mood, highlighting its textures, and shaping its perceived value. More than just illumination, strategic lighting tells a story, whether it’s the inviting warmth of a family home or the sleek, professional ambiance of a corporate office. Mastering light, both natural and artificial, is one of the most transformative tips for architectural photography you can learn.
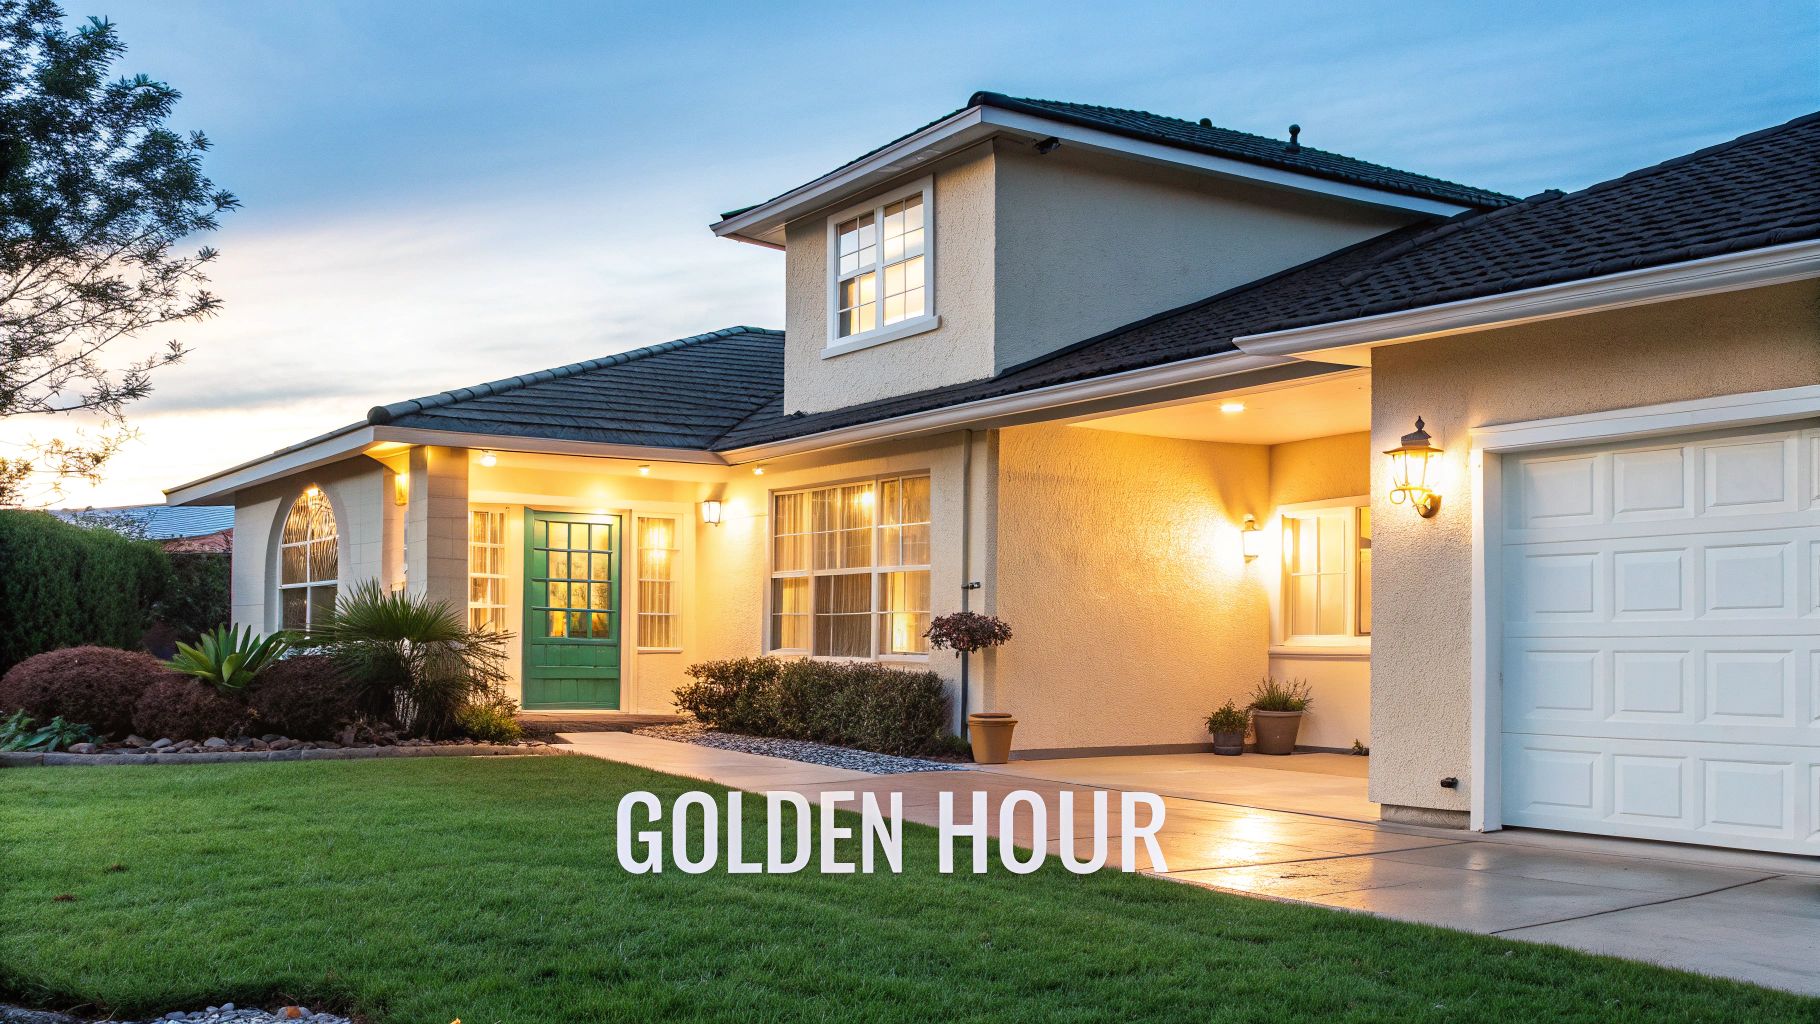
The goal is to produce images that feel authentic yet elevated. For interiors, this often means balancing the bright light from windows with the darker corners of a room. For exteriors, it means capturing the property when the light is most flattering, avoiding the harsh, detail-killing shadows of midday sun. This is where techniques like shooting at the golden hour and using High Dynamic Range (HDR) become indispensable tools.
Leveraging Different Lighting Scenarios
Understanding how to use light is key to creating images that sell. Different times of day and lighting techniques serve different purposes.
- Natural Light: Shooting during the day provides a clean, authentic look that shows a property as it would normally be experienced. It's ideal for creating a bright, airy, and welcoming feel.
- Golden Hour: The period shortly after sunrise or before sunset provides soft, warm, directional light that adds a premium, luxurious feel to exteriors. This is perfect for hero shots of luxury homes or commercial properties.
- Twilight/Blue Hour: The time just after sunset, when the sky has a deep blue hue and artificial lights are on, is perfect for showcasing landscape lighting, cityscapes, and a building's nighttime presence.
- High Dynamic Range (HDR): This technique involves blending multiple exposures to capture full detail in both the brightest highlights and the darkest shadows. It is essential for high-contrast interior scenes, such as capturing both the room's details and the view outside the window.
Actionable Tips for Mastering Light
Perfecting your lighting often happens before you even press the shutter.
- Schedule Strategically: Plan your shoot around the sun. Use an app to track the sun's position and schedule exterior shots for the golden hour and interior shots for when the natural light is best for each room.
- Bracket Your Exposures: For every composition, take multiple shots at different brightness levels (e.g., -2, 0, +2). This practice, known as bracketing, is the foundation of HDR photography.
- Master HDR Software: Learn to blend your bracketed photos using software like Adobe Lightroom or Photoshop. The goal is a natural-looking image, not an over-processed, surreal effect. For those interested in mastering this technique, our guide provides in-depth information on HDR photography for real estate.
- Use Reflectors: A simple reflector can bounce natural light into a dark corner, reducing the need for artificial strobes and maintaining an authentic feel.
4. Invest in Quality Equipment: Tripods, Filters, and Specialized Gear
While the photographer's skill is paramount, the right professional equipment provides the stability and control needed to capture technically flawless architectural images. Investing in quality gear goes beyond the camera body and lens; it encompasses the support system and light-modifying tools that elevate good shots to great ones. Reliable equipment signals professionalism and ensures you can consistently produce sharp, clean, and well-exposed photos, reducing the need for extensive post-production fixes.
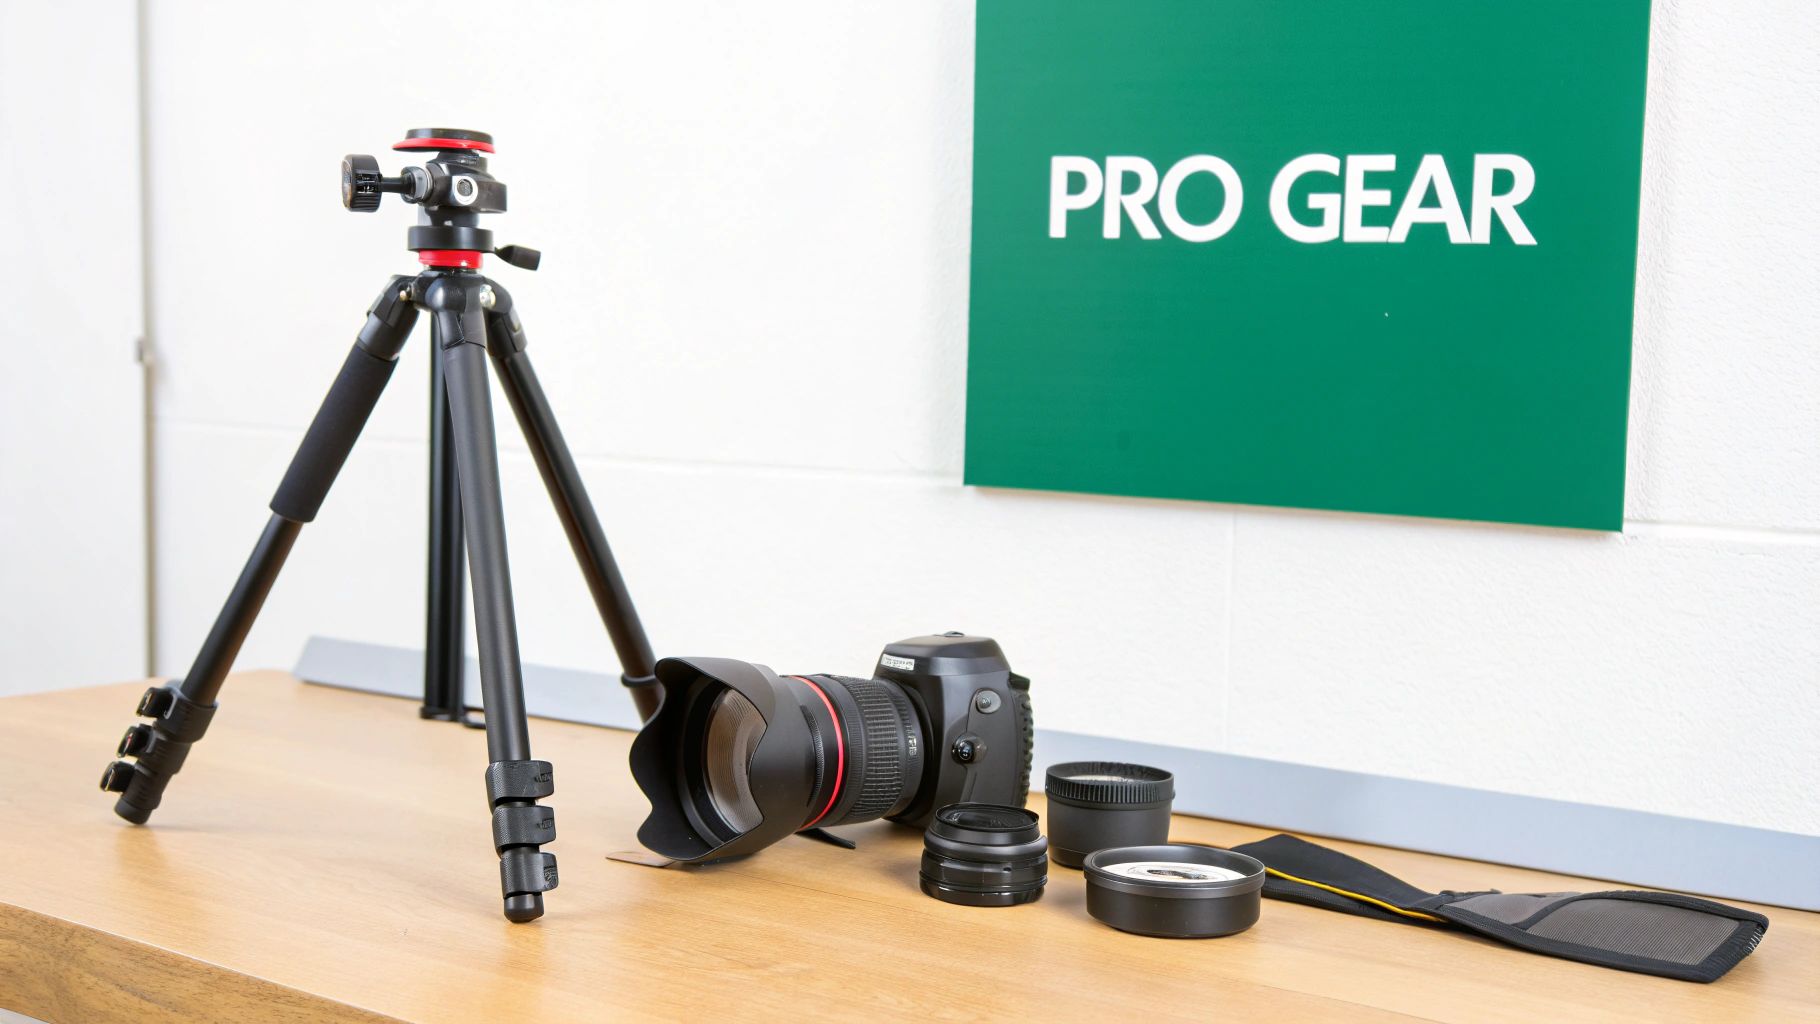
This investment is one of the most practical tips for architectural photography because it directly impacts image quality and workflow efficiency. A sturdy tripod eliminates camera shake for crisp long exposures, while specialized filters manage challenging reflections and lighting conditions right at the source. This gear isn't about luxury; it's about solving specific problems that arise when photographing architecture, such as glare on windows or balancing a bright sky with a shaded building facade.
Essential Support and Light-Modifying Gear
Certain pieces of equipment are non-negotiable for achieving professional results and expanding your creative capabilities.
- Sturdy Tripod and Ball Head: A robust tripod is your most important tool after your camera. It ensures absolute stability for sharp images, especially when bracketing exposures or shooting in low light. A reliable ball head allows for precise, fluid adjustments to perfect your composition.
- Circular Polarizing Filter (CPL): This is essential for managing reflections on surfaces like glass, water, and polished floors. By rotating the filter, you can minimize or eliminate glare, revealing the detail and color behind it, which is invaluable for both interiors and exteriors.
- Neutral Density (ND) Filters: ND filters reduce the amount of light entering the lens, allowing you to use longer shutter speeds even in bright daylight. This is perfect for blurring moving elements like clouds or water, adding a dynamic feel to a static structure.
Actionable Tips for Equipping Yourself
Smart gear choices will save you time, improve your final product, and protect your investment.
- Prioritize the Tripod: Don't skimp on your tripod. Look for sturdy carbon fiber or aluminum models with a sufficient load capacity for your camera setup.
- Carry a Remote Trigger: A remote shutter release or using your camera's app eliminates any chance of camera shake when you press the shutter button, ensuring maximum sharpness.
- Buy High-Quality Filters: Cheaper filters can introduce color casts and reduce sharpness. Invest in reputable brands to maintain the optical quality of your lenses. To discover more about camera and lens choices, you can explore our detailed guide on the best cameras for real estate photography.
- Protect Your Investment: Use a well-padded camera bag designed for professional gear. Regularly clean your lenses, filters, and camera sensor to maintain optimal performance and longevity.
5. Understand Color Grading and Consistency Across Photo Series
Beyond sharp focus and straight lines, color grading is the final artistic touch that elevates a gallery from a collection of images to a cohesive visual story. Consistent color grading ensures that every photo in a property's set feels like it belongs together, creating a seamless and professional viewing experience for potential buyers or clients. This process involves intentionally adjusting white balance, saturation, contrast, and tonal values to evoke a specific mood that matches the property's style.
A warm, golden-hour-inspired grade can make a family home feel cozy and inviting, while a cool, high-contrast look can emphasize the clean lines and sleek materials of a modern apartment. This deliberate control over color is one of the most impactful tips for architectural photography because it directly influences a viewer's emotional response. Consistent grading builds a recognizable brand style and shows a high level of polish and attention to detail.
Applying Color Grading Styles
The right color palette enhances the architecture's inherent character. Different property types benefit from distinct grading approaches to attract their target market.
- Warm and Inviting: For family-oriented residential properties, slightly warmer tones, soft contrast, and bright whites create a welcoming, comfortable atmosphere.
- Cool and Modern: Luxury apartments or minimalist commercial spaces often benefit from cooler, desaturated tones, deep blacks, and crisp whites to highlight their sophisticated design and premium materials.
- Vibrant and Energetic: Resort and hospitality photography often uses vibrant, saturated colors to convey a sense of excitement, leisure, and fun, making pools look bluer and landscapes greener.
- Muted and Sophisticated: For high-end architectural work focused on form and texture, a more neutral or muted palette ensures the design itself remains the hero, without distracting colors.
Actionable Tips for Consistent Grading
Developing a streamlined workflow is key to achieving consistency efficiently across dozens or even hundreds of photos.
- Create Lightroom Presets: Develop 2-3 signature presets for your most common property types. This serves as a starting point, saving immense time and ensuring brand consistency.
- Use a Reference Card: Shoot a gray or white balance card in the first shot of each new room or lighting condition. This gives you a perfect neutral reference point for accurate color correction in post-processing.
- Utilize 'Sync Settings': In editing software like Lightroom, apply your primary adjustments (white balance, lens corrections, basic tones) to one image and then use the 'Sync' function to batch-apply them across the entire set.
- Avoid Oversaturation: A common mistake is pushing colors too far. Subtle, realistic enhancements almost always appear more professional and high-end than overly vibrant, unnatural-looking hues.
6. Scout Locations and Plan Shoots for Optimal Conditions and Safety
The most successful architectural photos are rarely the result of spontaneity. Meticulous planning and location scouting are what separate amateur results from professional, high-impact imagery. This pre-shoot process involves researching the property to understand its layout, orientation, and potential challenges, ensuring you arrive on shoot day prepared to capture it in the best possible light and under the safest conditions.
By investing time in preparation, you can anticipate how natural light will interact with the structure throughout the day, identify the most compelling compositions, and address logistical issues before they derail your session. This level of foresight is one of the most critical tips for architectural photography, as it demonstrates professionalism, maximizes efficiency on-site, and significantly reduces the need for costly re-shoots.
Applying Scouting and Planning Principles
Effective planning transforms your approach from reactive to proactive, allowing you to control the outcome and deliver consistently excellent results.
- Exterior Planning: For exterior shots, the sun’s position is paramount. Use apps like Sun Surveyor or PhotoPills to predict the exact time the sun will illuminate the front façade during the golden hour, creating warm, flattering light and dramatic shadows. Virtual scouting with Google Maps can also reveal the building's orientation and surrounding environment.
- Interior Assessment: During an on-site walkthrough, map out the flow of natural light from room to room. Note which spaces receive morning versus afternoon sun to schedule your interior shots accordingly. This is also the time to identify potential staging issues or clutter that needs to be addressed before the shoot.
- Logistics and Safety: Planning extends beyond lighting. It includes confirming parking access, identifying power outlets for lighting equipment, and noting potential safety hazards like uneven flooring or high-traffic areas where a tripod could be a tripping risk.
Actionable Tips for Efficient Scouting
Integrate these practices into your workflow to ensure every shoot is well-prepared and executed flawlessly.
- Start with Virtual Scouting: Use Google Maps Street View and satellite imagery to get a preliminary understanding of the property’s exterior, orientation, and potential obstructions.
- Utilize Sun-Tracking Apps: Download a sun-tracking app to your phone. It’s an indispensable tool for visualizing the sun’s path and planning your exterior, twilight, and interior shots for optimal natural light.
- Conduct an On-Site Walkthrough: If possible, visit the property before the shoot day. Take reference photos with your phone, measure tight spaces, and make a detailed shot list.
- Communicate with the Client: Ask the agent or property manager about key features to highlight, access restrictions, and the best times to shoot to avoid disruptions.
- Plan for Contingencies: Identify backup angles in case of unexpected obstacles or poor weather. Having a Plan B ensures you can still deliver a complete set of images regardless of conditions.
7. Post-Processing Workflow and Diversify Services (Editing Standards, HDR, Twilight, Drone, Virtual Tours)
Exceptional photography doesn't end when you press the shutter; a systematic post-processing workflow is what transforms great shots into professional, client-ready images. A standardized editing process ensures consistency across every project, speeds up turnaround times, and maintains a high-quality standard. This efficiency then creates the bandwidth to offer a diverse range of high-value services that can significantly increase your revenue per property.
The core of this approach involves developing a repeatable editing sequence: organizing and culling images, correcting exposure and white balance, fixing perspective distortions, applying color grades, and performing final quality checks. This system, often built within software like Adobe Lightroom, is one of the most crucial tips for architectural photography for scaling a business. By systemizing your post-production, you can confidently offer advanced services like HDR, twilight, and drone photography, knowing you can deliver them efficiently.
Developing a Standard Workflow and Expanding Services
A documented workflow is the foundation, while diversified services are the path to growth. This combination allows you to become a one-stop-shop for all property marketing needs.
- Systemize Your Editing: Create a step-by-step checklist for your editing process. Start with lens corrections and perspective adjustments, move to global exposure and color, then finish with local adjustments and sharpening. This ensures no step is missed.
- Leverage Presets: Develop a core set of 3-5 Lightroom presets for different lighting conditions (e.g., sunny interiors, overcast exteriors, twilight). This creates a consistent look and dramatically speeds up your initial edits.
- Diversify Your Offerings: Once your core photo workflow is efficient, begin adding complementary services. Start with HDR for challenging interiors, then add twilight shoots for a luxury feel. From there, you can expand into aerials and 360° virtual tours.
- Bundle for Value: Create service packages that combine multiple offerings. A "Luxury Package," for example, could include standard photos, a drone session, a twilight shoot, and a Matterport 3D tour, providing immense value to the client and increasing your average booking price.
Actionable Tips for Efficient Post-Production and Service Expansion
Executing this strategy requires both technical skill and business acumen.
- Time Yourself: Set time limits for editing. Aim for 3-5 minutes per standard image and 10-15 minutes for premium "hero" shots. This discipline keeps you on schedule.
- Certify and Insure: Before offering services like drone photography, ensure you have the necessary FAA certifications (like the Part 107 license) and liability insurance. This protects you and your clients. For an in-depth guide, you can learn more about drone photography for real estate.
- Start Small: Don't try to offer everything at once. Master one new service, integrate it into your workflow and pricing, and then move on to the next.
- Communicate Clearly: Be transparent with clients about what each service includes and the expected turnaround time. This manages expectations and builds trust.
7-Point Architectural Photography Tips Comparison
| Item | 🔄 Implementation Complexity | ⚡ Resource Requirements & Speed | ⭐ Expected Outcomes (Quality) | 📊 Ideal Use Cases | 💡 Key Advantages / Tips |
|---|---|---|---|---|---|
| Master Composition and Keep Lines Straight (Rule of Thirds, Leading Lines, Alignment) | Moderate — practice + tripod skills; in-camera grids | Low equipment (tripod, level); moderate time per shot | High — professional, consistent images that improve listings | General architectural & real estate interiors/exteriors emphasizing geometry | Builds trust and consistency; use gridlines, tripod, bubble level |
| Utilize Wide-Angle Lenses and Understand Lens Distortion | Moderate — positioning, leveling, post-correction skills | Medium — quality wide lenses or tilt-shift; moderate setup time | High — conveys larger spaces; risk of distortion if unmanaged | Tight rooms, open floor plans, dramatic architectural exteriors | Capture full layouts; mount level, use lens correction or tilt-shift |
| Perfect Your Lighting: Natural Light, Golden Hour, and HDR Techniques | High — planning, bracketing, blending skills required | Medium — timing constraints, HDR software; longer on-site/post time | Very high — accurate detail, mood, and premium appearance | Luxury listings, high-contrast interiors, twilight exteriors | Schedule golden hour, bracket exposures, avoid over-processed HDR |
| Invest in Quality Equipment: Tripods, Filters, and Specialized Gear | Low–Moderate — learning gear usage and filter techniques | High — upfront cost, heavier kit; improves reliability and speed onsite | High — sharper images, fewer retakes, professional presentation | Glass-heavy facades, twilight shoots, precision architectural work | Buy sturdy tripod, polarizer, quality filters; carry remote trigger |
| Understand Color Grading and Consistency Across Photo Series | Moderate — editing skills and preset development | Low–Medium — software time investment; efficient with batch workflows | High — cohesive portfolios and stronger brand recognition | Portfolio presentation, brand-focused listings, varied property types | Create signature presets, shoot WB reference, sync edits across sets |
| Scout Locations and Plan Shoots for Optimal Conditions and Safety | Moderate — research and on-site reconnaissance time | Low — apps/tools cost; non-billable prep time saves onsite time | High — fewer surprises, safer shoots, more efficient sessions | Large estates, drone/aerial launches, time-sensitive lighting | Use Google Maps, Sun Surveyor/PhotoPills; document access and hazards |
| Post-Processing Workflow & Diversify Services (HDR, Twilight, Drone, Virtual Tours) | High — multi-step workflows and new service learning curve | High — software subscriptions, equipment, certifications; scales workload | Very high — faster turnover, higher-value packages, repeat business | Agencies, luxury/commercial projects, clients wanting bundled services | Standardize workflow, add services incrementally, obtain required certifications |
Building a Career One Perfect Shot at a Time
Architectural photography is a craft where precision, patience, and perspective converge to transform three-dimensional structures into compelling two-dimensional art. Throughout this guide, we've explored the foundational pillars that separate amateur snapshots from professional, client-winning imagery. From the geometric discipline of maintaining perfectly straight vertical lines to the strategic use of wide-angle lenses, each tip serves a single purpose: to represent a space with both accuracy and emotion.
The journey to mastery is one of continuous practice and refinement. Mastering the interplay of natural light during the golden hour, understanding the technical nuances of HDR bracketing, and developing a consistent post-processing workflow are not just skills; they are the very language you use to tell a building's story. These tips for architectural photography are designed to be more than a checklist; they are a blueprint for developing your unique artistic voice and a reliable, repeatable process.
From Technical Skill to Business Success
The most successful photographers understand that technical excellence is only half the equation. The other half is business acumen. This involves meticulous planning through location scouting, diversifying your service offerings to include drone shots or twilight sessions, and understanding how to deliver a polished, consistent gallery that exceeds client expectations. Every detail, from the color grading of an interior shot to the dynamic range of a twilight exterior, contributes to your professional reputation.
This reputation is your most valuable asset. It's built on a portfolio that showcases your ability to:
- Control Perspective: Consistently delivering images free of distracting distortion.
- Harness Light: Creating bright, inviting, and dramatic photos regardless of conditions.
- Deliver Quality: Providing a polished, high-end final product that helps clients sell or showcase their properties effectively.
By internalizing these principles, you move beyond simply taking pictures of buildings. You become a strategic partner, an artist whose work directly influences a property's marketability and perceived value. This is the ultimate goal: to create images that are not just beautiful, but also powerful business tools for your clients. As you apply these concepts, you'll find that your confidence grows, your portfolio strengthens, and your ability to attract high-value projects expands exponentially.
Ready to turn your polished skills into a thriving business? Create your professional portfolio on PropPhoto today and connect directly with real estate agents, developers, and designers who are actively searching for top-tier architectural photography talent. Showcase your best work and start booking premium jobs at PropPhoto.

